In this article, I’m going to show you that how you can work with VirtualBox Appliances. If you are working with Linux, especially while testing for security reasons, then you need to setup some operating systems in the Virtual machine. One of the excellent features of VirtualBox is Appliances which allows to setup operating system without installation. With ISO file of Windows, every company creates a virtual Machines in a zipped file for users to save much time.
Microsoft Virtual Machines
All Microsoft’s operating systems from 7 to windows 10 are now available for VirtualBox, Vagrant, Hyper-V, VMware (Windows and Mac), Parallels (Mac).
Notes
- Please note that these virtual machines expire after 90 days. We recommend setting a snapshot when you first install the virtual machine which you can roll back to later.
- Mac Users: You need to use a tool that supports zip64 like The Unarchiver to unzip the files.
Linux Virtual Machines
The founders and developers of Kali Linux have generated alternate flavors of Kali using the same build infrastructure as the official Kali releases. VMWare, VirtualBox and ARM architecture Kali images produced by offensive security can be found on the official offensive security Kali Linux virtual images and offensive security Kali Linux ARM images pages respectively.
Getting Started with VirtualBox Appliances
#1- Download and install VirtualBox, Create any virtual machine of any Operating System. I am demonstrating for you Kali Linux 2016.1.
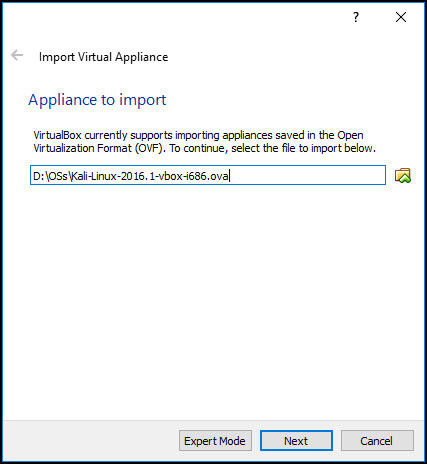
#2- After creating a new virtual machine, it is time to import the OVA (Open Virtualization Archive) file. Press Ctrl+ I or Navigate to file select import appliance. Find the OVA file and import.
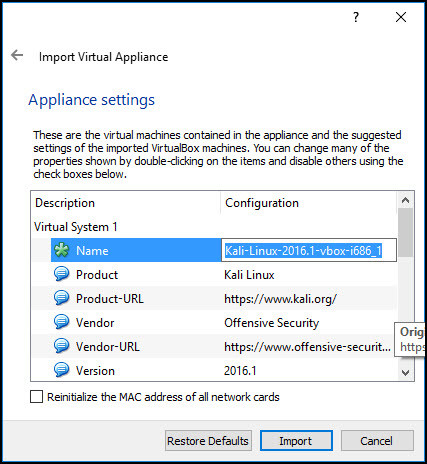
#3- In this step, you can watch complete settings of the OVA file If you desire you can change. I am only changing the name is from Kali-Linux-2016.1-vbox-i686_1 but I am changing it to Kali Linux 2016.1, When your work is done click import, it will import all of them in 3 steps.
#4- Now it is time to “Power ON” the virtual Machine and let’s enjoy the pre-installed virtual Machine in our VirtualBox.
#5- Here you are at login Page of Kali Linux 2016.1. Remember by Default Its “Username” is “root” with a Password of “toor”.
Conclusion
It was the really the easiest method to install an OS in any virtual Machine, Don’t Forget you can try other OSs in other Virtual Machines too without losing too much time. So here it’s my suggestion to you, ask me about it if you didn’t get.


Leave a Reply