It does not matter whether you are using Android, iOS, or PC, chatting and typing is the most common thing that is used on the daily basis. Especially on the cell phone because you are chatting with friends, customers, and more. Even you are learning How to code on your cellphone, Keyboard is used a lot. Every company has made their Keyboard, whether it is PC, Android, or iOS. Among them, I prefer Gboard Keyboard made by Google. It has a lot of features and among them, there are 3 features that takes the Gboard my favorite. So, in this post, you are going to learn How to use Gboard with its Full Potential adding the following three features.
How to use Gboard with its Full Potential?
Google is a giant tech company and its product are really amazing, and among them, the Gboard keyboard is one of them. This keyboard has multiple features and among them, I like really the below 3 features which can be really helpful on the daily basis.
1. Type with Your Voice on Your Blog or Search on the Web
I know you have heard of Google Assistant, Siri, or other voice assistant apps, you may have searched with them on the web. These days almost every phone has a Voice Assistant application on it, however, there are still some older phones which do not have the Voice Assistant application inside them. Besides even if it has the Voice Assistant feature within the Android phone you cannot still use it to type inside your blog (Mobile blogging).
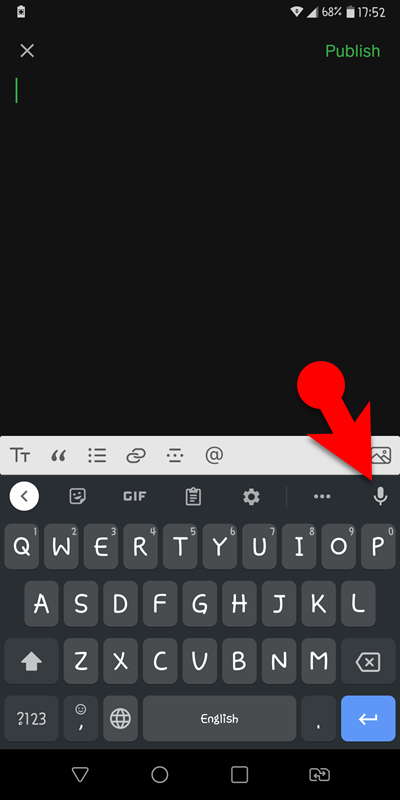
In fact, there are many people these days who are doing mobile blogging rather than PC blogging. If your Android Phone, does not have a Voice Assistant, You can use the Gboard to search on the web using your Voice. You can see how to see the voice option on the below screenshot while I am typing in the medium.
2. Copy Screenshot in Gboard Clipboard
Taking a screenshot on any Android phone is easy it is not hard, but copying a screenshot within the clipboard it is another matter. However, the Gboard keyboard has the ability to copy screenshot directly into the clipboard and send it for fast typing during a conversation. You have to enable it from the Settings.
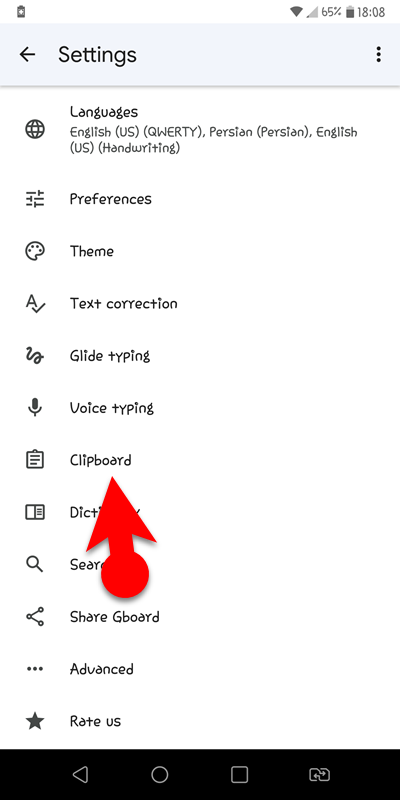
To enable the Screenshot in the Clipboard follow the below steps.
- Click on the Settings.
- Choose Clipboard.
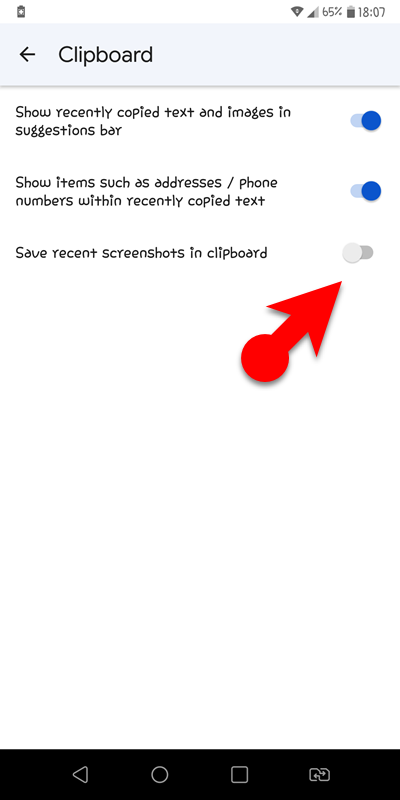
- Tap on the Save Recent screenshots in the clipboard.
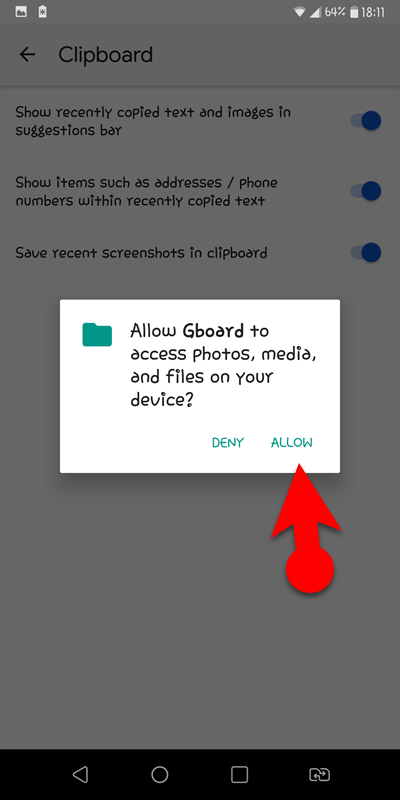
- Then allow the GBoard to access the media file by tapping on allow.
- Allow Gboard to Media
- Enable Screenshot Clipboard in Gboard
- tap on Clipboard
3. Use Google Translate while you type
Apparently, if you are chatting with a customer whose language you cannot understand, it is a good feature to use it while you are typing. I have noticed these several times on the Facebook page that I manage, Indian people are typing in Hindi and I basically can’t understand so I basically use this option.
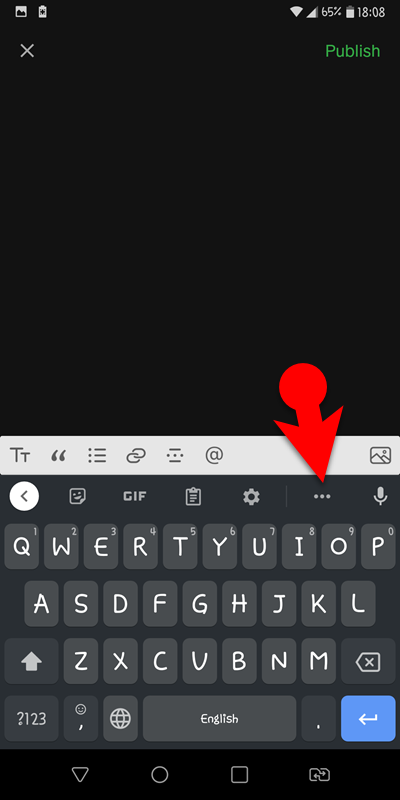
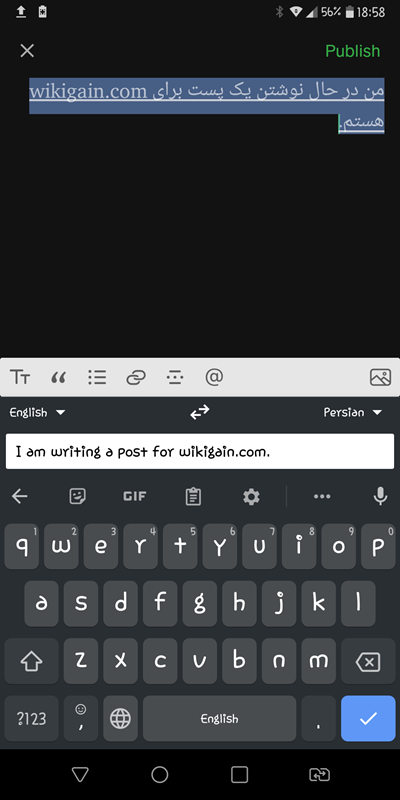
To enable the Translate option while you are typing, click on three dots (known as more option) and then tap on Translate. On the Next panel, tap ok, where Gboard is explaining that the text that you type into the translate box will be sent to Google for translation.
Language can be detected but you have to choose the language to translate it.
- Tap on More options
- Translate While Typing
Conclusion:
Emojis, personalization, voice searching, dictionary, theme layouts, text correction, glide typing, configured for the one-hand user, and multiple other features are available within this keyboard. And by adding the Blog type, Translate, and screenshot clipboard, I hope you use Gboard with its Full Potential.

Leave a Reply