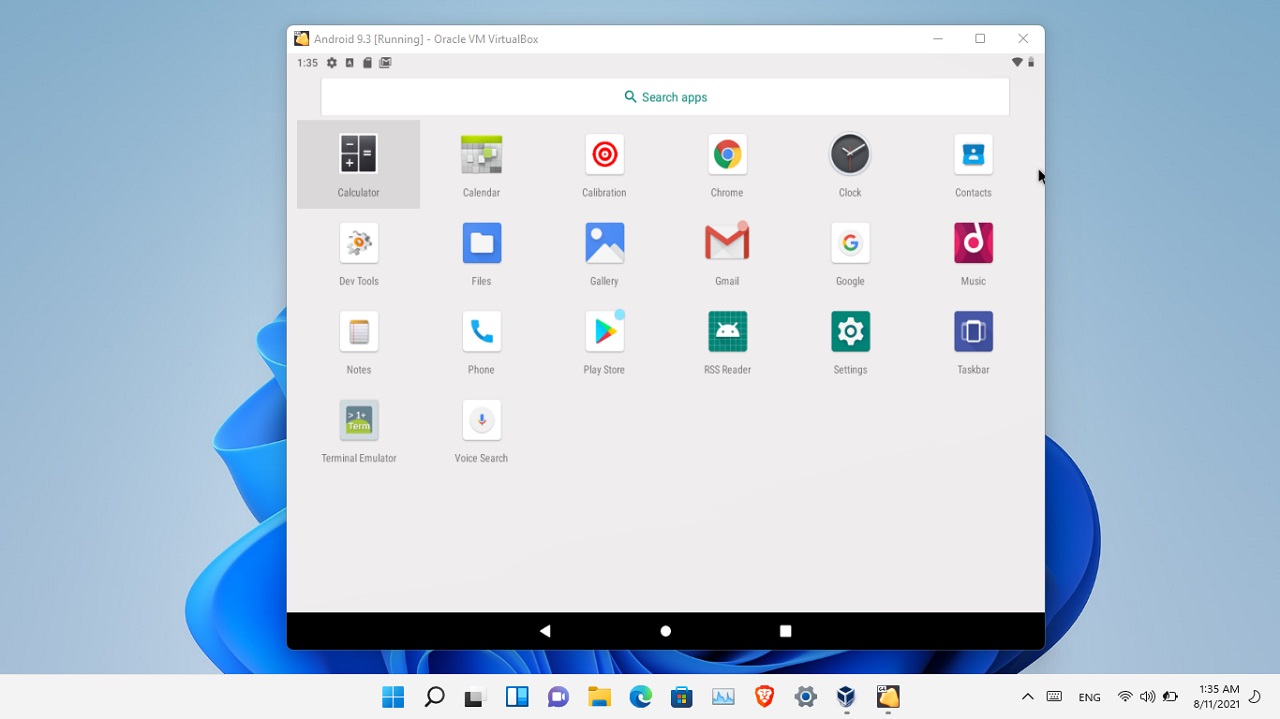
If you have followed the article known as How to use Third-party Android Apps in Windows 11, maybe you’re not very comfortable with it. Among all the reasons one of the reasons, one of them can be that this is a Chinese operating system. That’s why I figured I have to find another method where are you can be at ease to run Android on PC and then install Android apps inside it in windows 11 without any issue. And believe it, I found another method that you can use to test Android on PC. The bad thing is that it is not the latest Android operating system which is Android 12, it is an Android 9 with a fully functional play store available inside it. I figured, it is way better than the Android Studio, which is using a lot of storage, data, and resource and way better than the FydeOS.
1. How to Run Android on PC?
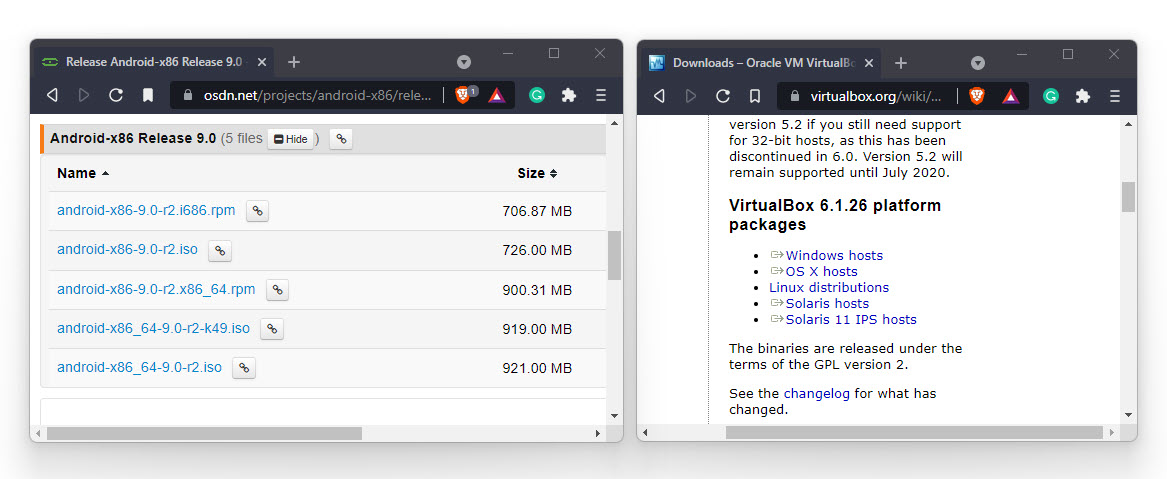
Step #1. In order to run Android on PC and then install Android apps in windows, 11 using the play store, we have to download the required files. Before going a step further, I have to mention that for this guide I’m going to use VirtualBox, and inside VirtualBox, I’m going to install Android using an ISO. So now you know that the second file is the ISO of the Android.
You can get the VirtualBox, from their official site virtualbox.org and get the Android ISO from OSDN. At the moment, only Android 9’s ISO is available, so you have to know that there is no Android 10 ISO. If you find any, make sure that the source is a trustworthy website.
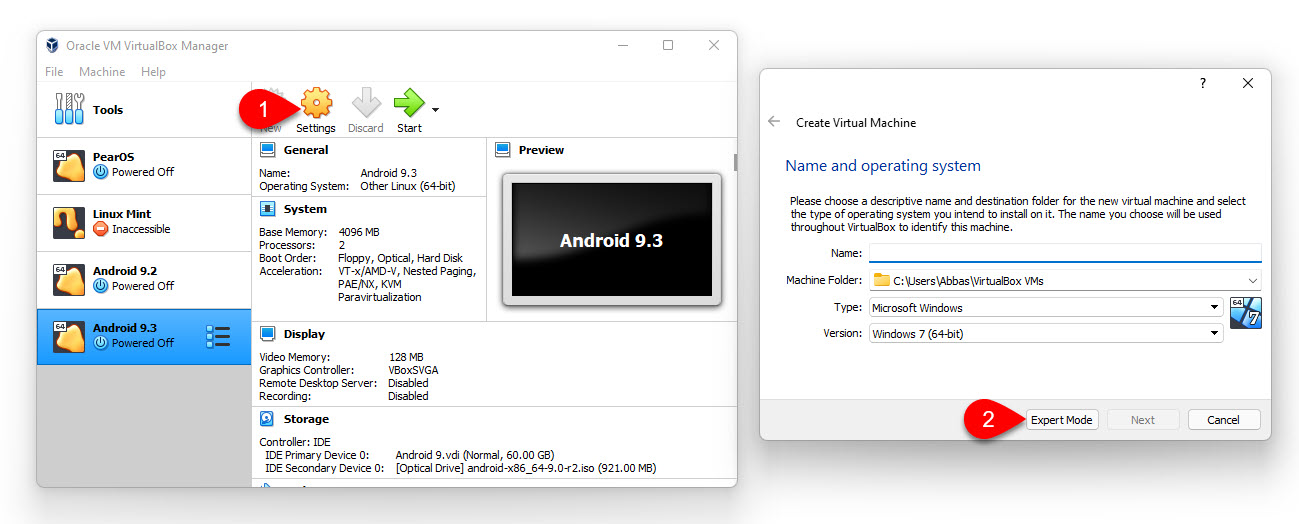
Step #2. After downloading the required files, make sure to install the VirtualBox on your main operating system. The other step is to create a Virtual machine for the android to Install Android apps using the play store. Click new, and on the next window, click on the expert mode, this way it will save a lot of time.
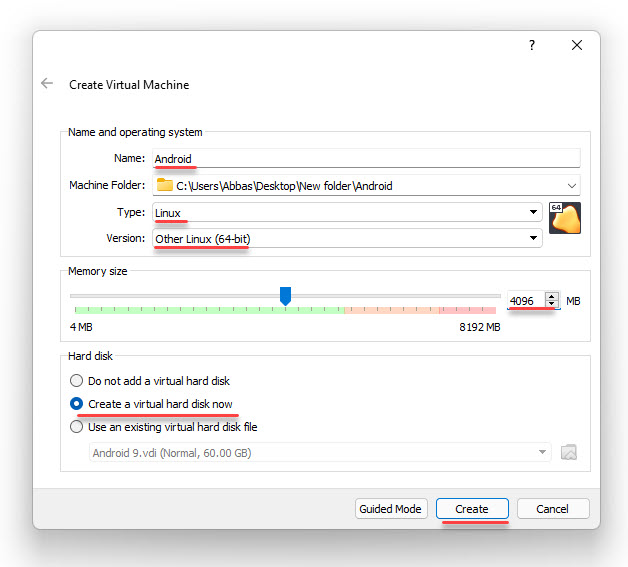
Step #3. It is time for us to provide a name for the virtual machine, and if you want to save it to any other location you can also do it. But the very most important part is the type, you will have to make sure to choose Linux and for the version, you’ll have to choose other Linux 64 bit or 32 bit. I downloaded the Android 64 bit so it’s up to you to decide on the version.
Ram is another matter, 2 GB is required for android 64-bit, and for 32 bit 1GB has to be entered there. However, I have inserted 4GB of ram for better performance. In the end, choose to create a new virtual hard disk.
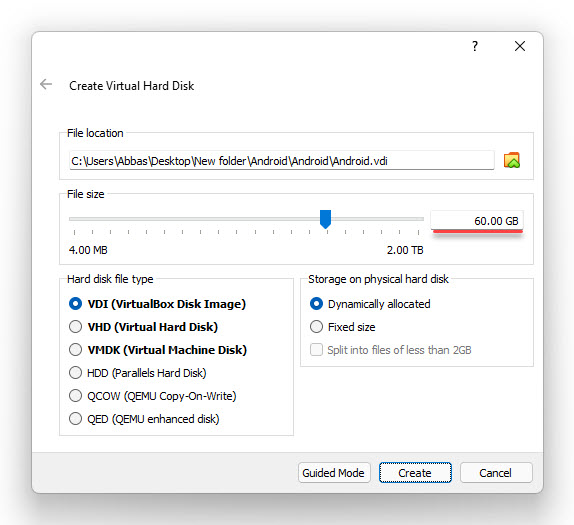
Step #4. Insert the amount of storage that you want for the Virtual machine, I will go with 60 GB. Leave the rest of the settings as default.
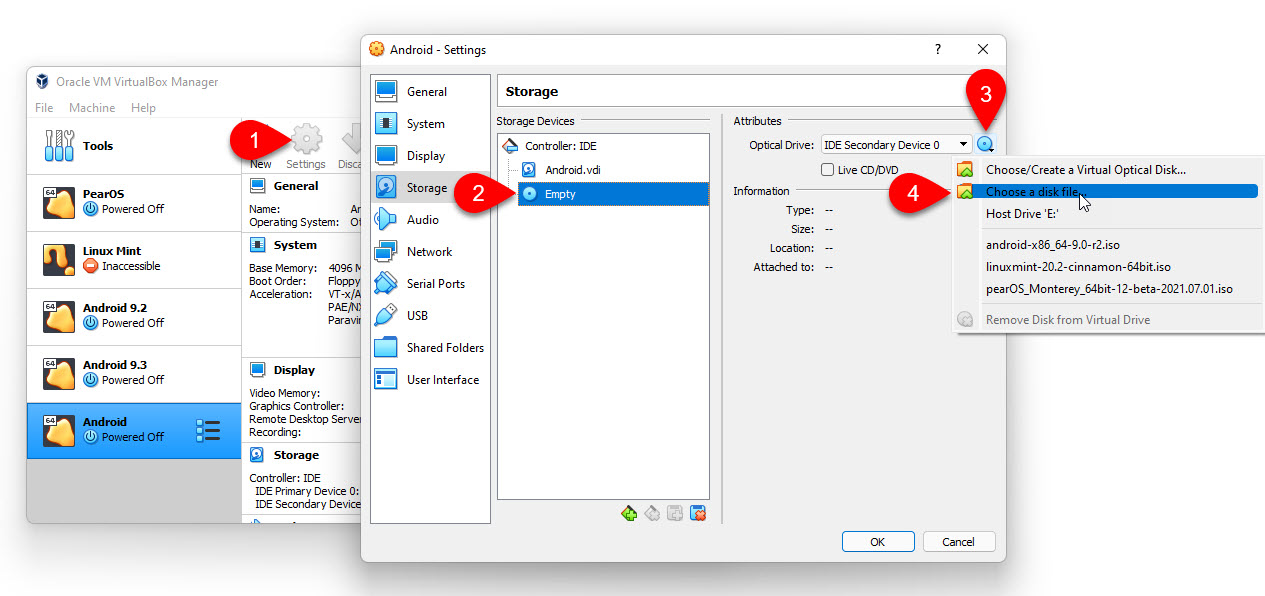
Step #5. We need to Attach the Android ISO to the Virtual machine and then configure some important settings. To add the ISO to the VM, click on the settings of the VM, Go to the storage, and locate the ISO Image.
we have to configure some other settings regarding the VM, or else you will be stuck at some point that you can’t go further. So it’s better to prevent those things before facing the errors. Also, screenshots are in the below slideshow, you can browse through them.
- Increase Video memory to 128 MB and change the graphics controller to VBOXSVGA.
- Increase processor number up to 2.
- Change the Paravirtualization Interface to KM and save the changes.
2. Install Android on PC in VirtualBox.
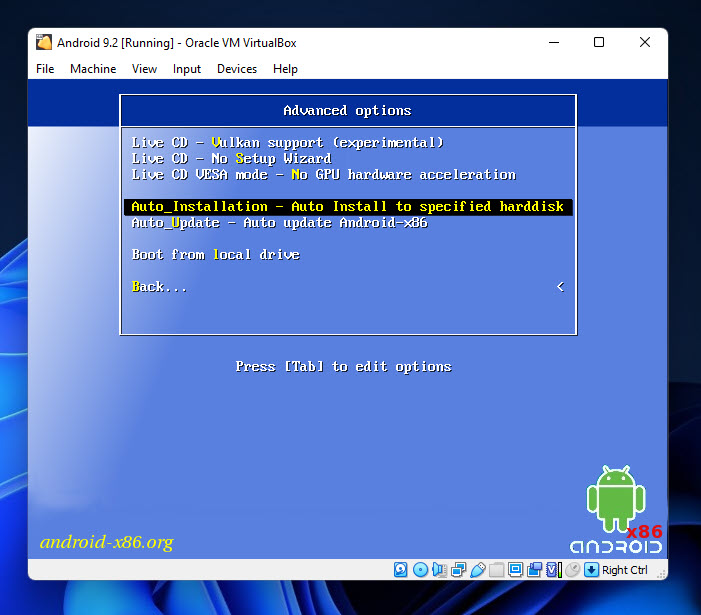
If you are following up until now, then congratulations we are ready to install Android on PC in VirtualBox. So click start to power on the VM, use the arrow keys to navigate around the menu. Choose the advanced option.
Choose the fourth option knows as Auto Installation- Auto Install to specified hard disk and press enter.
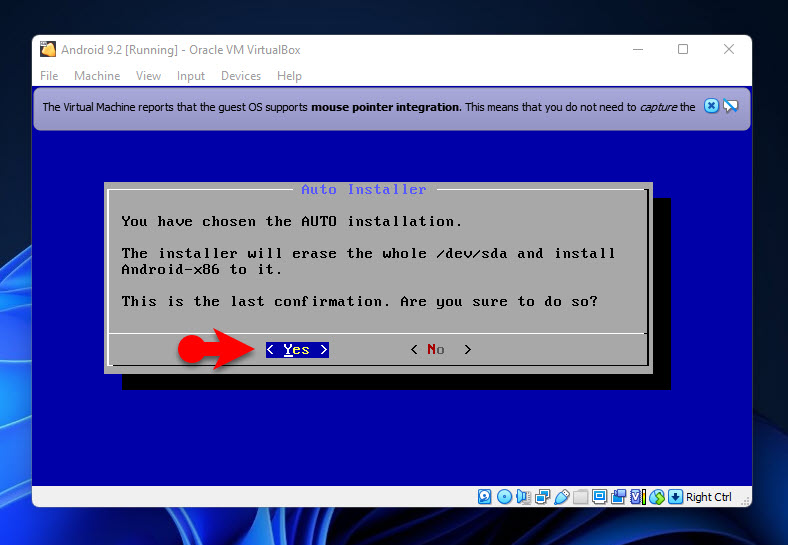
Well, the Installer is asking again to confirm if you want to erase the hard disk and install android inside it. Choose yes and wait until the installation is done in a minute.
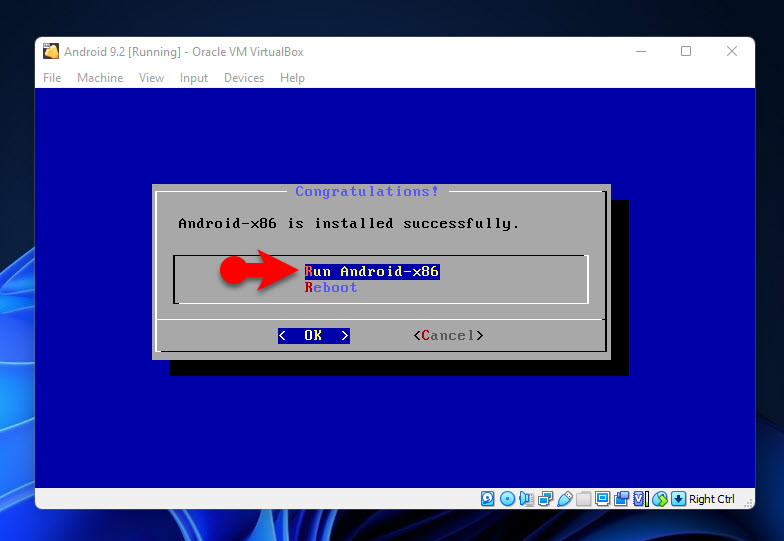
Once the installation is done, the installer asks if you want to reboot the OS or Run it. Choose Run Android x86 and press enter.
After the reboot, you have to set up the steps the same as when you are setting up a new phone. The settings like language, time and region, agree to the terms and more. you can handle them, if you can’t handle them on your own, then follow through the below slideshow.
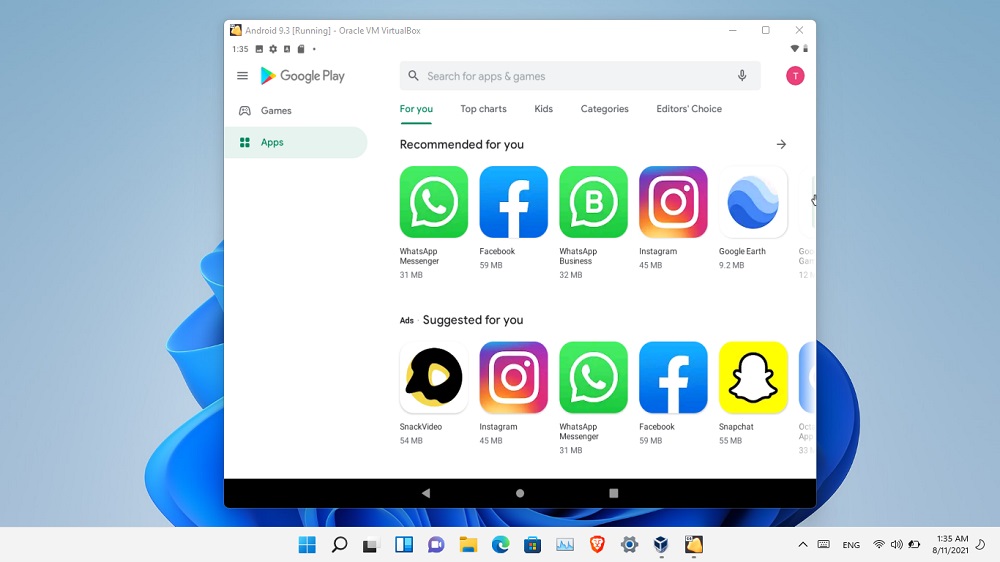
And this is How you Run Android on PC and then install android Apps using the play store, or install apk from their-party sites.
Summary:
Running Android on PC using the ISO on the Virtual machine is less time-consuming, it doesn’t take a lot of storage. And finally, it is very fast and you can run android apps through the play store or use the APK from third-party websites.


Leave a Reply