In this article, you are going to learn that how to Protect Documents in Office 2016. Protecting your document means that to save your document from bringing changes by others. And put some limits that till where people can use your document and can bring some changes in your document. Sometimes you share a complete document to others which doesn’t any changes because it does not have any problem or mistakes. In this situation, you can put a password on your document and let reader just reading your document. But when your document is a secret document even others can’t read your document. And you don’t want others to copy your document. Then in this kind of situation, you can put a password on your document. And no one is able to open your document. Now see the explanation that how to put this limits for your document.
Make your Document Limited to Protect Documents
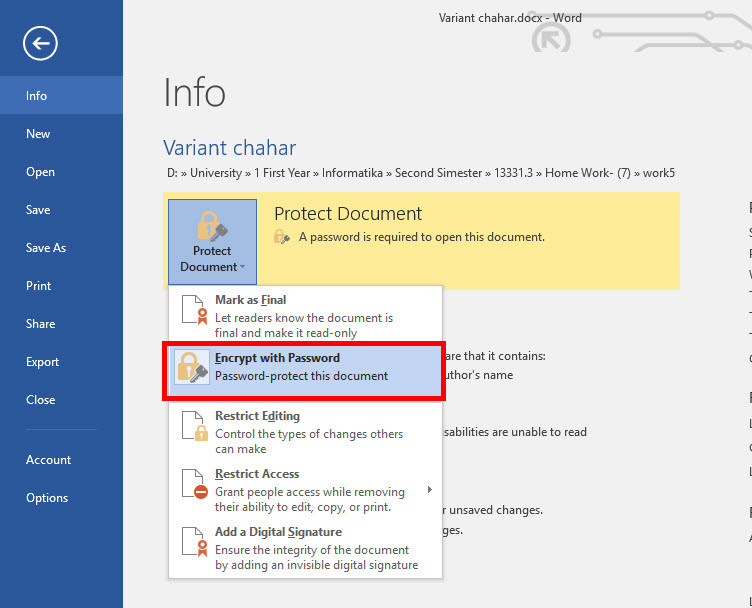
You can find the option Protect Document through to File ⇒ Info ⇒ Protect Document. Here you can see the option Protect Document on the first line of the page. Through to this option, you have Five different methods for protecting your document. Here I am going to explain them.
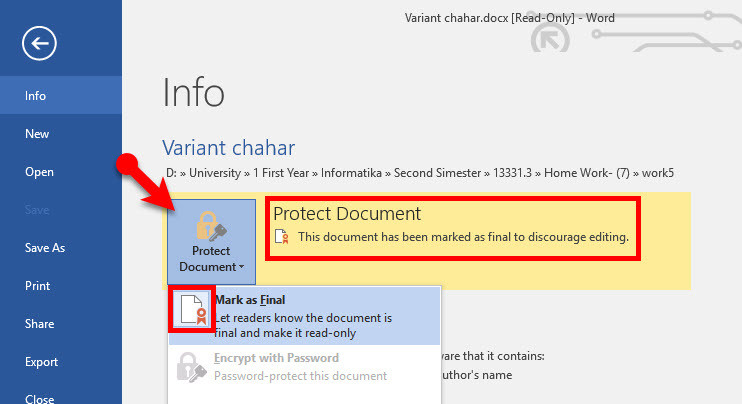
Step 1: – Mark your Document as a Final, Here you did your document final it means your document doesn’t need any changes because now it’s ready to read-only. And you let the reader read only. To mark your document click on the option and mark it. Then save your document, when you marked it as final the protect document option will be highlighted. To show others that it’s has been marked as final to discourage editing the document.
Encrypt and Break Password for Your Documents
Step 2: – Encrypt with Password, here you can make a password for your document this password wouldn’t let others even open and read your documents. To use this option it’s Important that at first, unmark your document then apply this option. If you didn’t unmark it making a password for your document is impassable. By making and using a password you can protect your document easily. To make the password click on and write your password and save the document.
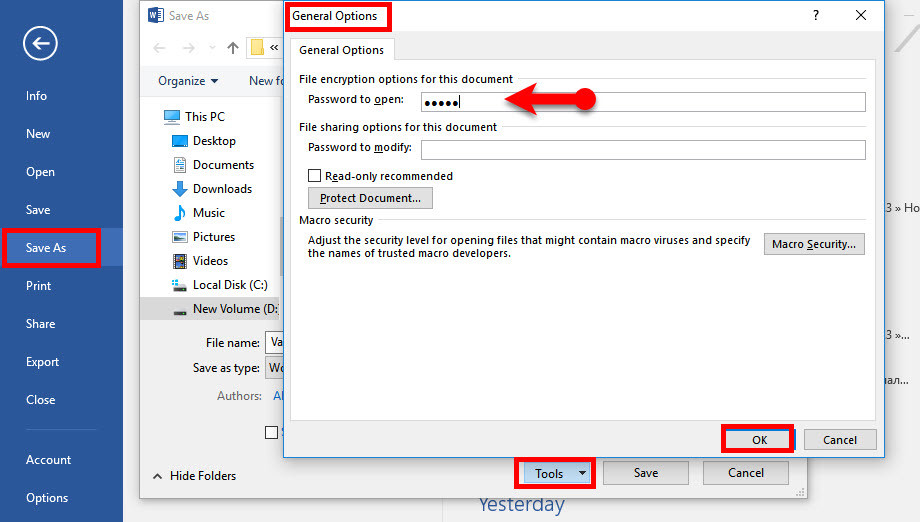
To break your password and use other option for protecting your Document go to Save as ⇒ Tools ⇒ General Options and Clean the password then click OK to save without any password or use other option to protect your documents.
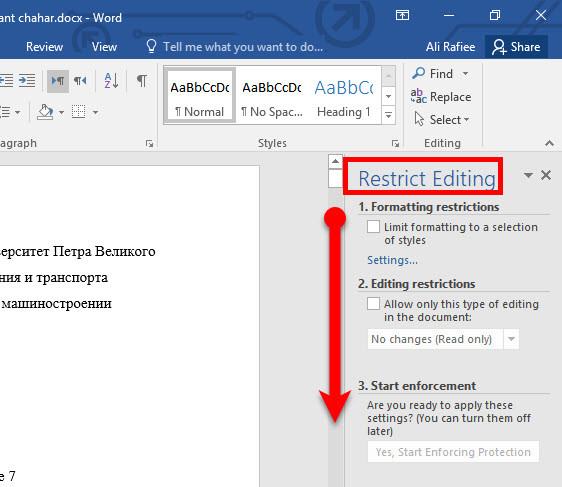
Step 3: – Restrict Editing, This option help you to control the editing of your document which by others will come. Here if you are not sure about the spelling of the content of your document or grammatical mistake or any other problem in your document. By using this option you can let readers that to bring changes only to limited places. When you applied this option on the right side of your main office page. and determine the restrictions to apply to your document.
Step 4: – Restrict Access, Grant people access while removing the ability of readers to Copy, Delete and Print the Document. To apply this option on your document you should Connect to Rights Management Servers to get templates. To connect here your machine should set up for Information Rights Management (IRM). If not you can not connect, to set up IRM, sign in to Office and open an existing IRM protected message or document or contact your help desk.
Conclusion
Protect Documents in office is one of the most important options. Here you can limit your document for readers to save from stealing and copyright. It’s important to that when your document is secret how to save and share your document with those who you want them to read and check and bringing changes in your document. Thanks for being with us.


Leave a Reply