Windows 11 will be releasing soon in the fall, at the moment since it is in the beta version it is better to test it on a virtual machine than the physical computer. Also, you may have another reason to test windows 11 inside the virtual machine. That’s why in this article you will learn how to install windows 11 on VirtualBox. I personally started testing Windows 11 inside the virtual machine due to the new features, center taskbar, and a new look. What is your reason, let me know your thoughts in the comments section
Steps to Install Windows 11 on VirtualBox
- Download Required files (VirtualBox & Windows 11 ISO)
- Install VirtualBox
- Create a New Virtual Machine for Windows 11
- Install Windows 11 on VirtualBox
Step #1. Download the Required Files
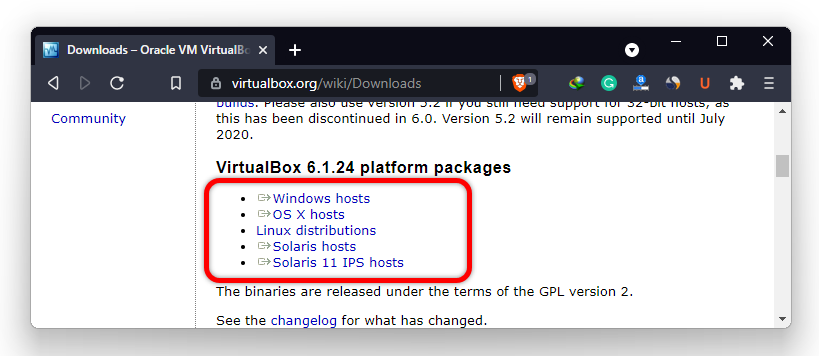
Download VirtualBox: You need to visit virtualbox.org and download the VirtualBox depending on the operating system that you are using. On my main computer, I’m using Windows 11, so I’m going to download the VirtualBox for Windows. If you are using a Mac OS or Linux on your main computer, you have to download VirtualBox for your system.
Download Windows 11 ISO Image: without windows 11 ISO, you cannot install windows 11 on VirtualBox. Unfortunately, at the moment Windows 11 is in the insider preview at the dev channel. Even the stable insider preview is not released, but it will be released you get it from Microsoft Official website. At the moment you need to use the below link to get the Windows 11 ISO Image Latest version.
Step #2. Install VirtualBox on your Local Machine
If you are using a Windows operating system, installing VirtualBox on your system is not a very hard thing. All you need to do is launch the setup and then click next, next and finally click install and it will be installed on the computer. However, if you are a beginner here is a post with the step-by-step guide which can help you install the VirtualBox on windows OS.
The same goes for macOS, just have the download the VirtualBox and then launch the setup and then simply click install, it will be installed on the computer. For Linux use the below links and Learn How you can install VirtualBox.
- Install VirtualBox on Kali Linux
- How to Install VirtualBox on Linux Mint?
- A Step-by-step guide to Install VirtualBox on Ubuntu
If you are using another Linux Disto, do a google search and you will find How.
Step #3. Create a New Virtual Machine for Windows 11
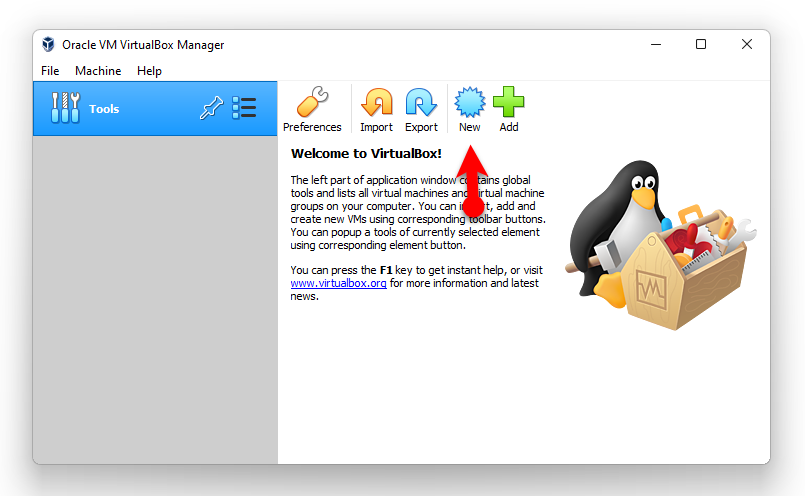
We are ready to create a New Virtual Machine for testing Windows 11. So, launch the VirtualBox and Click on New on the homepage.
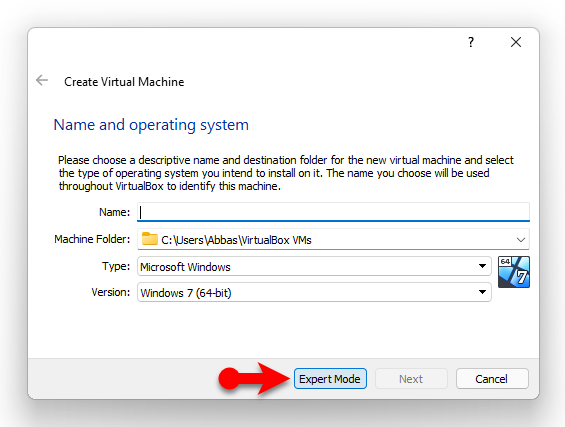
We can go step by step forward using the basic mode, but I want to use the expert mode, it will save some time.
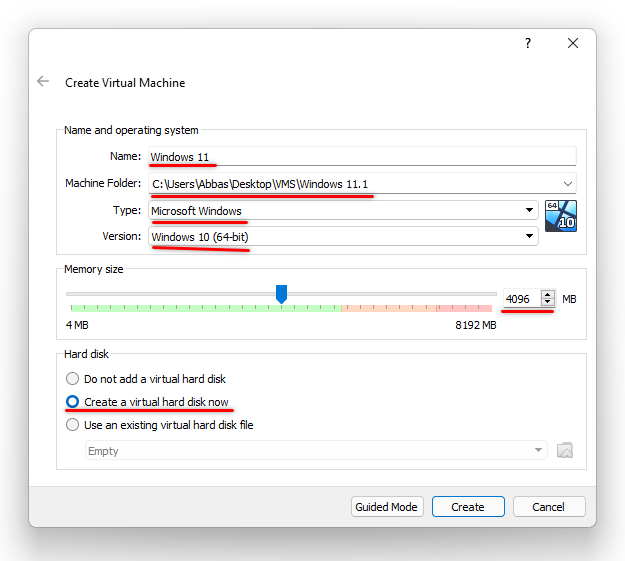
Once the Expert mode is activated, the whole panel is divided into three categories of Name and Operating system, Memory Size, and Hard Disk.
Type Windows 11 for the operating system, and save it to a new location if you want. The Type and the version will be selected by default when you type Windows. If the version is not right, manually set it to Windows 10(64-bit).
Specify at least 4 GB of RAM for the Windows 11 Virtual Machine, otherwise, it will work very slow.
And Finally, choose to Create a Virtual Hard Disk Now and click create.
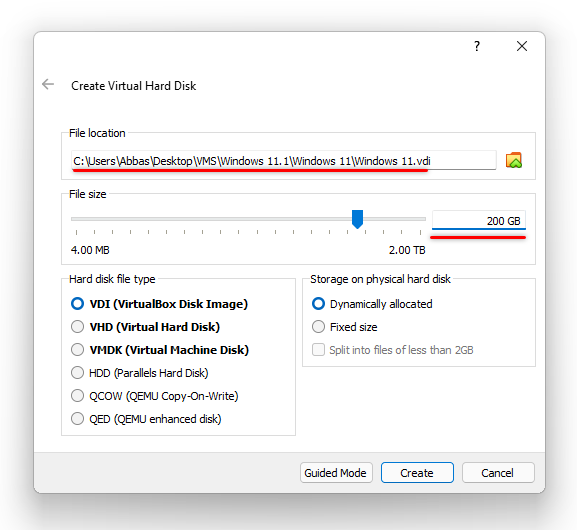
The Windows is divided into four panels of File Location, File Size, Hard Disk file type, and Storage on Physical hard drive.
You can go with the default location or change to the path you want. Next, you have to insert the amount of storage for the Virtual hard drive of the VM. Let the hard disk file be VDI and Dynamic for the storage on the physical hard drive.
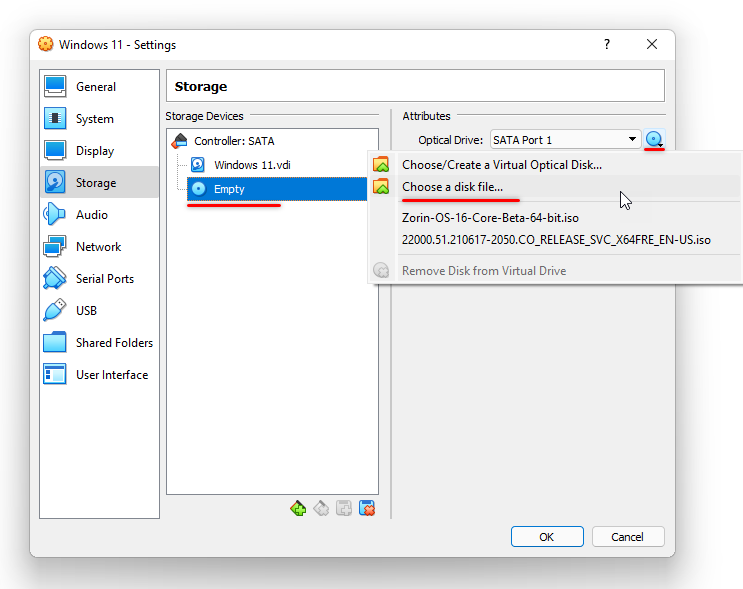
Once the Virtual Machine is created, we have to attach the Windows 11 ISO Image to the Virtual machine inside the VirtualBox. Click on the settings> and go to the storage Windows. under the storage devices choose the empty, and choose the Windows 11 ISO Image using the optical drive.
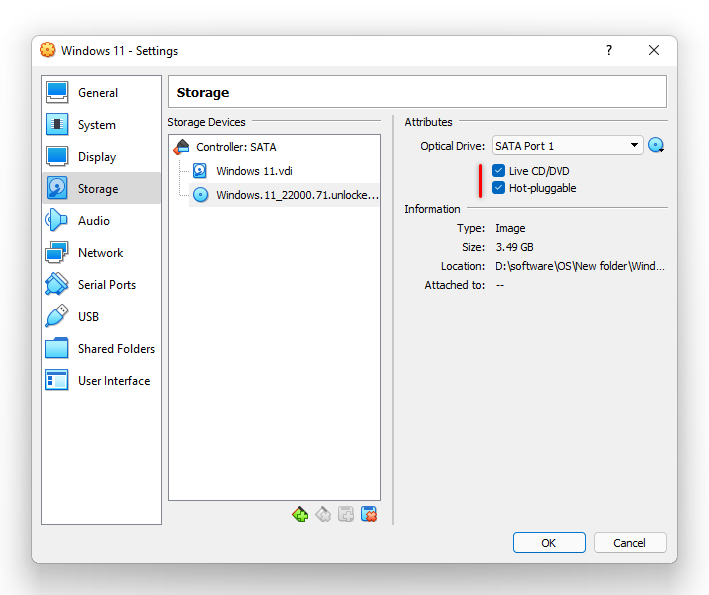
also, make sure that the below boxes are checked.
- Live CD/DVD
- Hot-Pluggable
This is all with the creation of the Virtual machine for Windows 11 inside the VirtualBox.
Step #4. Install Windows 11 on VirtualBox
On the homepage of the VirtualBox, choose the Windows 11 VM and click start to power on.
- Choose your language and click Next.
- Click Install Now.
- Choose a Windows 11 Edition you are interested in using, I will with Windows 11 Pro.
- Choose I accept the License terms and click next.
- Choose Custom to Perform a Clean Installation of Windows 11.
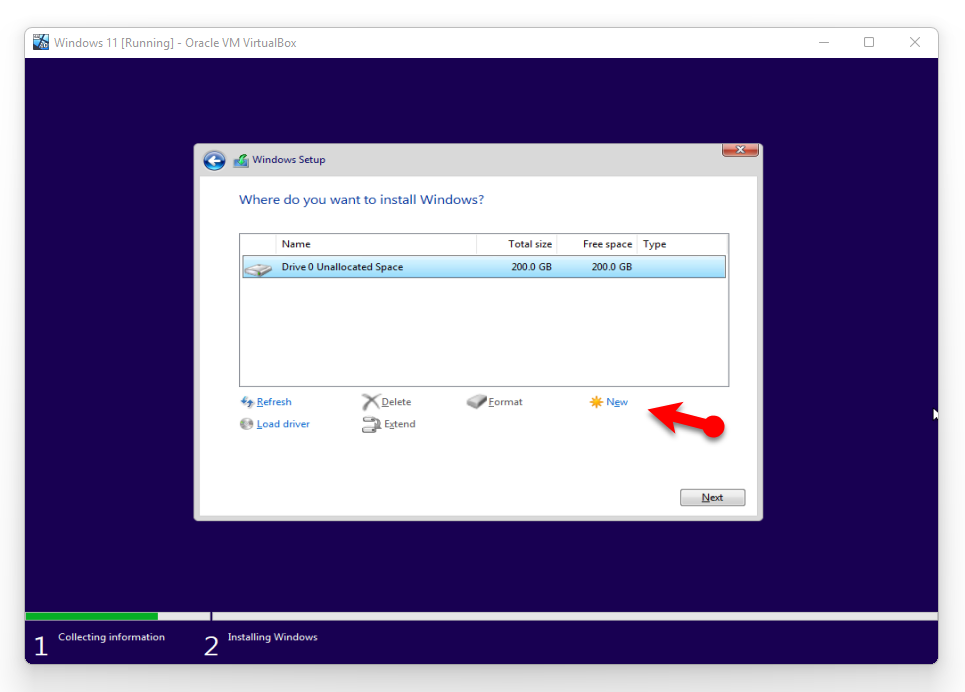
It is time for you to partition the hard drive that you create before. If you want to create multiple drives click on them and enter the amount of storage and click create. I need one drive with the default size, so, I will click next.
Now you have to wait until the files from the Windows 11 ISO image should be copied inside the Virtual HDD. Once all the files from the ISO image are copied, the Virtual machine will restart.
After the OS restarts, you will be on the following steps.
- Choose your country.
- Select a keyboard layout.
- If you have another keyboard layout add it or else skip it.
- It is time for you to name your PC and click Next. You can also skip this section if you want.
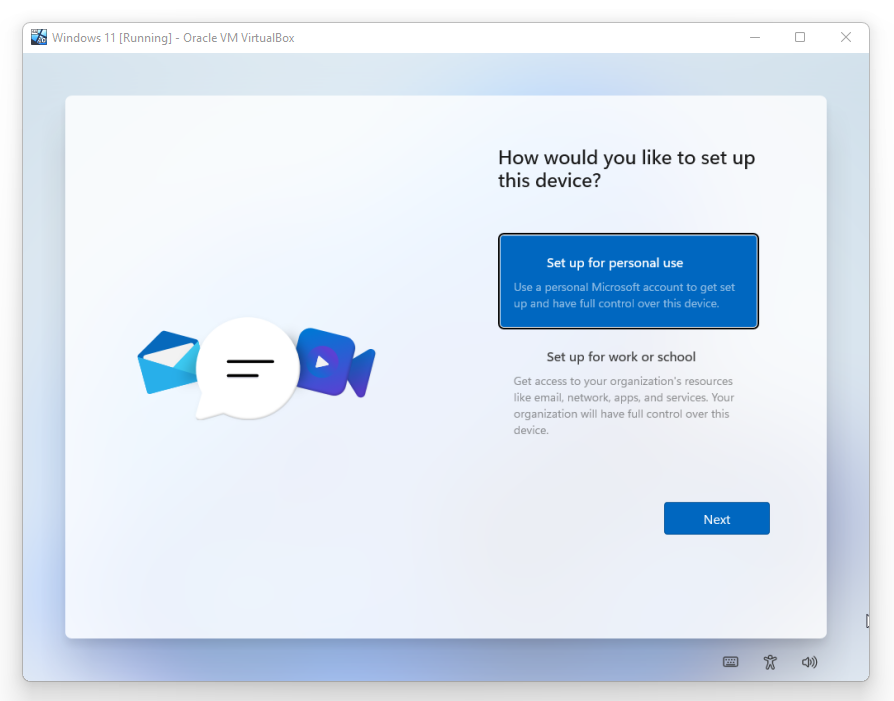
Set the Windows 11 based on your work, I will go the Personal usage, you use it for work so, choose the second option.
There are two types of sign-in options in Windows 11, Microsoft account and local account. Microsoft is recommending using the Microsoft account to log in, if you are not interested use the local account.
- To create a local account, click on the sign-in option.
- Choose an offline account.
- Choose close.
- And finally, choose don’t sign in with Microsoft account.
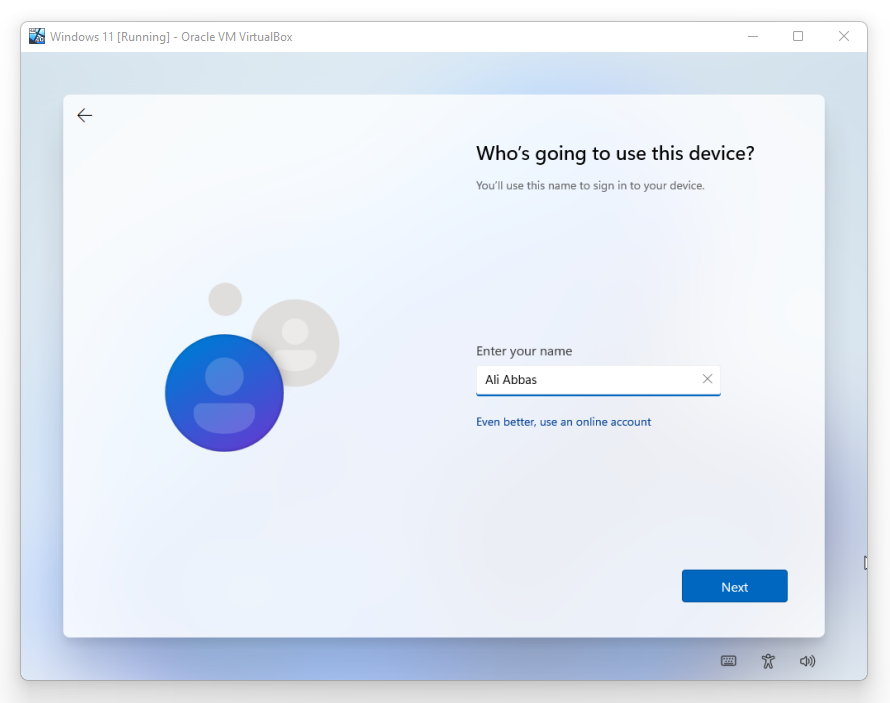
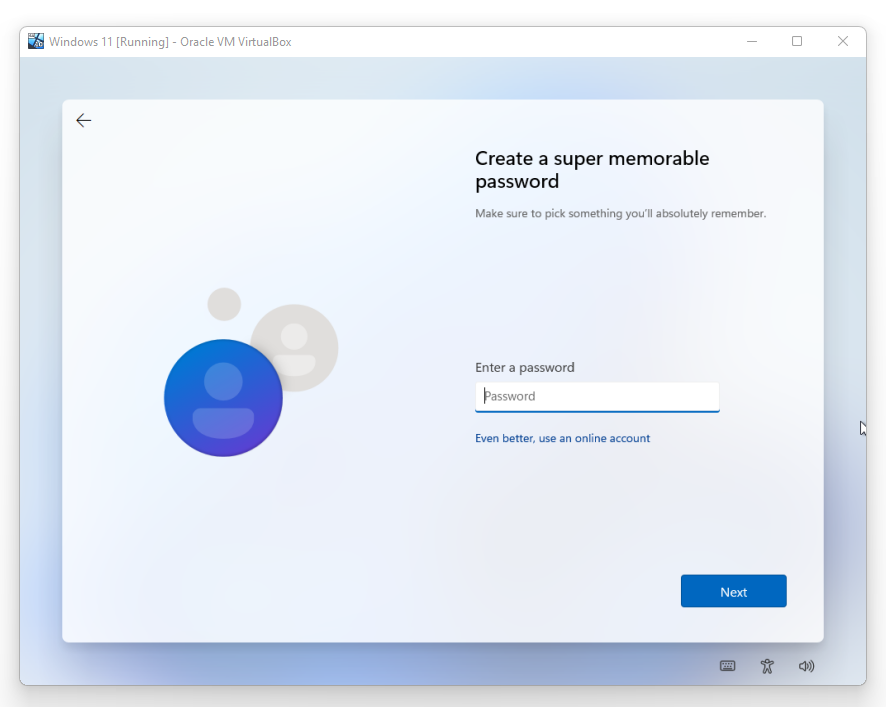
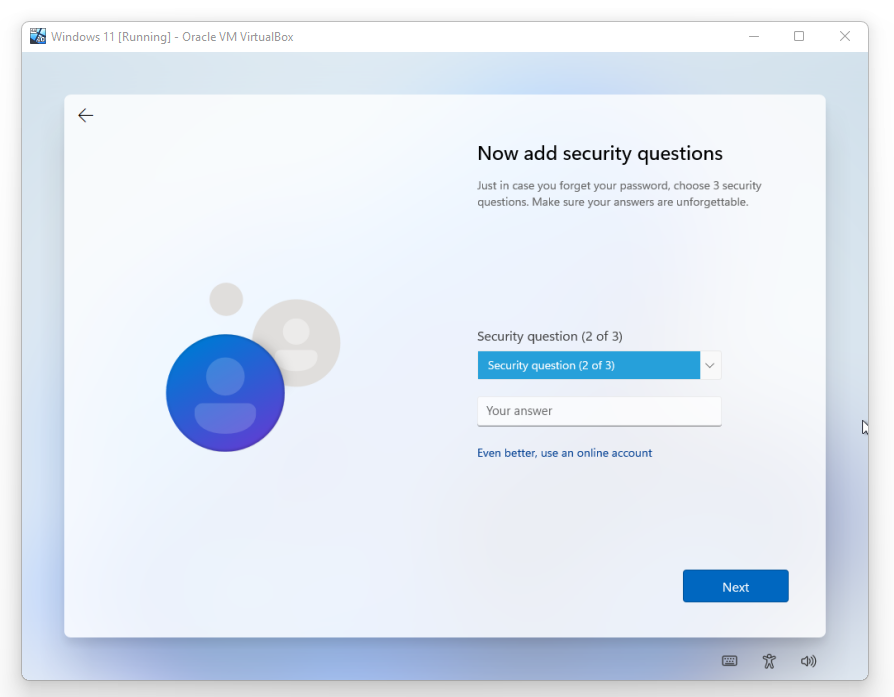
Name your device and click next, then enter a password and finally answer some security questions.
- name your Device
- Enter a Password
- Security Questions
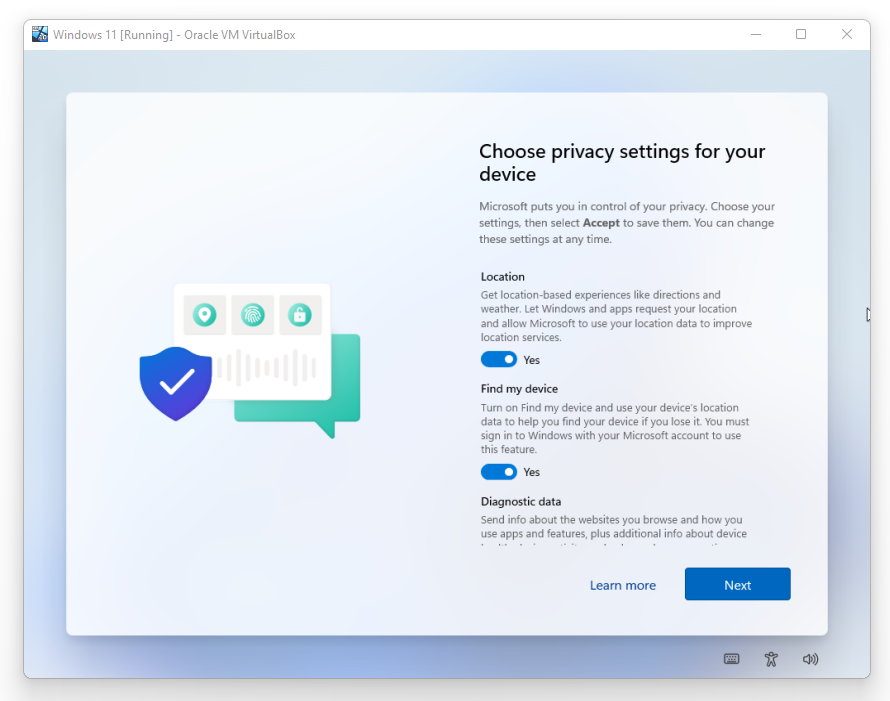
Configure the Microsoft Privacy settings and click next.
Wait a moment and the Windows 11 interface will be ready for first-time use.
Summary:
To Install Windows 11 on VirtualBox, you will need to download and install VirtualBox and also get the windows 11 ISO image. After that, you have to create a new virtual machine inside the VM and then attach the ISO of Windows 11 to it and finally, start installing. That’s all.

Leave a Reply