In this article, you will learn how to install windows 11 on a PC or laptop with a step-by-guide. If your PC can’t support the minimum requirement of windows 11 then in the end you will find out how to fix this PC can’t install windows 11 without TPM 2.0.
The minimum requirement to install windows 11 on your PC or laptop is 1.5 GigaHertz, 64GB of storage, a secure boot must be enabled, and finally, your PC must have TPM version 2.0. Before creating a bootable USB or performing a clean installation of Windows 11 on a PC or laptop, you need to check out if your PC has the TPM 2.0 chip.
Steps to Install Windows 11 on PC/Laptop
- Create Bootable USB for Windows 11
- Boot your PC to Install Windows 11
- Install Windows 11 on PC/Laptop
- Fix This PC can’t Install Windows 11
Step #1. Create Bootable USB for Windows 11
Creating a bootable USB for Windows 11 is the very most crucial part. You must have to know how to create a UEFI bootable USB for Windows 11, it does not matter which operating system you are using as long as you know how to create a UEFI bootable USB.
Click on the blue link and find out how you can create a bootable USB for Windows 11 with a step-by-step guide and screenshots. In that post, I feel I have explained 2 methods of how you can create a UEFI bootable USB for Windows 11. If you are worried about the ISO of Windows 11, it is explained in that post and how you can get it.
Step #2. Boot your PC to Install Windows 11
The moment you create a bootable USB for Windows 11, you need to restart the system or power off your computer. I am assuming that you have already attached the USB flash drive to the computer when you’re Powered off the PC. Upon powering on the system, you have to press the boot menu for your system. Here is a post that can help you to find out what is the boot menu of your computer.
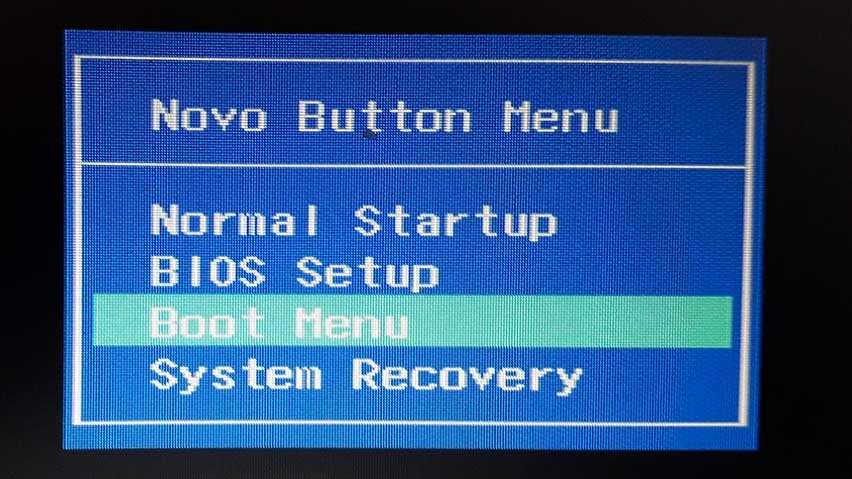
In any case, I want to point out the boot menu for Lenovo laptops. Most of the Lenovo computers do not have a boot key, instead, the company has provided another option known as one key recovery. If you want to go to BIOS, or if you want to press the boot key of your computer, you can visit them using the one key recovery. One key recovery will not work upon restart, you’ll have to power off your computer and then press the one key recovery button. The moment you press the one key recovery button your computer will power on. Then you will be on the menu where you can choose to go to the BIOS, normal startup, or go to the boot menu.
Step #3. Install Windows 11 on PC/Laptop & configure the settings
Step #1. Pass the basic settings for Windows 11
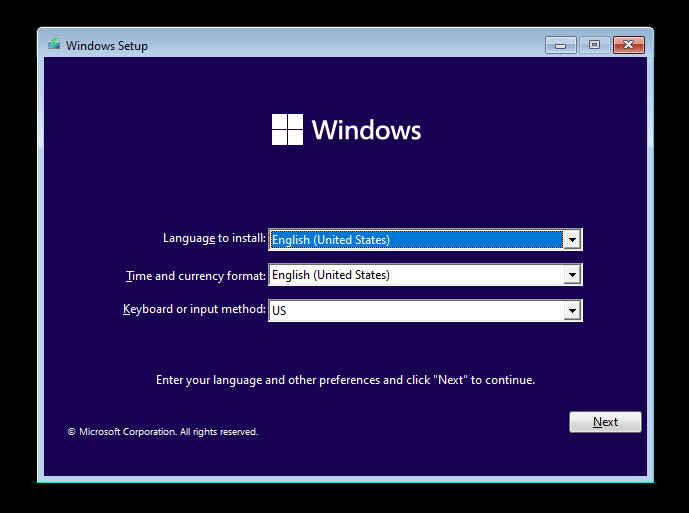
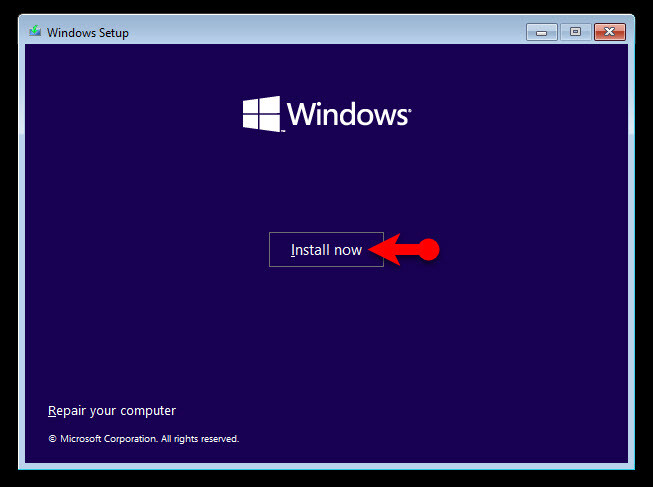
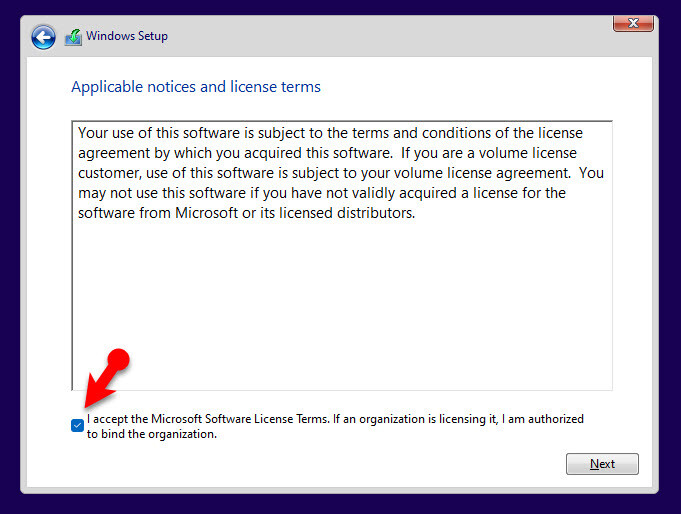
Now that you have booted your computer using the USB flash drive. It is time for us to perform a clean installation of Windows 11. In the basic windows settings you have to configure your language, and then click install now. After that Window will ask you to enter the license for Windows 11, if you have your Windows 10 license simply enter it or if you don’t have then choose I don’t have a license.
Click on the picture to view it in full size.
- Configure Language Settings
- Install Windows 11 Right Now
- Accept Terms of the software
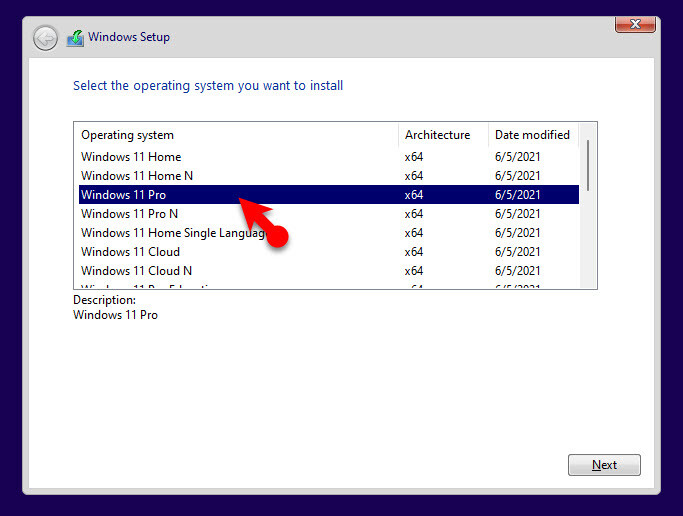
Step #2. Choose a Windows 11 Edition
Now you have to choose a windows 11 version that you are interested to use. Windows 11 is released in many editions of windows 11 home, pro, enterprise, education, Windows N series, and Windows 11 workstation series. I want to point out if you are trying to install windows 11 home on your PC. You cannot proceed without entering a Microsoft account, during the installation Microsoft is forcing you to log in with a Microsoft account. So creating a local account is out of the question, unless you disconnect your network connection then you will get the option to create in local account.
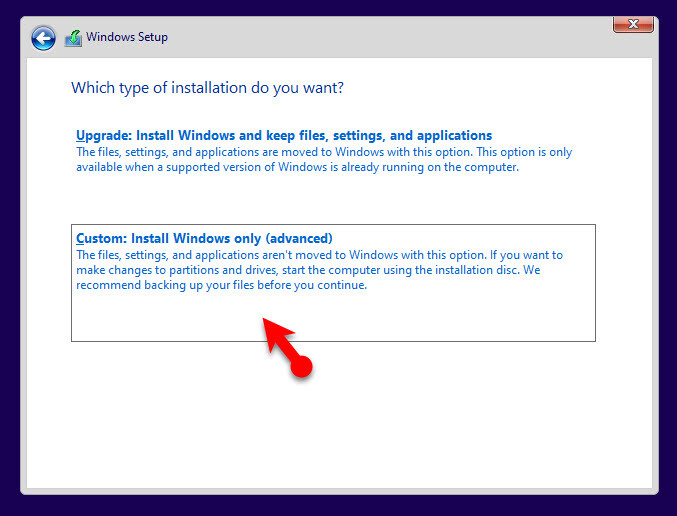
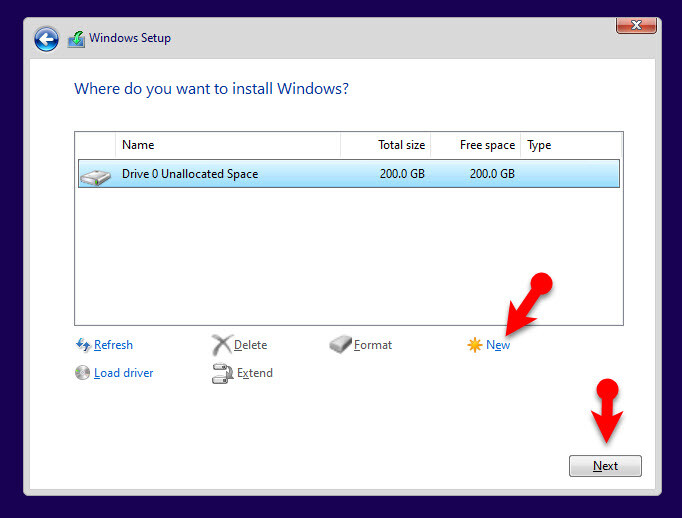
Step #3. Choose Custom Installation and Partition Your HDD/SDD.
Once you choose an addition of windows 11, the installer will ask you to choose an option to install windows 11. There are two options of upgrade and a custom installation. You will need to choose a custom installation to move to the next step.
It is time to partition the HDD or SSD that you are using on your PC. Remember at least 64GB of storage is required to install windows 11. Remember that and create a partition for Windows 11 or install it on previously installed windows by formatting the drive, it is up to you to decide.
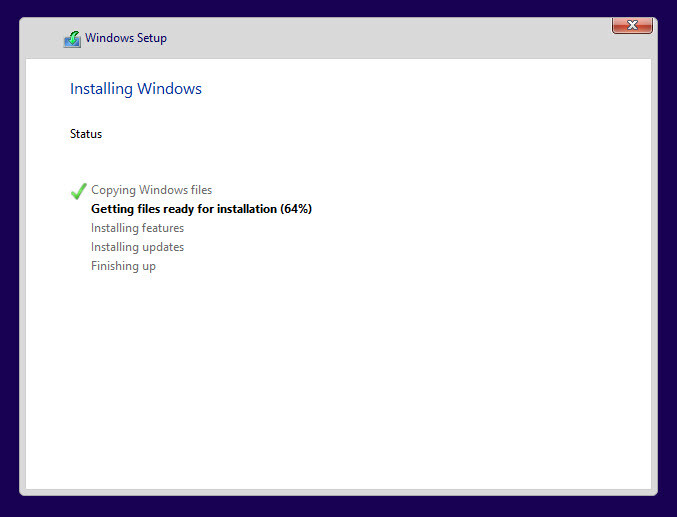
The moment you are done with partitioning the HDD or SSD, you’ll have to wait until the files should be copied from the ISO into your local HDD or SSD. Once the files are copied your PC will restart.
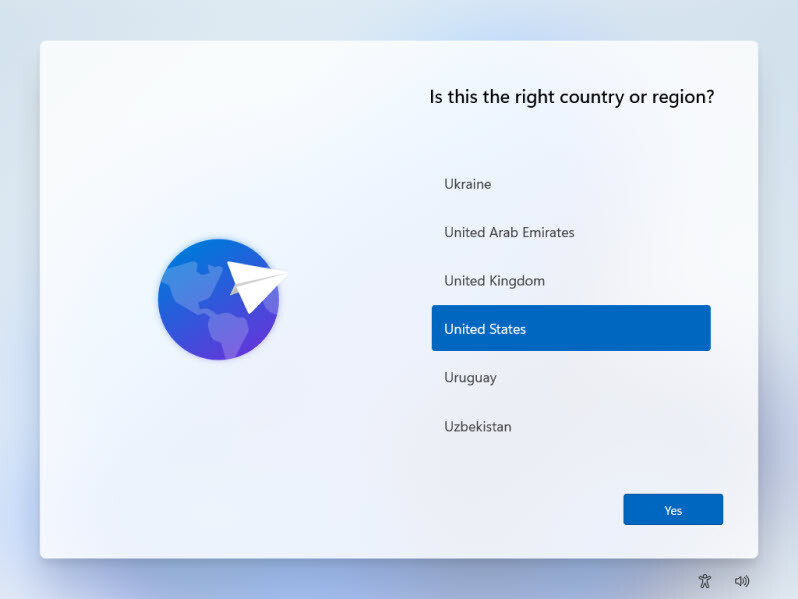
- Choose Your Country.
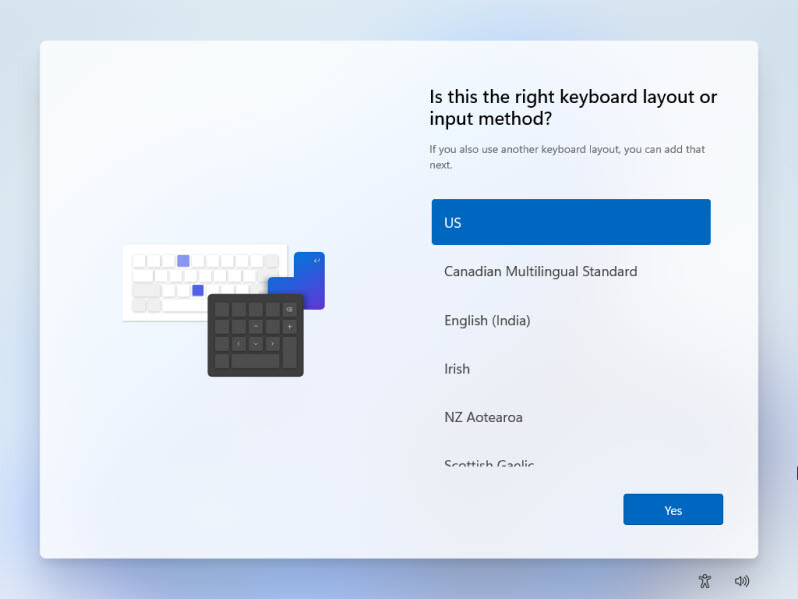
- Choose a Keyboard Layout.
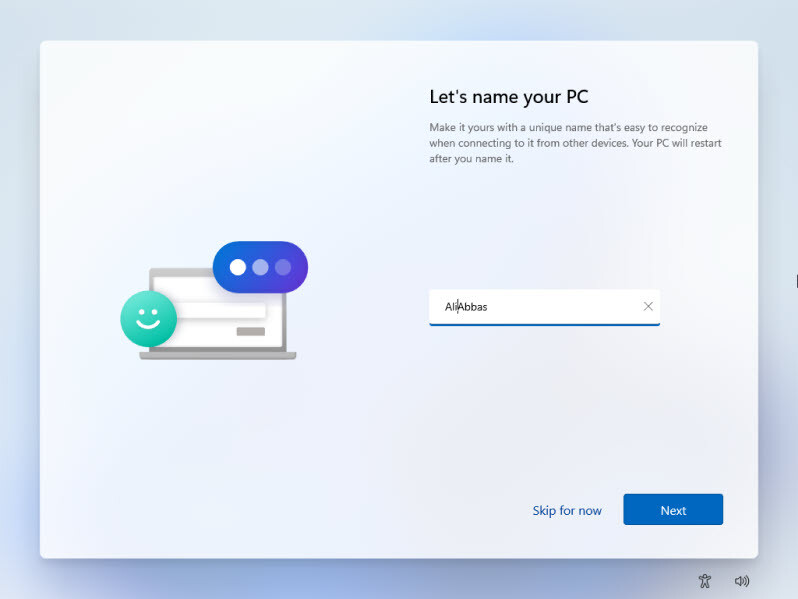
- This step is entirely new in Windows 11, it asks you to name your computer.
- Choose Your Country
- Is this the right Keyboard Layout
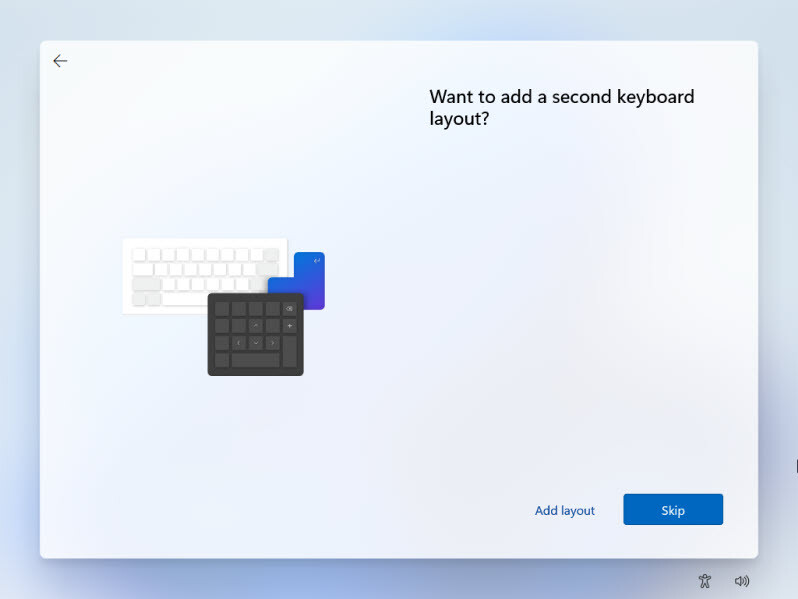
- Add another keyboard layoout
- Name Your PC
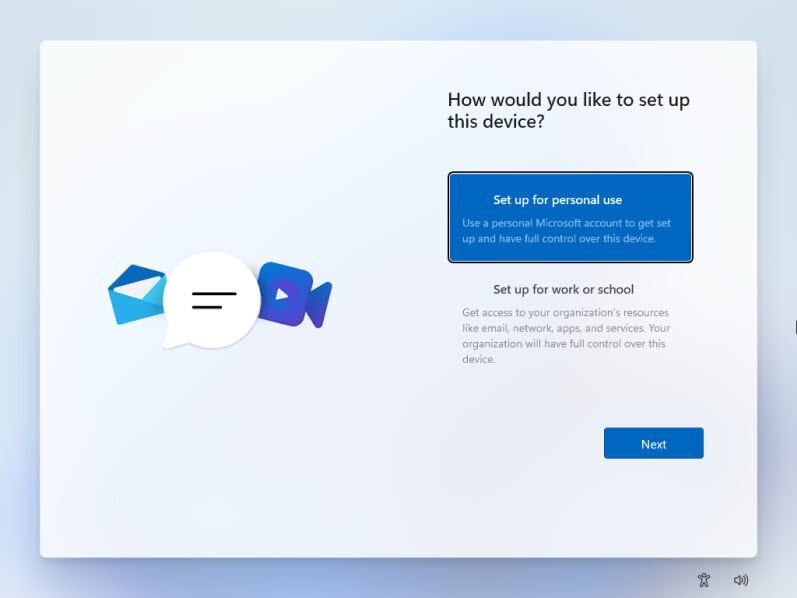
You need to set up your computer between the two options mentioned by Microsoft (Personal use or Work). In my case, I’m going to set up this computer for personal usage and testing purposes so I’ll choose to set it up for personal use.
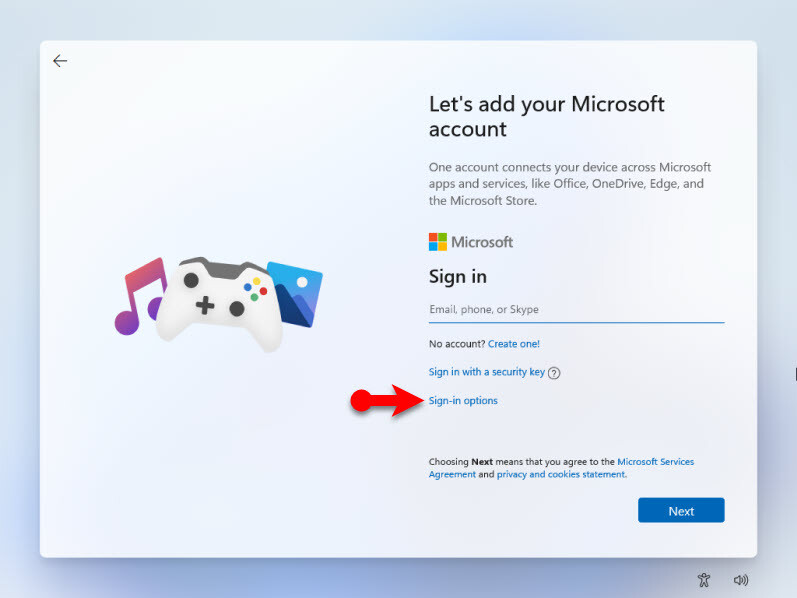
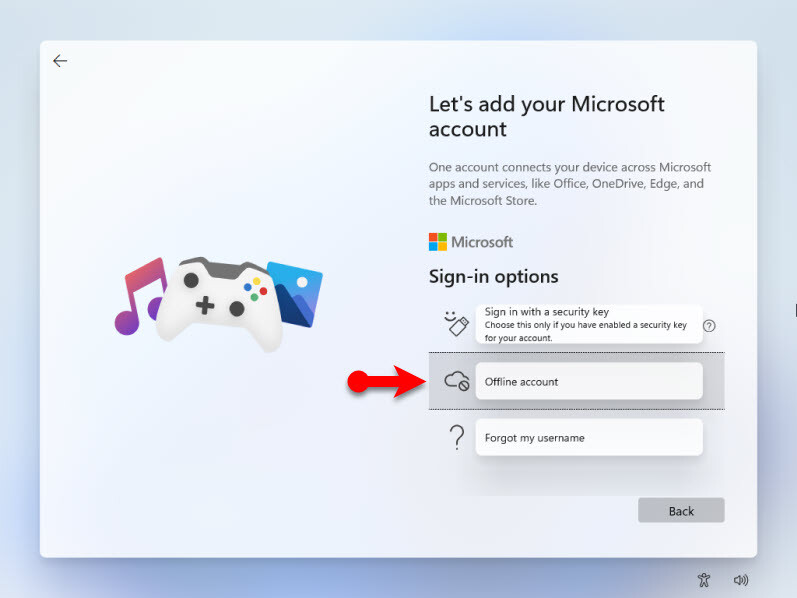
It is time for you to sign in to the computer. You can either sign in using the Microsoft account which Microsoft is recommending however if you want to sign up with a local account click on the sign-in options, then click create a local account.
- Sign in Options
- Create a Local account
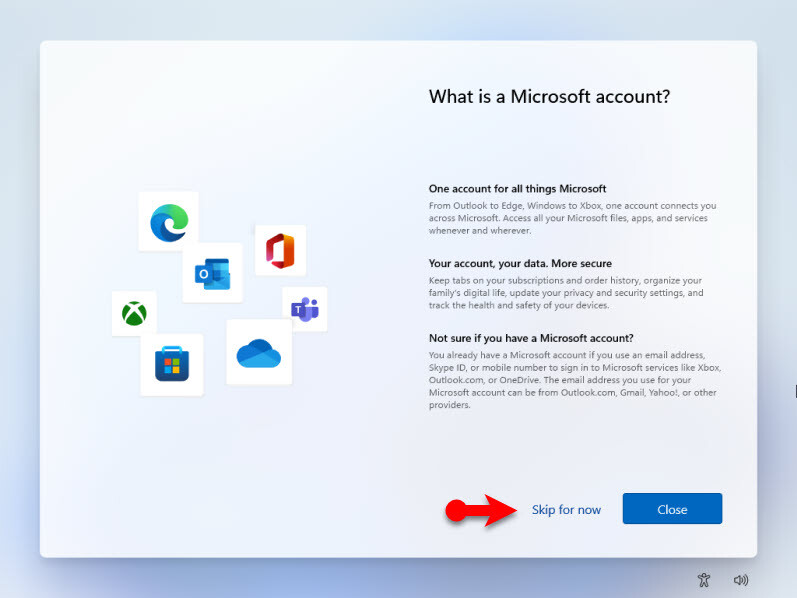
- Skip using Microsoft Account
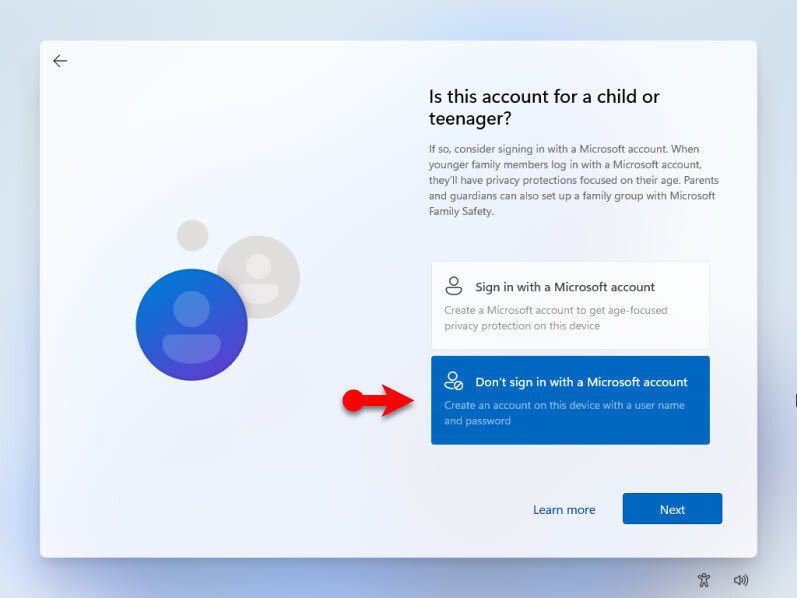
During the setup, Microsoft is asking that if you are setting this computer for a teenager if yes then you have to sign in with the Microsoft account and create a limited experience account for a teenager.
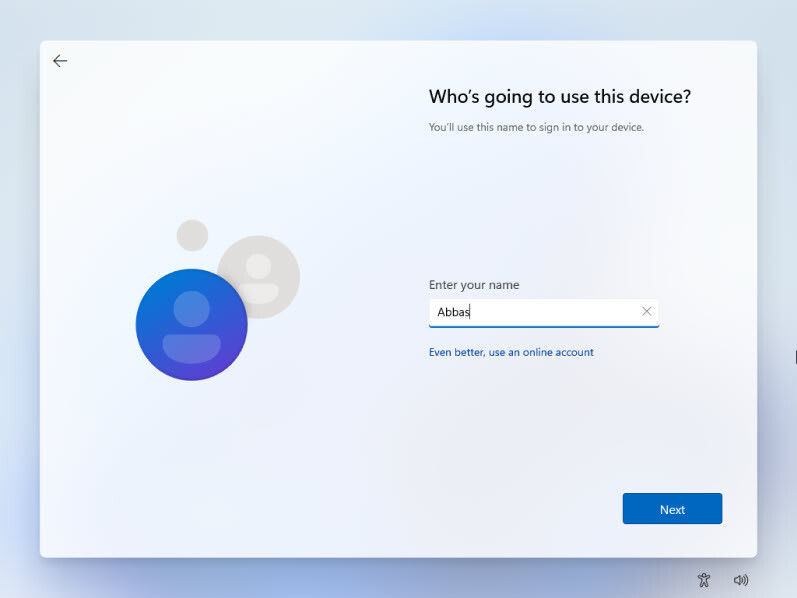
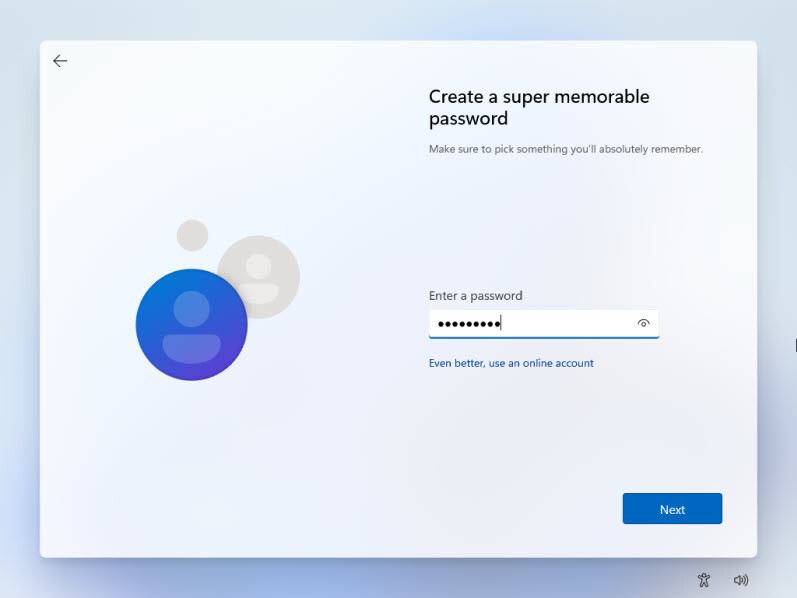
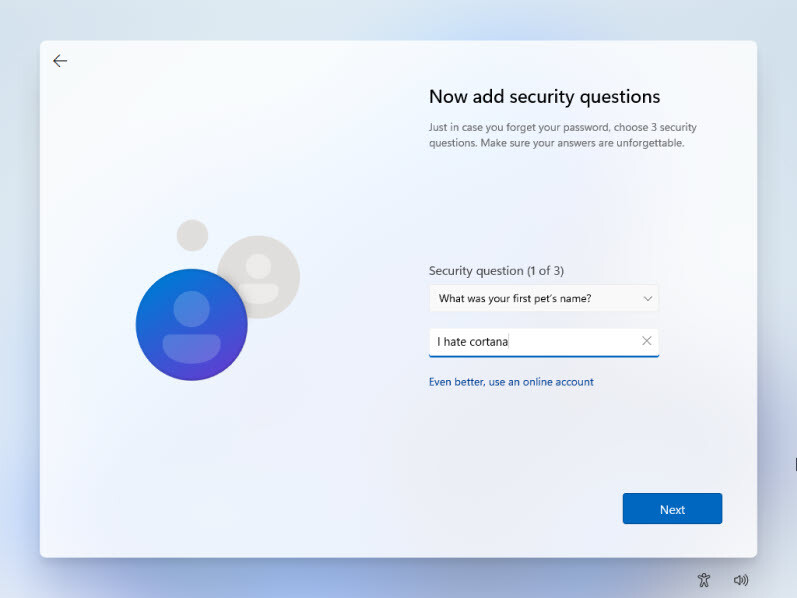
It is time to name your device, and then enter a password, reenter the password, and finally answer three security questions.
- Name Your Device
- Enter a Password
- Answer Security Questions
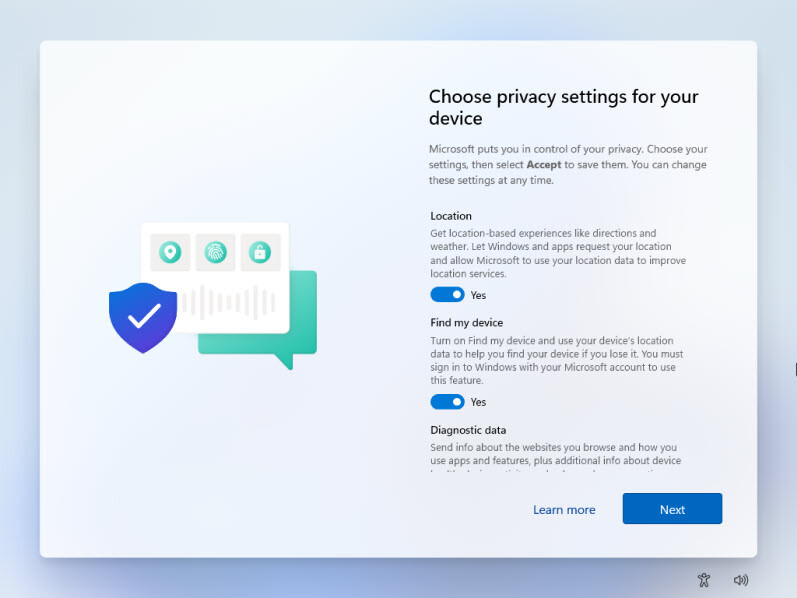
This is the Final Step, where you have to decide with Microsoft Privacy, if yes click next and wait for your desktop. If no, disable them and click next, then wait for your desktop.
and that is all how you can install windows 11 on PC/Laptop.
Step #4. Fix This PC can’t Install Windows 11
Among the requirement of windows 11, the TPM 2.0 is very important, and without it, you cannot proceed to install windows 11 on a computer. However, those PCswhich cannot support Windows 11 have to simply bypass the TPM 2.0 and secure boot. There are multiple ways that you can bypass TPM 2.0 and the secure boot. Among those methods, the registry is a very easy and simple method to bypass TPM 2.0 and secure boot.
You have to download the code to Bypass TPM 2.0 and secure the boot. When you open the file, it is a text file, you have to save with the extension of reg and save it. Then move it to the bootable USB of Windows 11. During the installation, if you face, this PC can’t Install Windows 11 due to TPM 2.0 and secure boot. Press Shift + F10, this will open the CMD window. In the CMD window, type notepad> then go to file and click open. Locate the USB which contains the registry file, right-click and choose merge. this will bypass the TPM 2.0 and secure boot issue.
- Source link for Code
Summary:
In order to install windows 11 on a PC or laptop, you’ll need to create a bootable USB Windows 11. Then boot your computer and perform a clean installation. However, if you face this PC can’t install Windows 11 due to TPM 2.0 and secure boot, will need to use the code to bypass it.

Leave a Reply