In this article, I am going to show you how to install remix OS on VirtualBox on your PC. Remix is an android Operating system which is powered by Marshmallow. It is also known as universal Android due to Mobile and PC suit. Remix OS is an Android variant that brings a slick desktop-style interface to Android. Now, you can install it on a USB stick and try it out on your computer, also you can try on Virtual Machines, like VMware or VirtualBox. Remix OS is available for mobile and for PC also. Follow below step by step to install remix OS on VirtualBox.
Install Remix OS on VirtualBox
Step #1. Firstly you have to download the VirtualBox and Remix OS iso file. If you have VirtualBox already installed on your PC then that’s okay then just download Remix OS iso file.
Step #2. If you have installed VirtualBox already then just open it and if you don’t have then install and open it that you have nearly downloaded from the link above.
Create Remix OS Virtual Machine
Step #3. When the VirtualBox is opened on the home page click New to create a new virtual machine(VM).
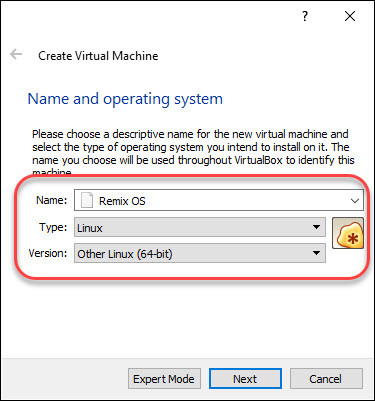
Step #4. On the “Name and operating system” windows, type any name that you would like to name your Remix OS VM then Choose Linux for type and for Version choose Other Linux (64-bit) then click Next.
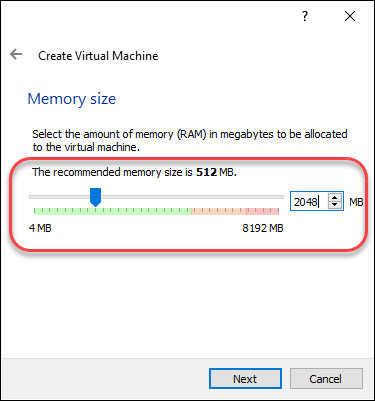
Step #5. Choose the Memory size to 2048 MB and click Next.
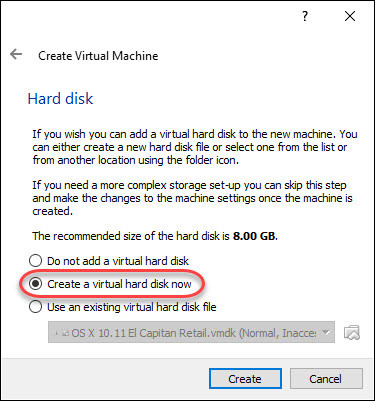
Step #6. After mentioning memory size, Select Create a virtual hard disk now on the Hard disk windows and click Create.
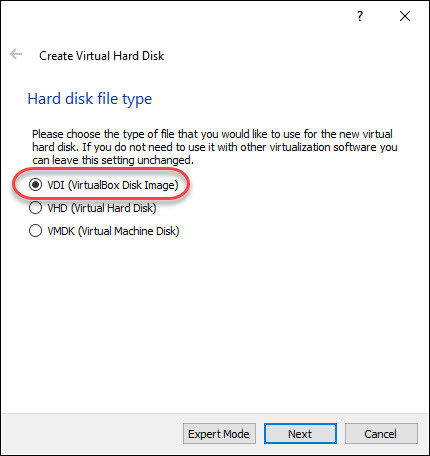
Step #7. For hard disk file type, select VDI(VirtualBox Disk Image) and click Next.
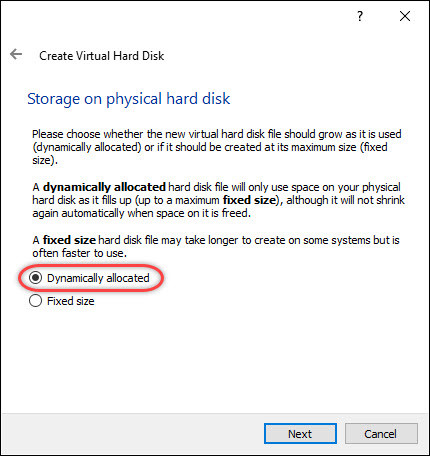
Step #8. Select Dynamically allocated on the Storage on physical hard disk window and click Next.
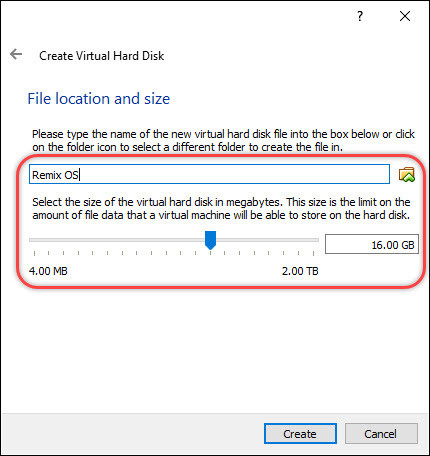
Step #9. Now Select the size of the virtual hard disk in 16000 megabytes (16 GB) . This size is the limit on the amount of file data that a virtual machine will be able to store on the hard disk. Then Name the new virtual hard disk and click on the folder icon to save where you want. But I suggest you to leave it by default and click Create.
Play Remix OS Virtual Machine
Step #10. So after all the settings that are mentioned above completed, then you’re done to go on and play the virtual machine, to install it on your VirtualBox. So now select the Remix OS virtual machine and click on the Start button to turn it on.
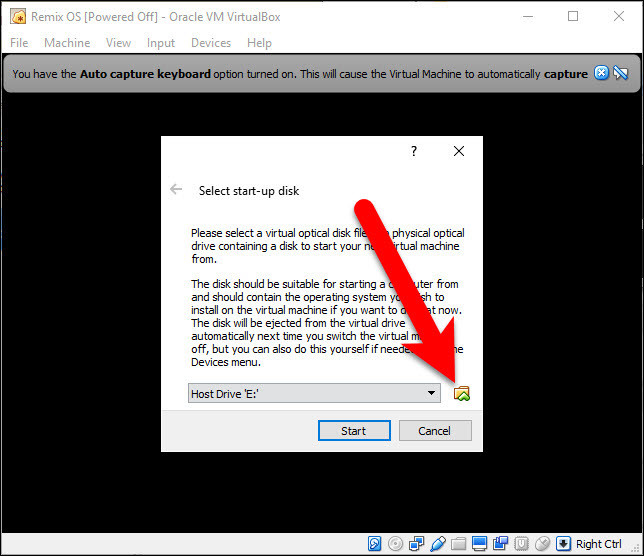
Step #11. When you start the machine, so it should ask for the Remix OS iso file or a startup disk. When it appears then click on the Folder icon to browse.
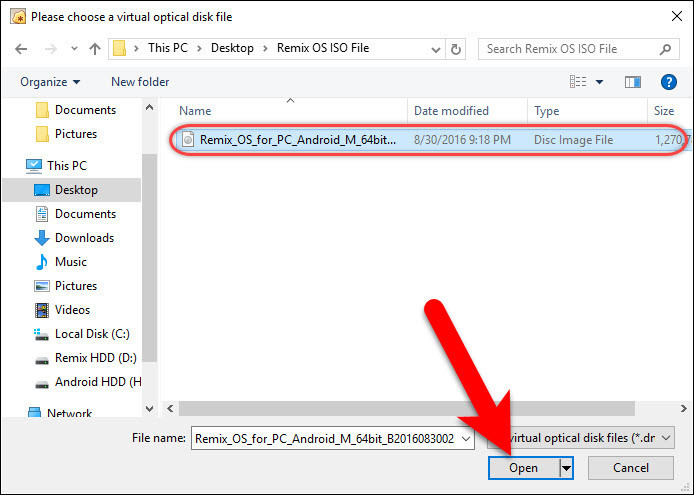
Step #12. Select the Remix OS iso file that you downloaded from the above and click Open.
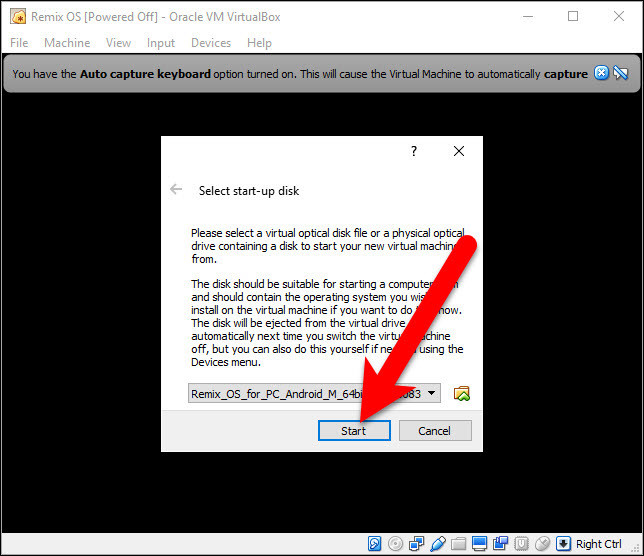
Step #13. When the Remix OS iso file is selected then click on Start button to go forward.
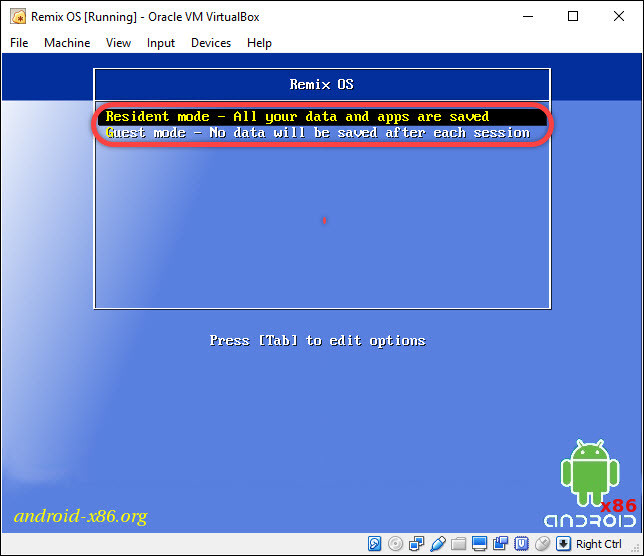
Step #14. When you click Start, VMware will automatically start. don’t do anything until this window appears. In this shot, you can see Remix gives you two mode.
- Resident Mode: The Resident mode will have all your Apps and data saved for the next time you run it.
- Guest Mode: The guest mode doesn’t save your data for the next time you restart the Virtual Machine.
So on this screen choose your preferred mode and don’t the installation of both them, they are the same.
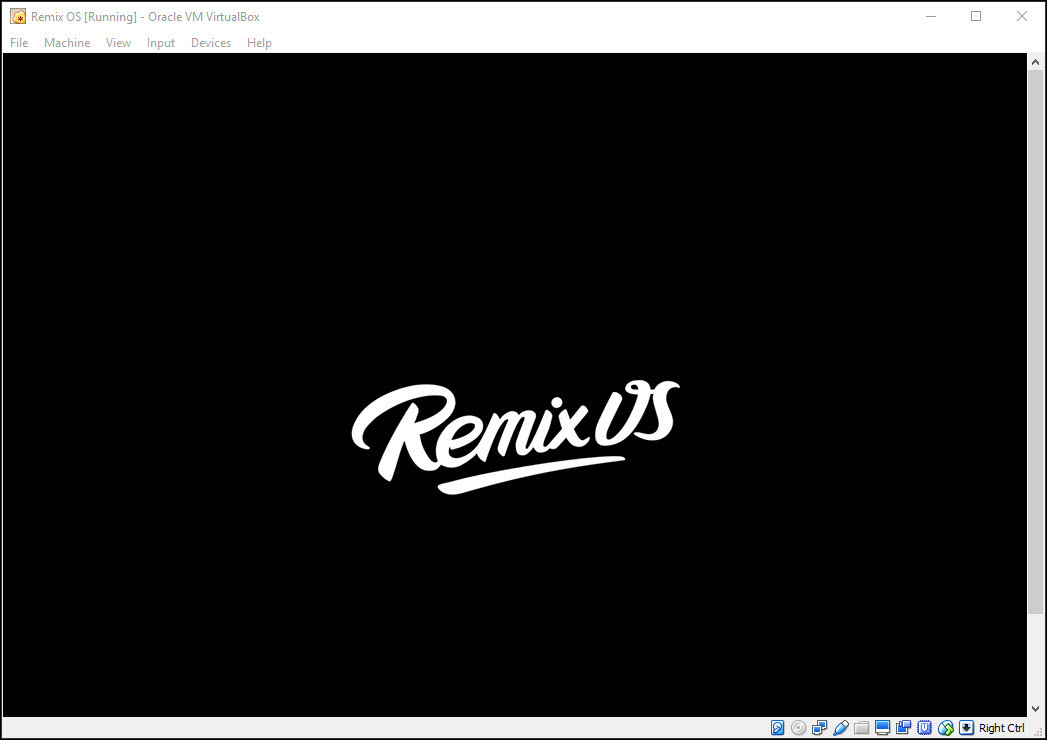
Step #15. After this Remix Logo will appear and it ‘ll take some time. Don’t do anything, just wait for the process to be completed.
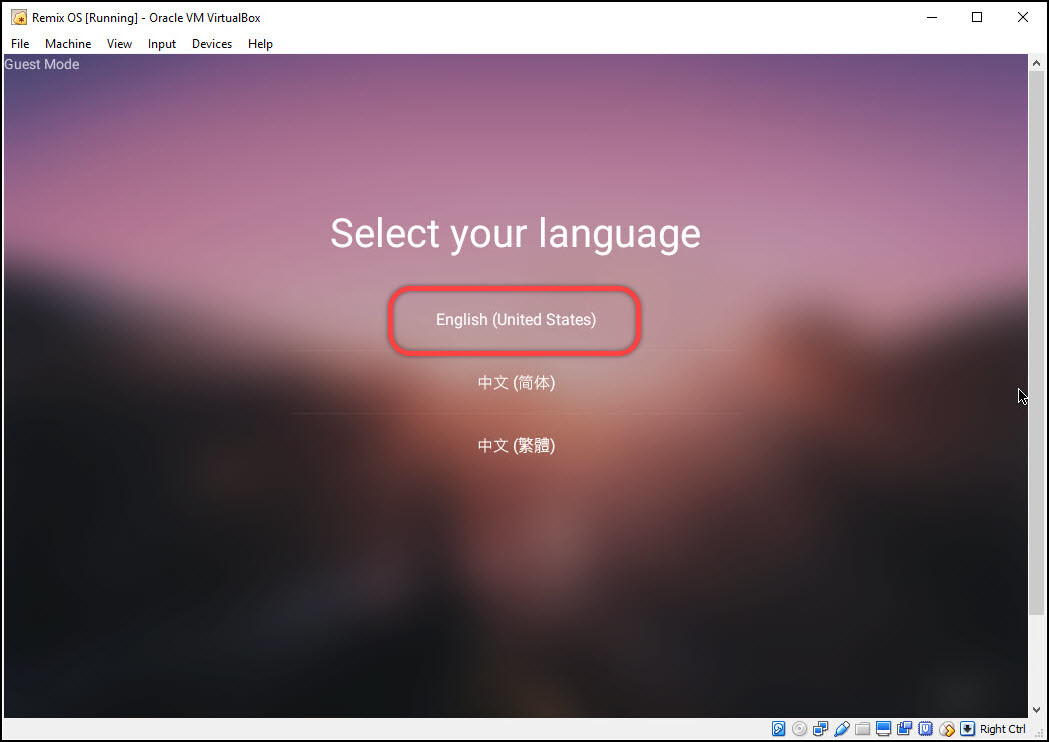
Step #16. So after that, select your language, to go forward to next step.
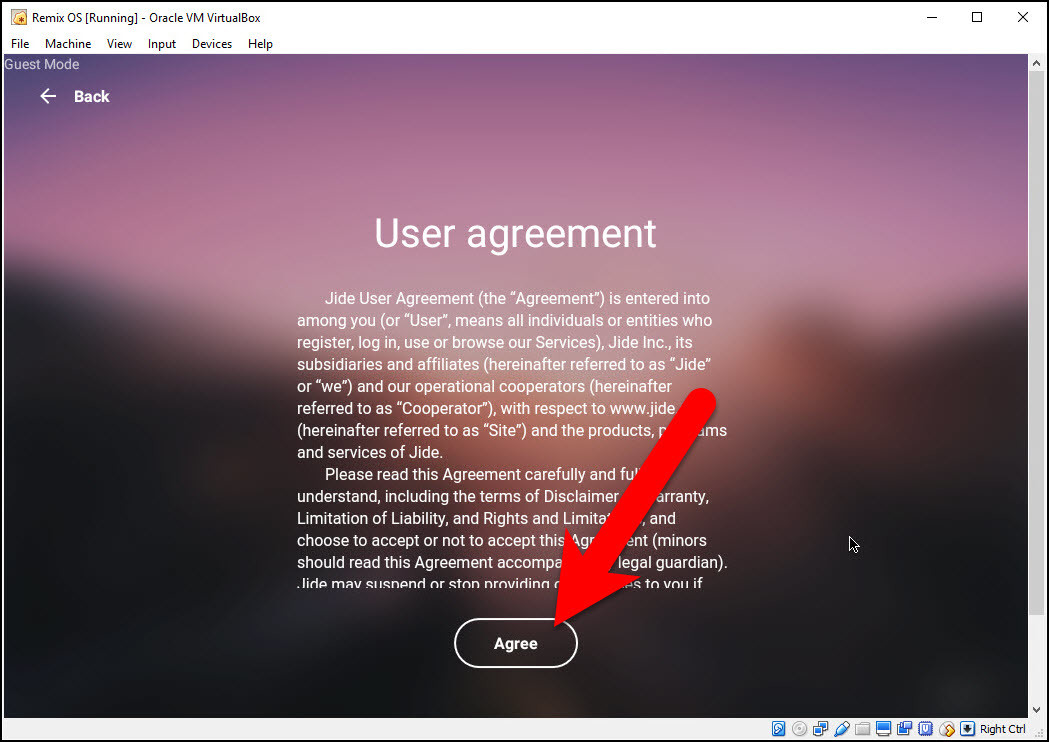
Step #17. Read the user agreements and click Agree.
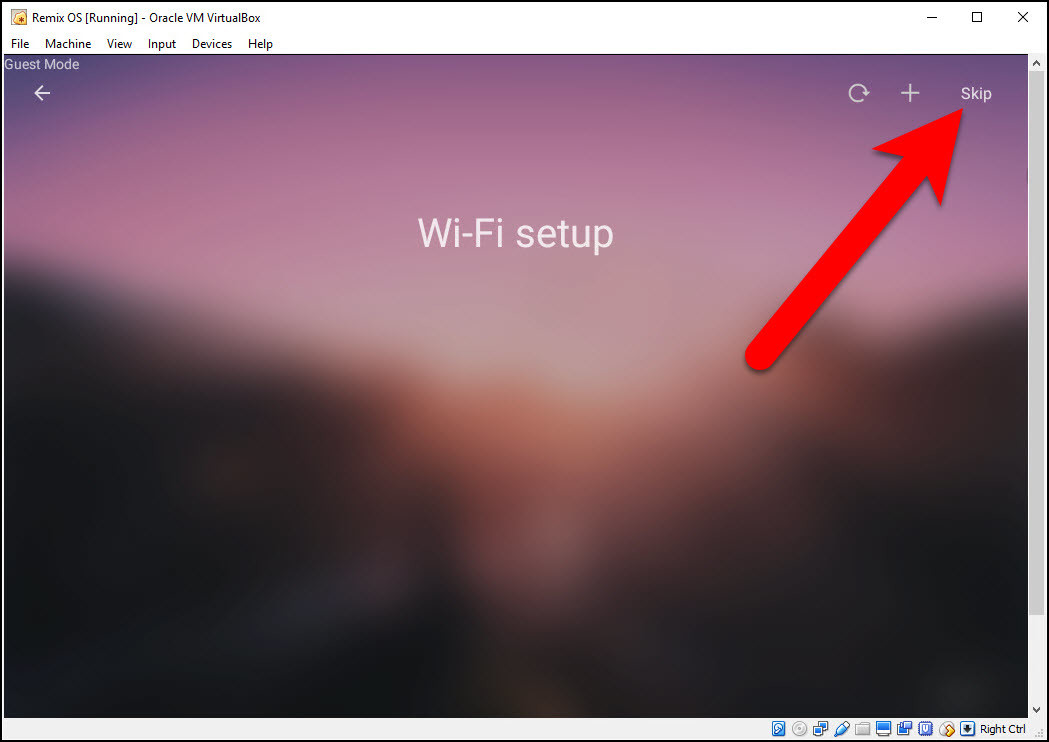
Step #18. Select a WiFi or click skip it.
Step #19. After this, you will be faced with the process of discovering apps. for the first pic click to continue.
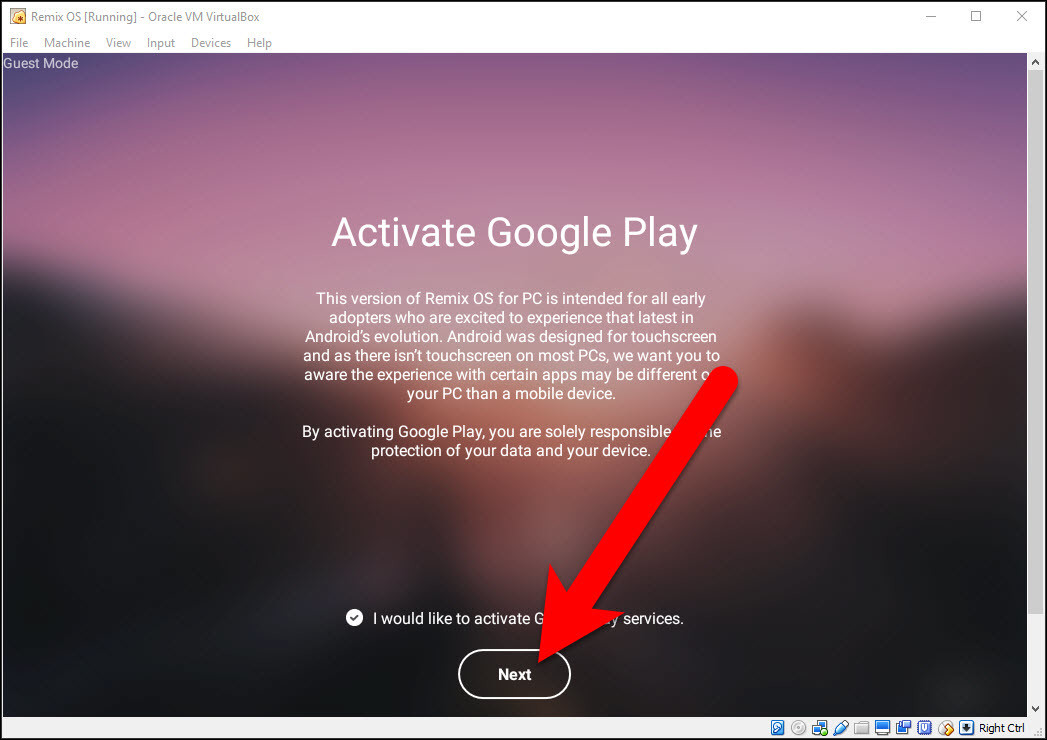
Step #20. Here you are at last step. If you want to use the google play services. Just check the checkbox and click next.
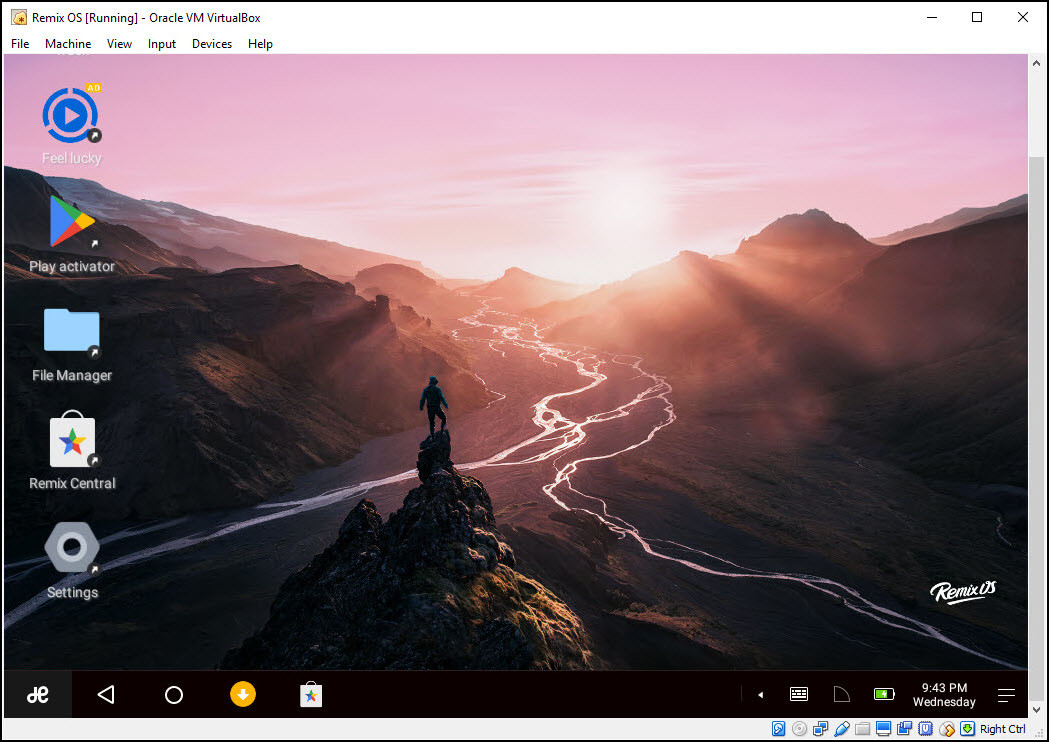
That’s it, congratulations you have successfully installed Remix OS on VirtualBox. Here it’s the preview.
Conclusion
It was all about, how to install Remix OS on VirtualBox. I hope you have learned this article, and I hope you will ask your questions, give us your suggestions, opinion about what articles we have to write. If you faced any problem tell us below by comment, Feel free to tell us. we’re waiting for your suggestion.


Hi, can you tell me how I can use shard folder with windows? The folders are set up as usual, but I can’t find them in Android…
Tanks you so much!
I don’t have a bright idea, but it seems that it will show in file manager app. You can also transfer into a USB drive partitioned Exfat or Fat32 from your windows then use it on the android via USB Drive.
This seems the better method: https://gist.github.com/cs8425/7315d86a273e57a988245345df68a4f9
Hi Guys, this is not a problem with space, it’s a fundamental problem with how Remix is installed. My guess is you chose resident mode for the install, but Resident mode simply runs directly from the ISO file which is effectively a virtual CD-ROM. Resident mode is a little bit useless unless running directly on native hardware (i.e. not in Virtualbox), because it tried to use the virtual CD-ROM drive to write the Remix settings etc. which you have asked it to do (store your settings, etc). This it cannot do because CD-ROMs are not writeable. You would haver to run Remix from a physical USB stick in virtualbox instead, rather than from the virtual CD-ROM file. This can be done but it’s not in the instructions.
As for guest mode, that would be where it will run correctly right off the ISO file, so this is the better way to do it.
However, it should be noted that these methods DO NOT utilise the hard disk you created in Virtualbox AT ALL. There is absolutely no point in this part of the instructions since nothing ever gets installed on that virtual 16GB hard disk you created. Ideally, you don’t want to run Remix off the USB stick OR the ISO file, you want to run it from your hard disk, or in this case the Virtualbox virtual hard disk. But Remix doesn’t include an installation option for doing that so unless you google around to find someone who’s done it, or build a completely new ISO file from scratch, you cannot run Remix in this way. It seems crazy to me that the Remix developers didn’t provide any hard disk installation options such as Ubuntu or standard Android-X86 both provide.
Thanks for sharing your feedback dear with us. Soon I will update the article again.
I’ve now set 3D Acceleration. Still same result.
Thanks for your reply. I did 16GB for storage, dynamically allocated as your article instructsw. How much is needed? Also, I don’t see where to enable 3D Acceleration in VirtualBox: in Settings Acceleration, there are only options for None, Default, Legacy, Minimal, Hyper-V, KVM.
Navigate to Settings>Display>Screen tab> Enable 3D Acceleration
I’m using Ubuntu 16.04 with VirtualBox 5.0.32 and kernel 4.4.0.59. I used Remix_OS_for_PC_Android_M_64bit_B2016101201.iso. After step 14, I get 2 strange messages: ‘intel_rapl: no valid rapl domains found in package.. cannot detect package: System may fail to bootup. To continue press Enter’ and ‘Not enough space to create data partition. Unable to use persistent mode. To continue press enter.’. I pressed Enter in reply to both messages. RemixOS was then displayed on screen as per step 15: however, no further displays even when left overnight. Any ideas?
Seems that you don’t have enough space for the VM to be created and you have missed any step. Try again step by step carefully, also enable 3D acceleration.