In this article, I’m going to show you that how to install macOS Sierra on VMware Fusion on MacBook. As Apple released its new desktop operating system macOS Sierra 10.12 some days ago. It’s the new version of Mac OS X El Capitan. In our previous articles, we have covered the following topics.
- How to install macOS Sierra 10.12 on VMware PC?
- How to install macOS Sierra 10.12 on VirtualBox PC?
- How to install Mac OS X El Capitan on VirtualBox PC?
- How to install Mac OS X El Capitan on Windows PC?
- How to install Mac OS X El Capitan on PC Using UniBeast?
- How to Dual Boot Mac OS X El Capitan with Windows 10?
We have lots of articles regarding installing Mac OS X El Capitan installation on different devices, but we don’t have many articles on how to install macOS Sierra on VMware Fusion on Mac computers. Because this operating system was released some days ago by Apple Inc. So it’s the first time that we create this topic. This article is a spacial gift for our MacBook users. I hope you enjoy this article.
Install macOS Sierra on VMware Fusion
Update: The Steps below works on macOS Sierra 10.12 Final Version released by apple. (20 September)
Now there are several materials that you have to download from the links below. Only the file that you have to download from Apple App store is the “The Unarchiver“.
- Download macOS Sierra Final (1 Part)
- Download mac OS Sierra Final (7 Parts)
- Download VMware Fusion
Step #1. Download the Unarchiver App
#1. First, what you are going to do is open Apple App Store. Search in the search bar “The Unarchiver” then hit enter.
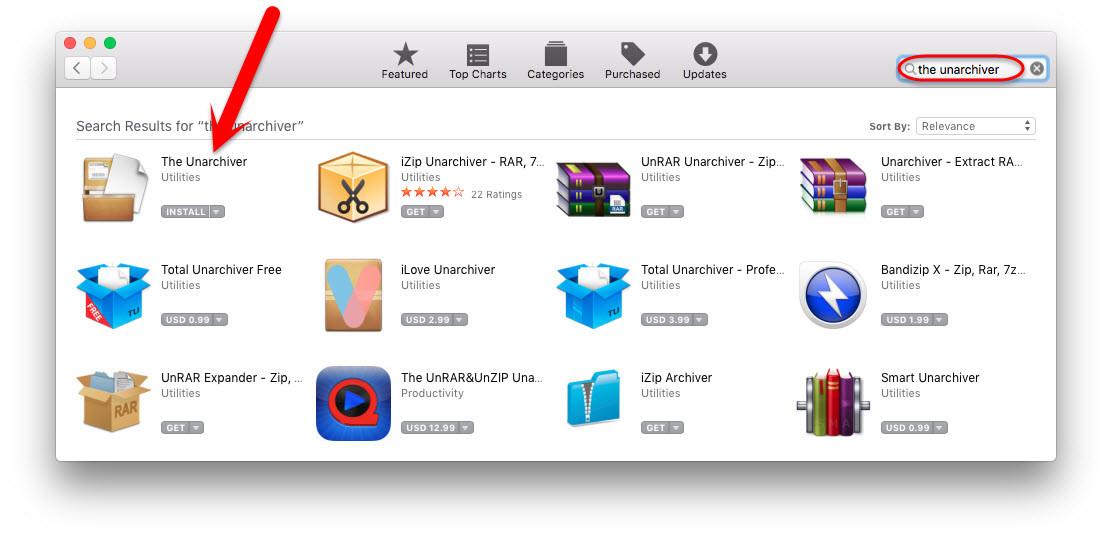
Search The Unarchiver
#2. Click on the app then tap on “Get“. You’ll be prompted to enter your Apple ID with a password. Sign in with your Apple ID and Password then download the app.

Download The Unarchiver
Step #2. Extract macOS Sierra 10.12 Zip File
Navigate to the macOS Sierra zipped file then double click on the file. It’ll automatically open the file with unarchiver extractor. Choose the file and hit “Extract” button.
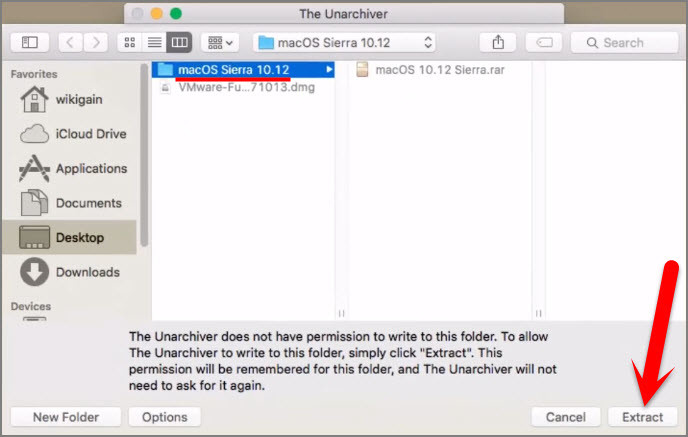
Extract the macOS Sierra Zip File
Step #3. Install VMware Fusion on MacBook
Get the VMware Fusion from the link above. Once you have downloaded the VMware, then Install it on your Mac. To install VMware, only double click on the VMware dmg file then double click on the VMware icon. Enter your “Username” and “Password“. Finally, click “Done”. If you have installed already, then that’s OK. For more information watch the video below this post.

Install VMware Fusion
Click “Agree” then choose “I want to try the VMware Fusion 8 30 days,” click “Continue.” Type your Email address and then hit the “Continue” button. Enter your username and password. Finally, click “Done“.
Installing VMware Fusion
Step #4. Create a New Virtual Machine
#1. When you installed the VMware Fusion, at the end a window will pop up that you can create new virtual machine. Click on the last option “Create a Custom Virtual Machine“.
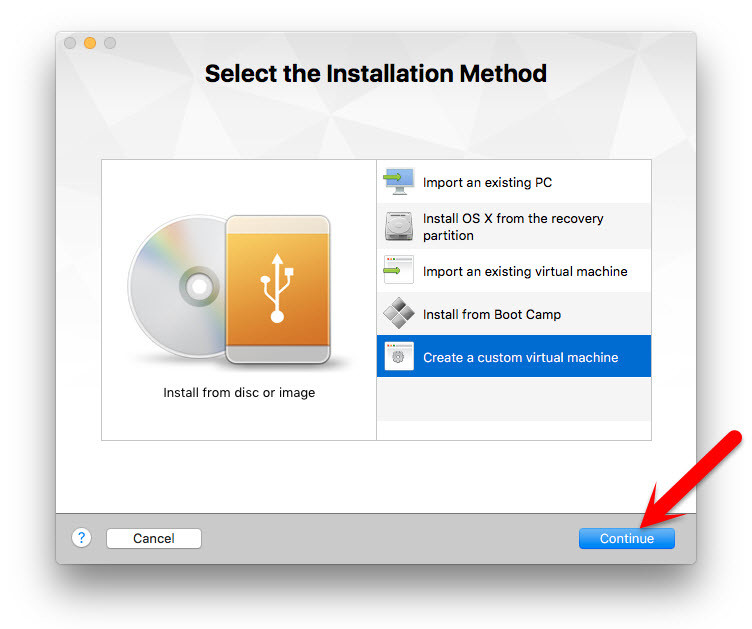
Select Installation Method
#2. On the “Choose operating system” window, select “Apple OS X” and choose “OS X 10.11“. Click the “Continue” button.
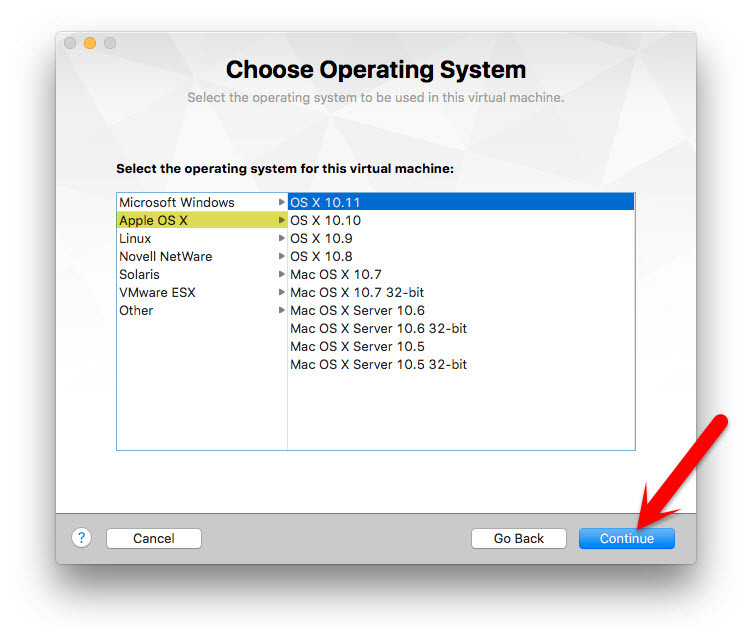
Choose Operating System
#3. On the “Choose a virtual hard disk”, select the second option “Use an existing virtual disk” and then tap on “Choose virtual disk“.
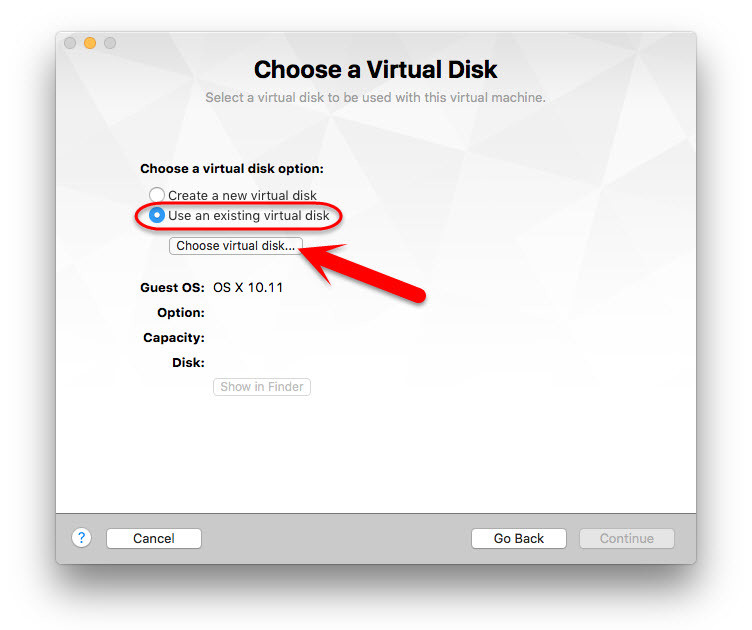
Choose a Virtual Disk
#4. When you click “Choose virtual disk”, a new window will pop up. Select the VMDK file of macOS Sierra then click “Choose“.
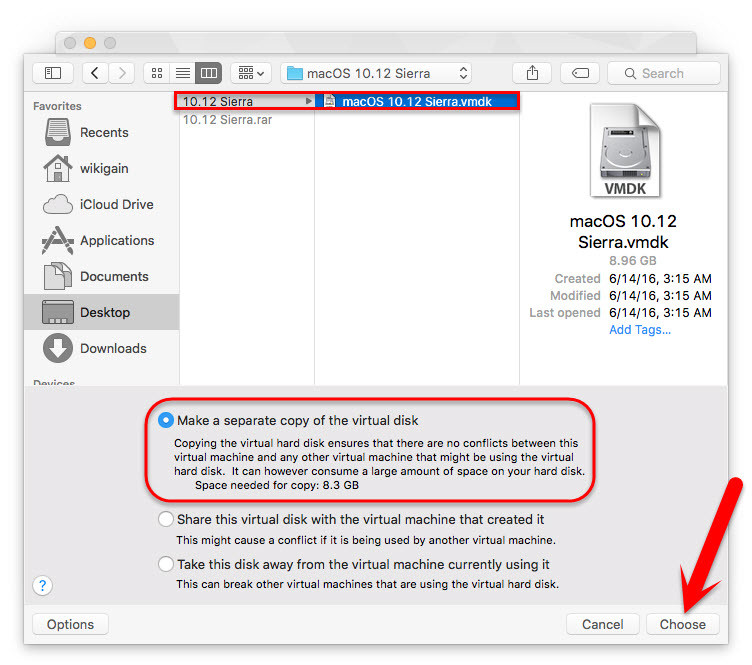
Choose macOS Sierra 10.12 VMDK file
#5. Now, don’t click “Finish”. Click “Customize Settings“.
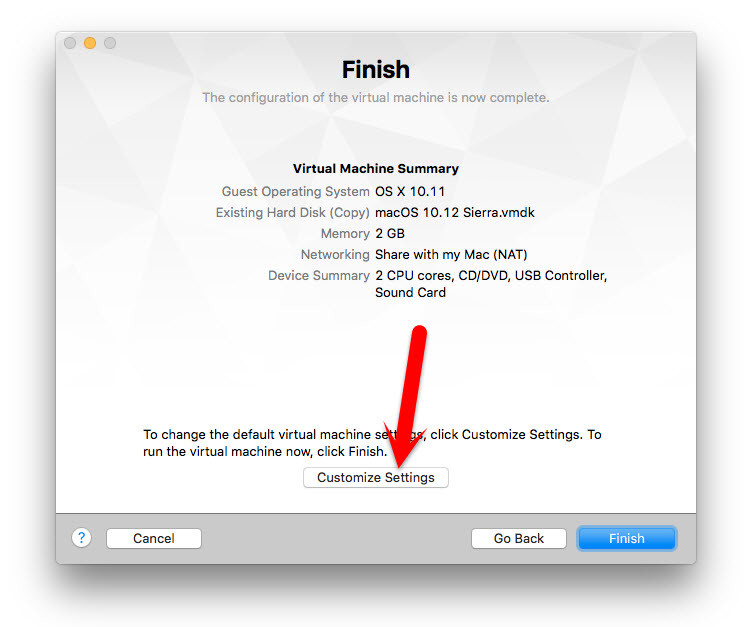
Customize Settings
#6. Name the Virtual Machine “macOS Sierra” then choose the new path if you want. Otherwise, put it in default. Finally, click “Save“. When you click save button, you’ll be prompted to step 5.
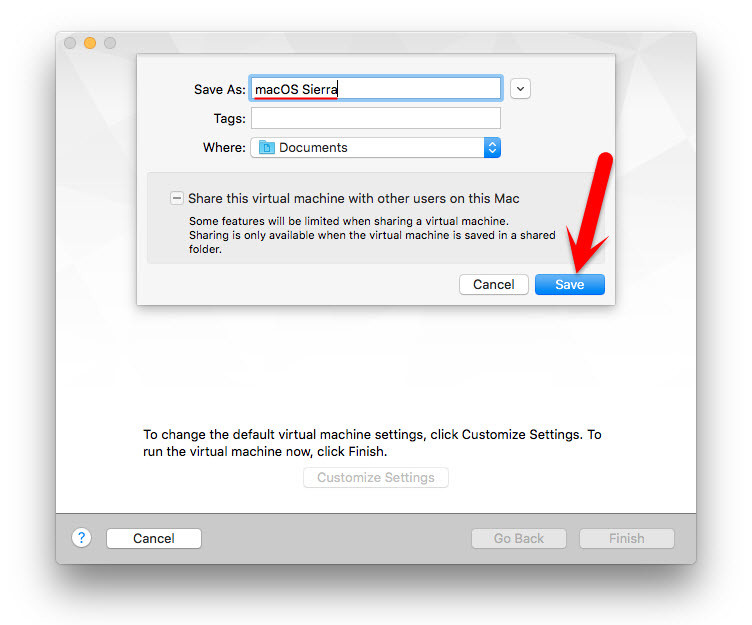
Name macOS Sierra & Choose Location
Step #5. Edit the Virtual Machine
#1. After clicking on the save button, the setting window will automatically pop up. Click “Processors & Memory“. By default everything is correct. If it wasn’t correct, select “2 Processors” and at least “2 GB Memory“.
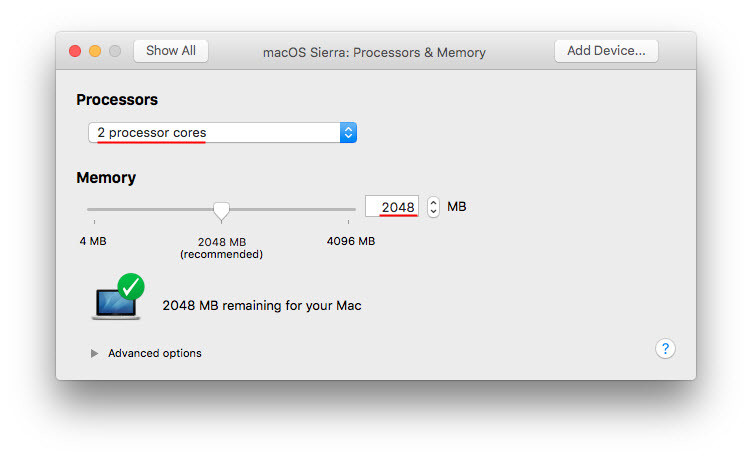
Recommended Processor & Memory
#2. Click on “Display” option then enable “Accelerate 3D Graphics“.
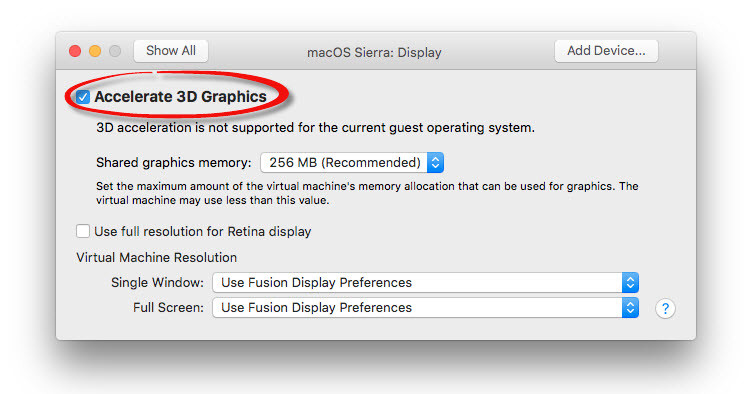
Enable Accelerate 3D Graphics
#3. Click “Hard disk” and put the bus type to “SATA“.
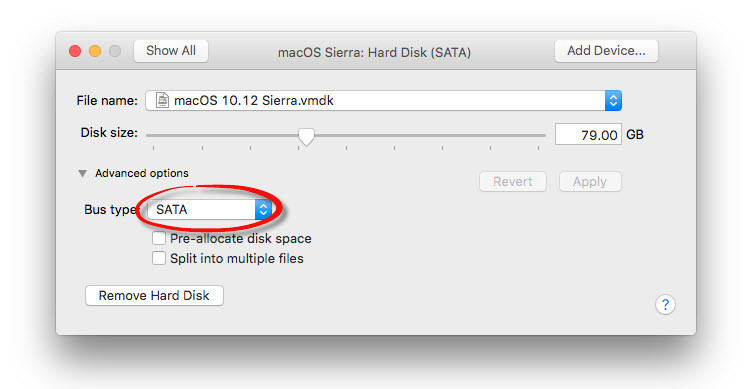
Bus Type to SATA
Step #6. Start the Virtual Machine
Open the macOS Sierra VM window then click “Start virtual machine”. When you started the VM, then it should take you to the next step. Setting up macOS Sierra in VMware.
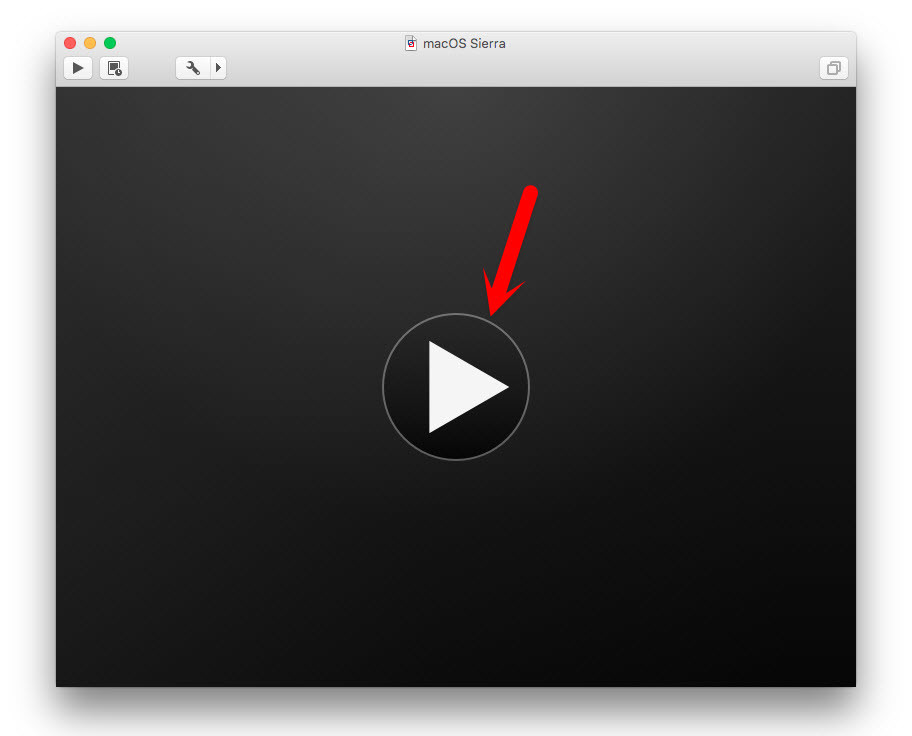
Start the Virtual Machine
Step #7. Perform a Clean Installation of macOS Sierra
Now while installing macOS Sierra or El Capitan on VMware or VirtualBox then we don’t need to install that on separate disk because while editing the VM we choose the virtual disk type SATA, and this is the one and only way for now to install macOS Sierra or El Capitan on VMware or VirtualBox. So that’s why now in the very next step we have to perform a clean installation and to set up macOS Sierra.
#1. Choose your Country and click on Continue.
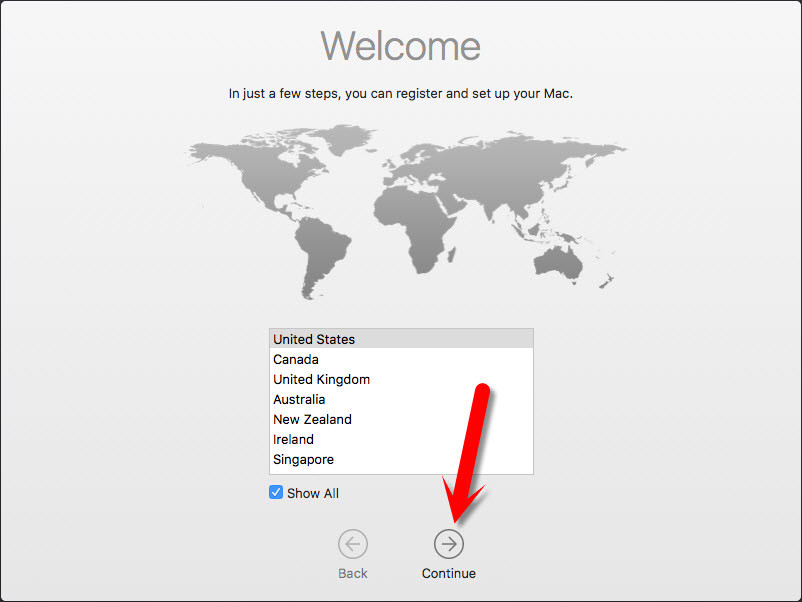
Choose Language
#2. Pick a keyboard Layout and click on Continue.

Choose Keyboard Layout
#3. Now select your method to “Transfer information” to this Mac and click on “Continue”.
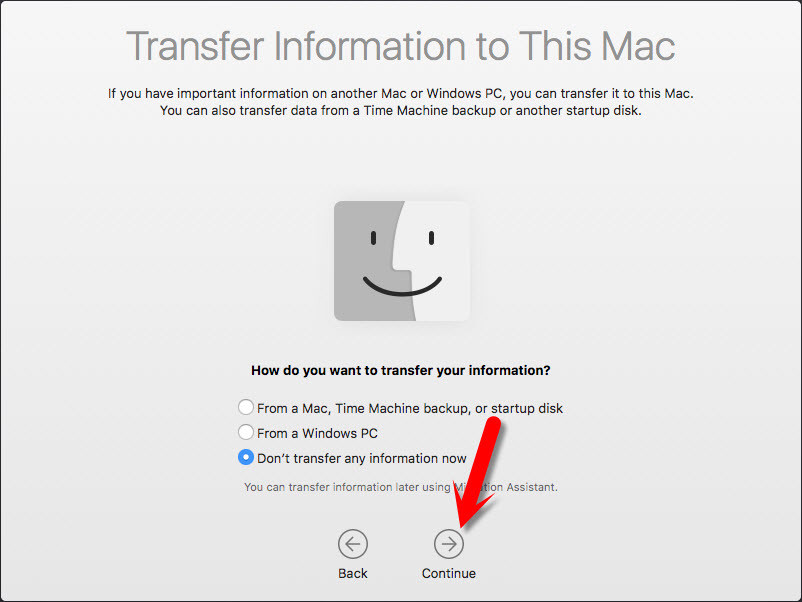
Transfer Information to this Mac
#4. Enable location services and click on Continue.
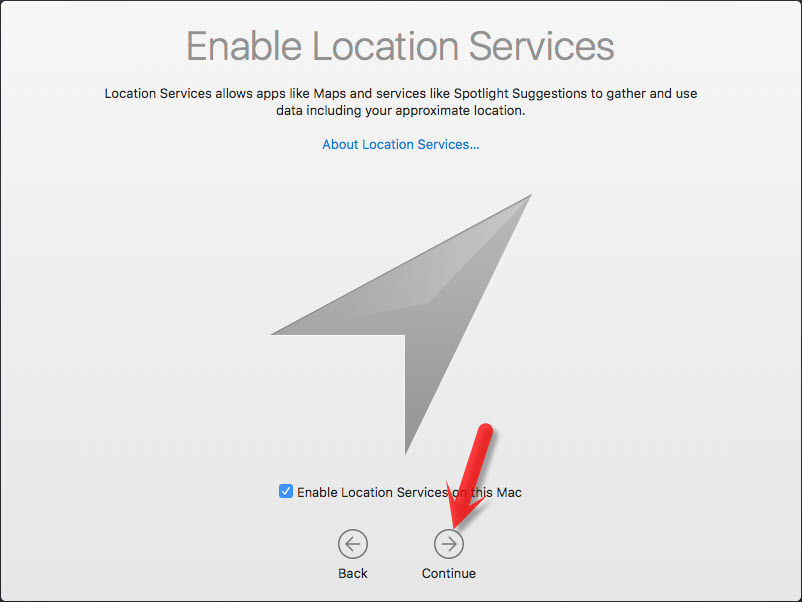
Enable Location Services
#5. In this step, you have to Sign in with your Apple ID. If you have one, then create a free Apple ID on, how to create an Apple ID on iPhone, iPad or iPod Touch. If you don’t want to sign in with Apple ID or don’t want to create Apple ID, then Choose Don’t Sign in and Click on Continue.
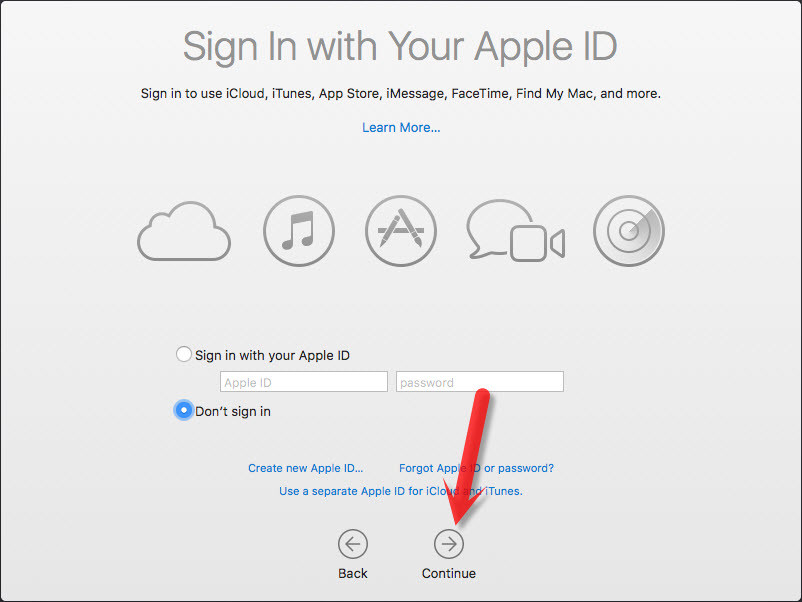
Sign in with your Apple ID
#6. Agree to the Terms and Conditions.
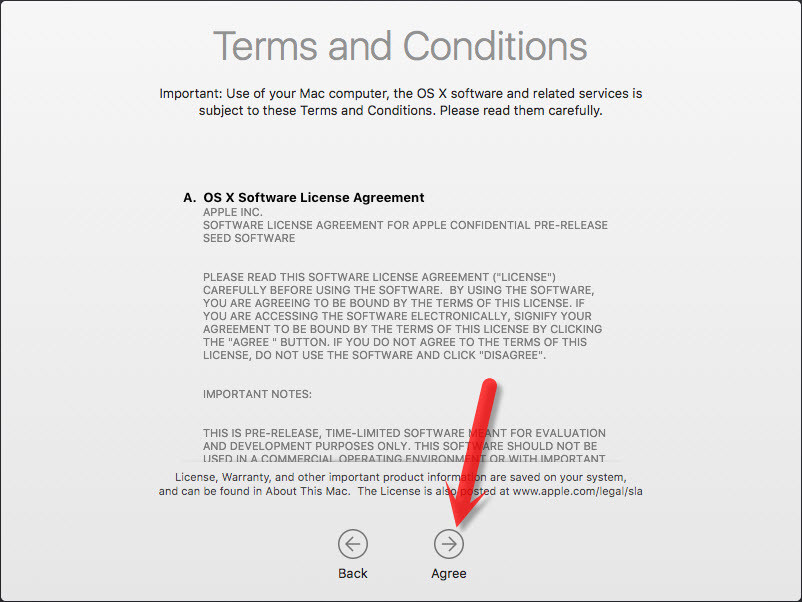
Terms and Conditions
#7. Fill out the Full name, Account name, Password, Hint and check the box of Set time zone based on Current location. Then finally click on Continue to create your user account for macOS Sierra, which will be installed.

Create a Computer Account
#8. Select the options for Diagnostics & Usage and click on Continue.
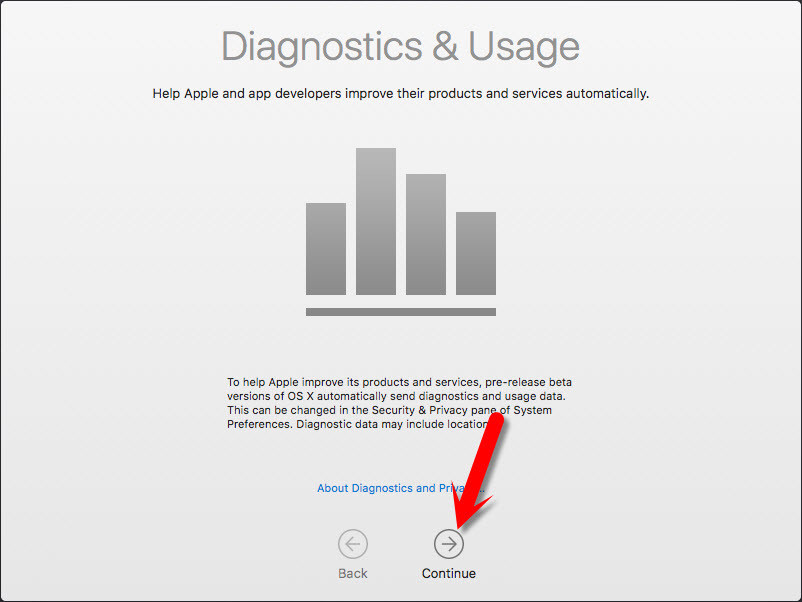
Diagnostics and Usage
#9. Wait a little while to Setting Up Your Mac. Then it will run on the desktop of macOS Sierra.
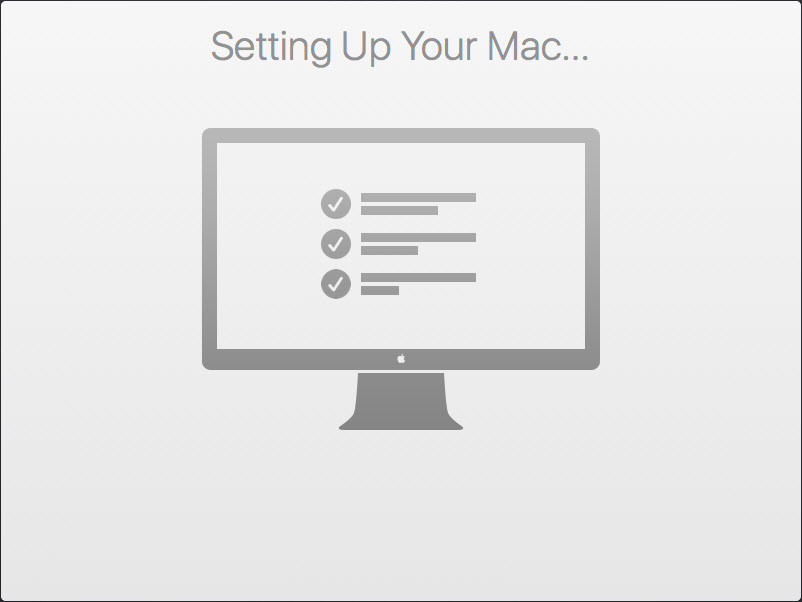
Setting up macOS Sierra
Step #8. Install VMware Tools on MacBook
The installation of macOS Sierra on macOS Sierra is done, and everything looks pretty awesome but one thing is remaining, and that’s VMware tools. As you have observed that you can get it into full-screen mode. It’s so small. Now, I would like to show you that how to install VMware Tools on macOS Sierra.
#1. To install VMware tools on macOS Sierra, just navigate to the top menu of apple. Click on “Virtual Machine” then tap on “Install VMware Tools“.
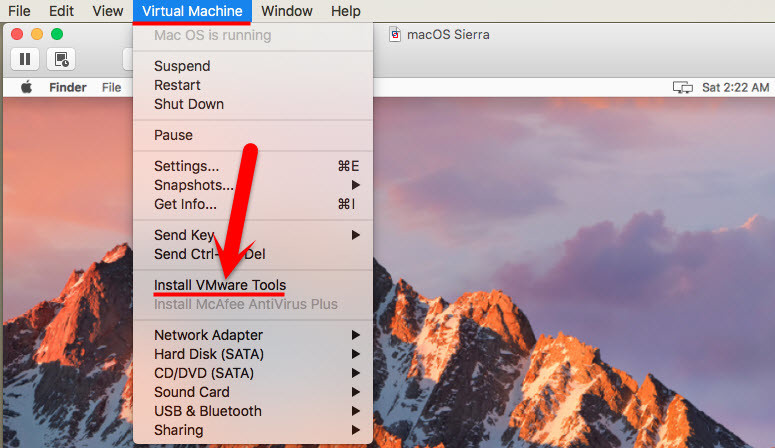
Install VMware Tools on macOS Sierra
#2. Click “Install“.
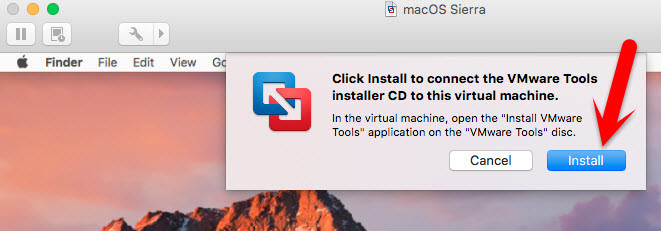
Install VMware Tools on VMware Fusion
#3. Double click on “VMware Tools” setup. Click “Continue” until it finishes.
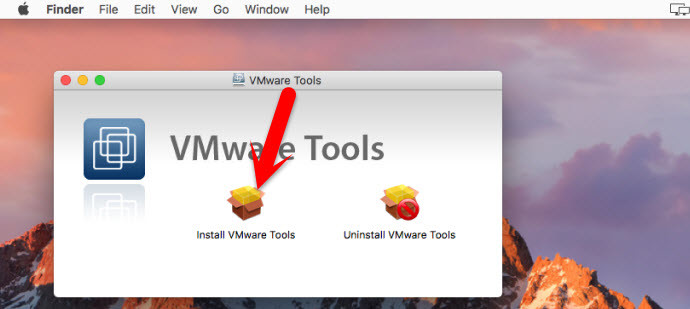
Install VMware Tools
#4. Finally, click “Restart“. Your VM will reboot and wait for a moment. After restarting, you will use macOS Sierra in full-screen mode.
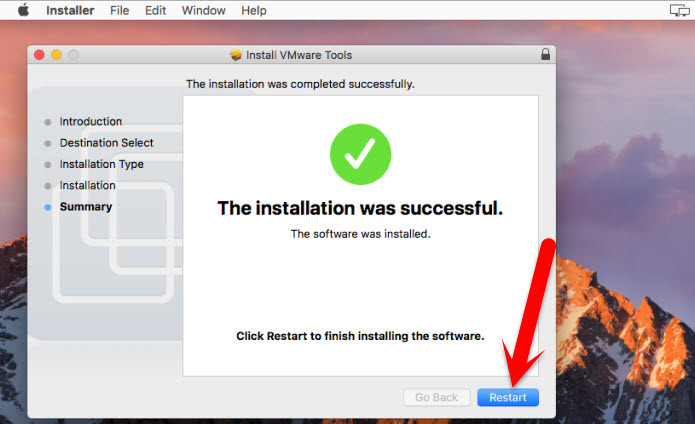
VMware Tools is Successfully installed
Conclusion
After performing a clean installation and installing VMware tools on macOS Sierra then you should see your final result that, macOS Sierra has successfully installed on VMware fusion. In this post, That was all about, how to install macOS Sierra 10.12 on VMware Fusion and I have covered;
- Download the Unarchiver App
- Extract macOS Sierra 10.12 Zip File
- Install VMware Fusion on MacBook
- Create a New Virtual Machine
- Edit the Virtual Machine
- Start the Virtual Machine
- Perform a Clean Installation of macOS Sierra
- Install VMware Tools on MacBook
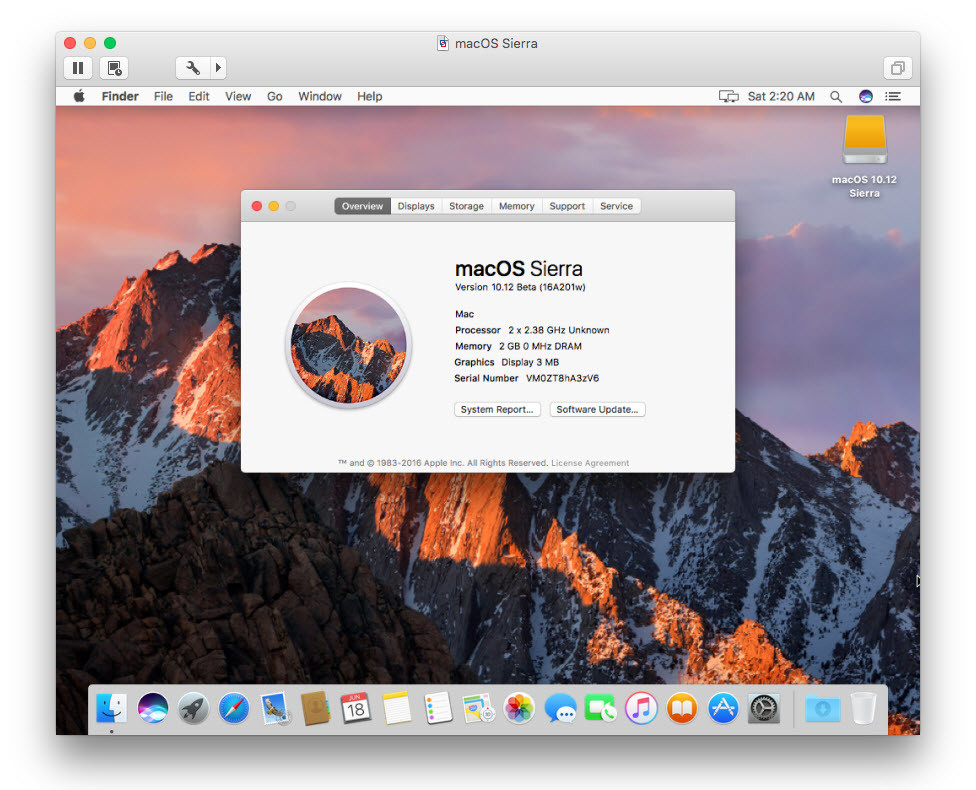
Final result macOS Sierra Installation on MacBook
Thanks for being with us.
Searches related to install macos sierra on vmware fusion on Mac
Install macos sierra on vmware fusion
mac os sierra vmware fusion
mac os sierra vmware image
install macos sierra vmware fusion
mac os sierra vmware image download
install mac os sierra on virtualbox
macos sierra vmware fusion 7
install mac os sierra on vmware
vmware fusion 7 sierra
where can I download the whole macOS Sierra 10.12 rar for installation to macbook?
Dear Victor,
In article, we have mentioned the link to download macOS Sierra 10.12