In this article, I am going to show you how to install Android KitKat 4.4 in VMware. Android KitKat, which is a Mobile Operating system, was published by Google in 2013. A good thing about KitKat is that it can install in PC too. You can use almost every feature of KitKat 4.4 in VMware, but mostly you can play your games more comfortable in a relaxing place with KitKat on your PC. That’s why today I have brought for you how to install Android KitKat in VMware? So let’s get started.
Also if you want to install android marshmallow on VMware then follow the link below.
Install Android KitKat 4.4 in VMware
Firstly, you need to download source files from the links below.
Create Virtual Machine for KitKat
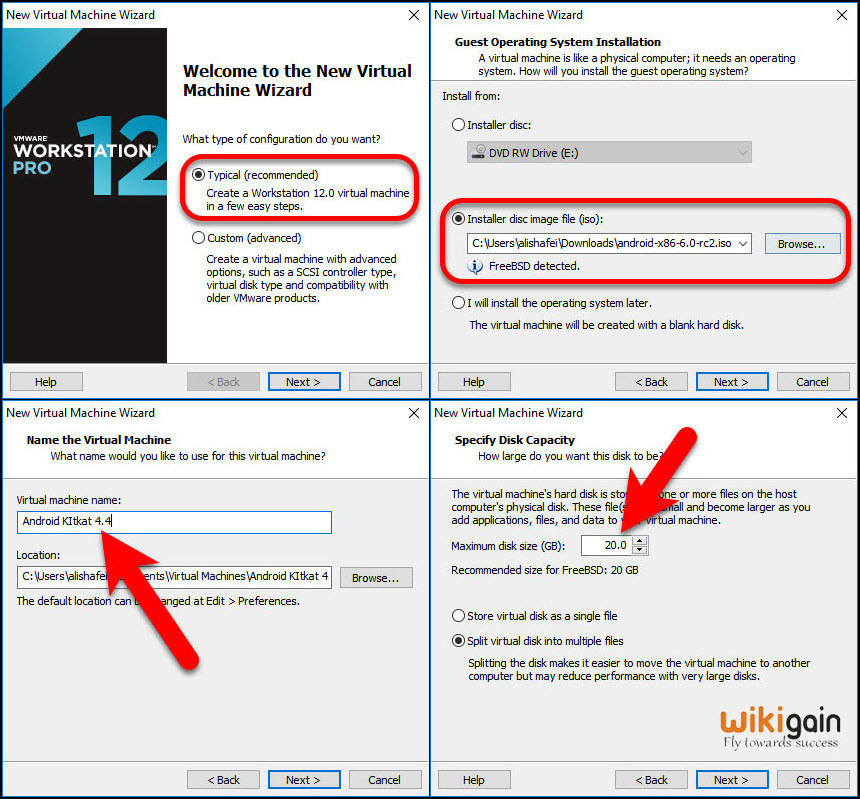
#1. Install VMware and launch it. Navigate to file menu- select New Virtual Machine- select Typical, click next.
#2. Select Installer disk image file, click browse and select the ISO.
#3.Give a name for virtual Machine.
#4. Specify disk size.
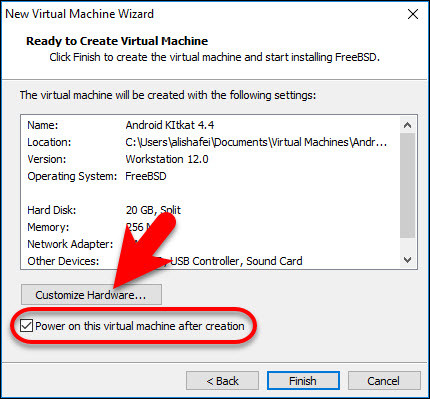
#5. Customize the virtual Machine settings. I’m increasing the memory size to 2 GB to work quickly.
Note: If you check the power on button, after clicking finish Automatically virtual starts if you uncheck it won’t start.
Play KitKat Virtual Machine
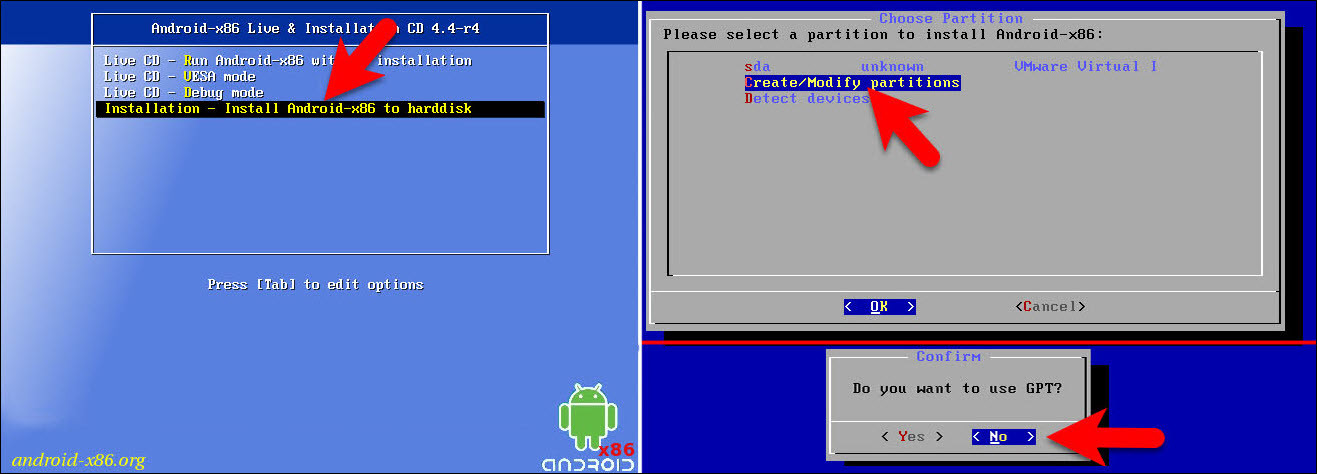
#6. When you power on the virtual machine you will be direct to the installer page. Here chose the 4th.
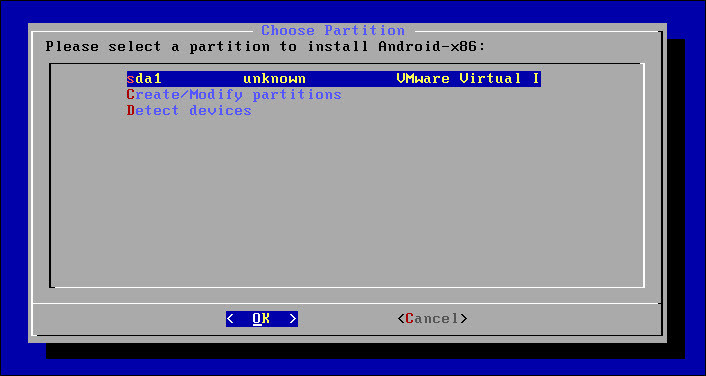
#7. After that, you need to select a partition. Select Create/ Modify Partitions.
#8. For GPT (Graphic Partition) select No and Press Enter.
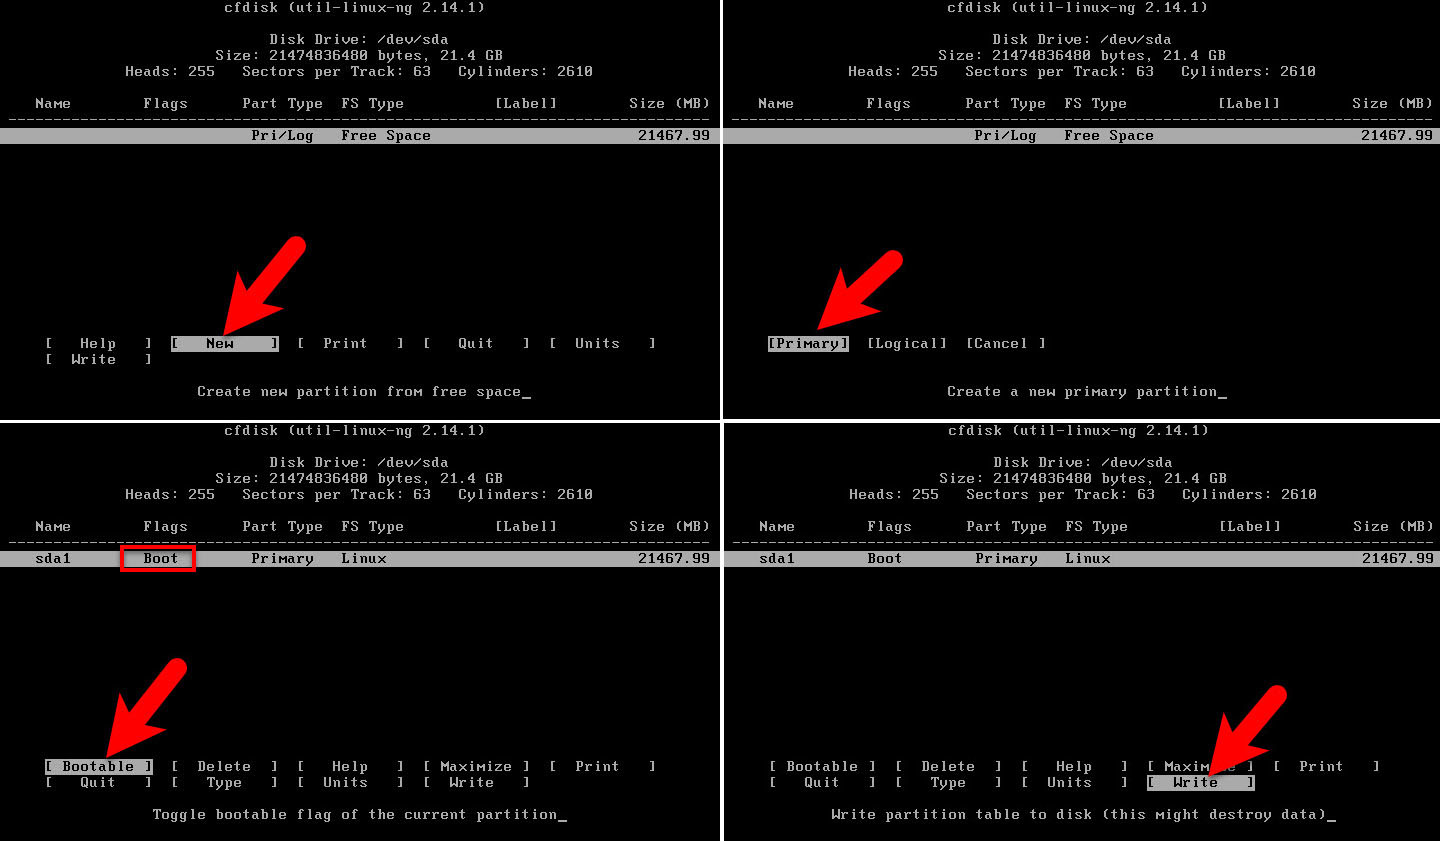
#9. From this step, you are going to modify your partition. The first one is to create a new partition. Select New and press Enter on the keyboard.
#10. Select Partition type “Primary”
#11. Select Bootable and press Enter.
Note: When enter button pressed on bootable, there will be written bootable.
#12. Select “Write” and press enter.
#13. After selecting write in step 12, you need to confirm it. In order to confirm it type “Yes” and press enter.
#14. After selecting Quit It will ask you again to verify the partition to install Android 86, what you need is to select the first one which is sda1 which you we created.
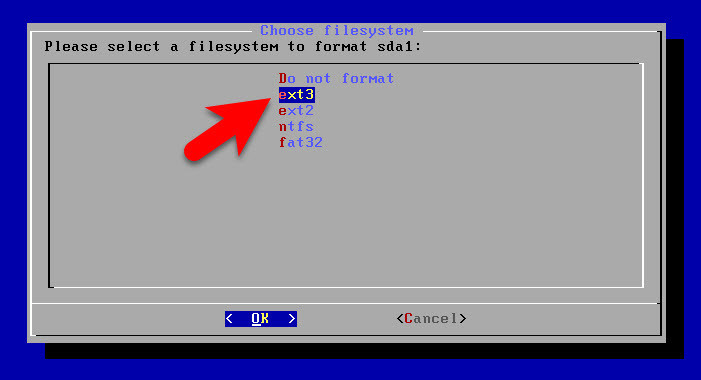
#15. For file system to format the drive select ext3 and press Enter.
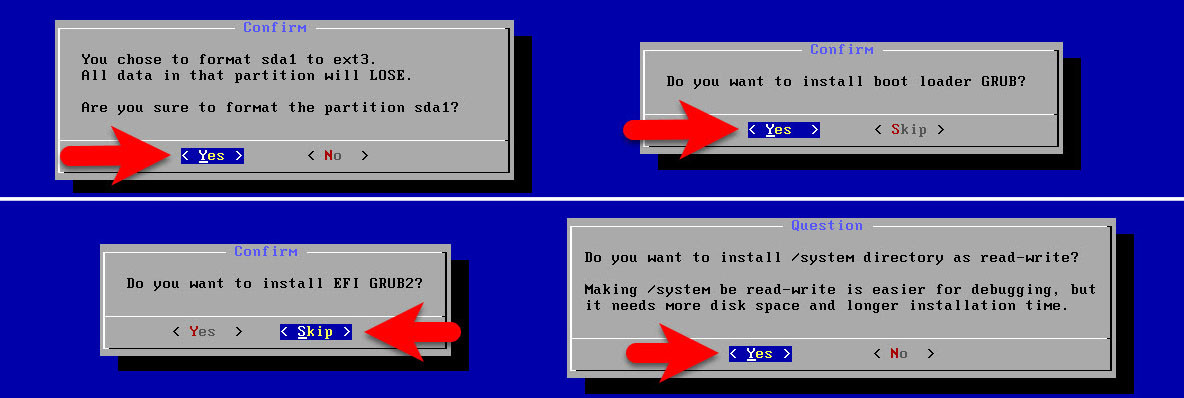
#15. In order to confirm the ext3 format select Yes.
#16. Select Yes for GRUB and press Enter.
#17. Skip GRUB2 and press Enter.
#18. For system directory as read-write select yes and press enter.
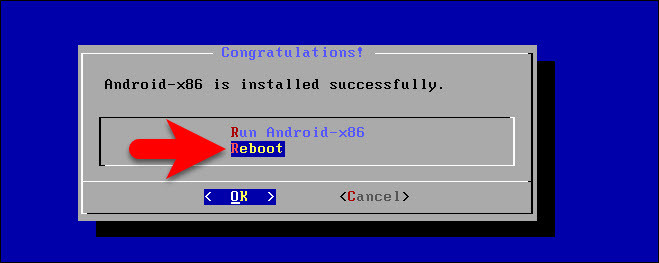
#19. Congratulations, you have installed Android KitKat 4.4 in VMware on your PC . Now you need to reboot the virtual Machine.
Setup Android KitKat Installed in VMware
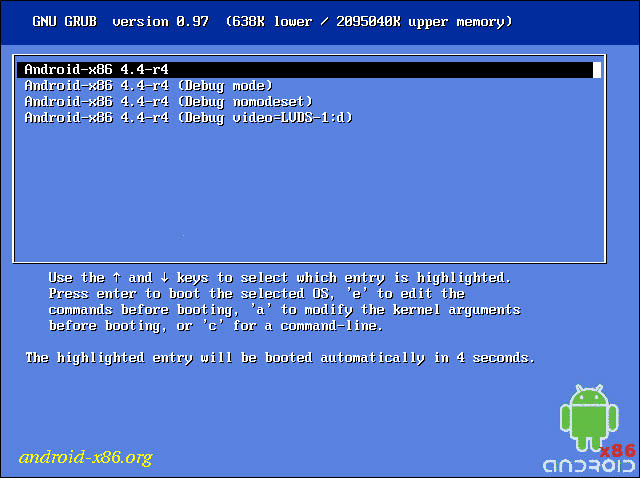
#20. When it come up you will be faced with this GRUB window, don’t do anything, just leave it on its own.
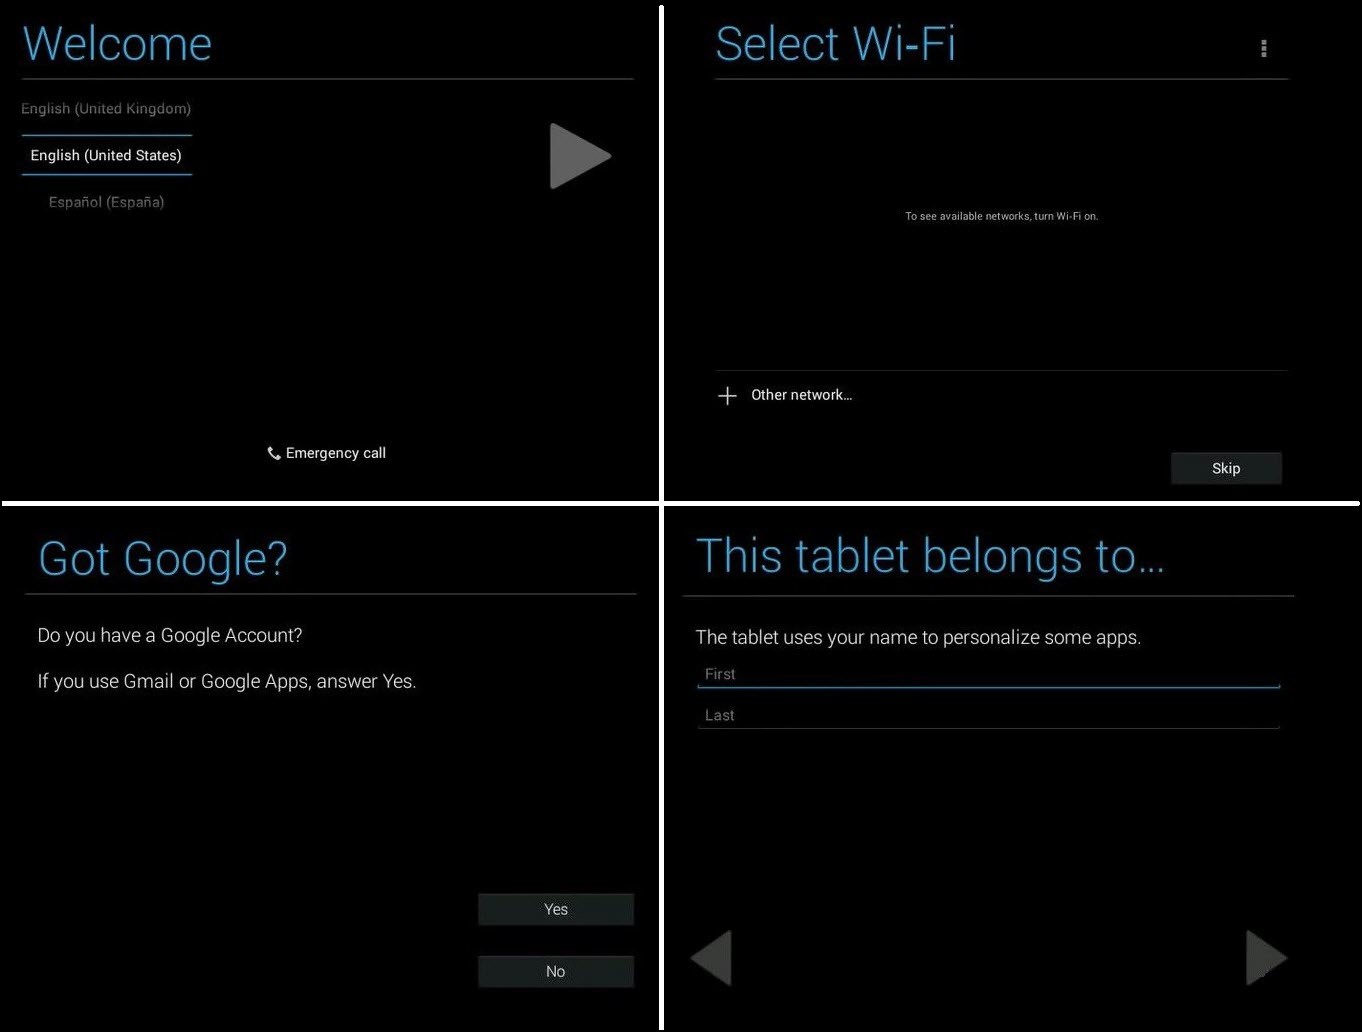
#21. After these you can setup other steps by your own, you will face different screens like Welcome screen, Setup your Gmail account for play store, location and some more. Here are some them in a screenshot.
#22. And finally after setting them up you will see the nice, beautiful window of Android KitKat 4.4. Now do whatever you want to do with it.
Conclusion
This was all about, how to install android KitKat 4.4 in VMware workstation. I hope you have learned this article, and I hope you will ask your questions, give us your suggestions, opinion about what articles we have to write. If you faced any problem tell us below by comment, Feel free to tell us. we’re waiting for your suggestion.




how to share files from host to android virtural machine
Is there anyway to fake the wifi connectivity? Without wifi the OS thinks theres no connectivity.
I’m not sure about it.