In this article, I will show you how to install VMware Tools on macOS Monterey. If you want to make macOS Monterey responsive, work fast and enable the drag and drop feature. You need to install VMware tools. It’s the tool created by VMware to make Virtual Machines work smoothly and have all the benefits of macOS as a VM. Sometimes the VMware tools don’t work when you install, so If the VMware tool didn’t work, you need to reinstall it, to make it work. Follow the steps below.
You should have macOS Monterey installed on VMware if not then follow this guide to install macOS Monterey on VMware on Windows.
Steps to Install VMware Tools on macOS Monterey
- Attach VMware Tools ISO to macOS Monterey
- Install the VMware tools
- Allow VMware tools from macOS Security Settings
- Reinstall the VMware tools if required
Step 1: Attach VMware Tools ISO to macOS Monterey
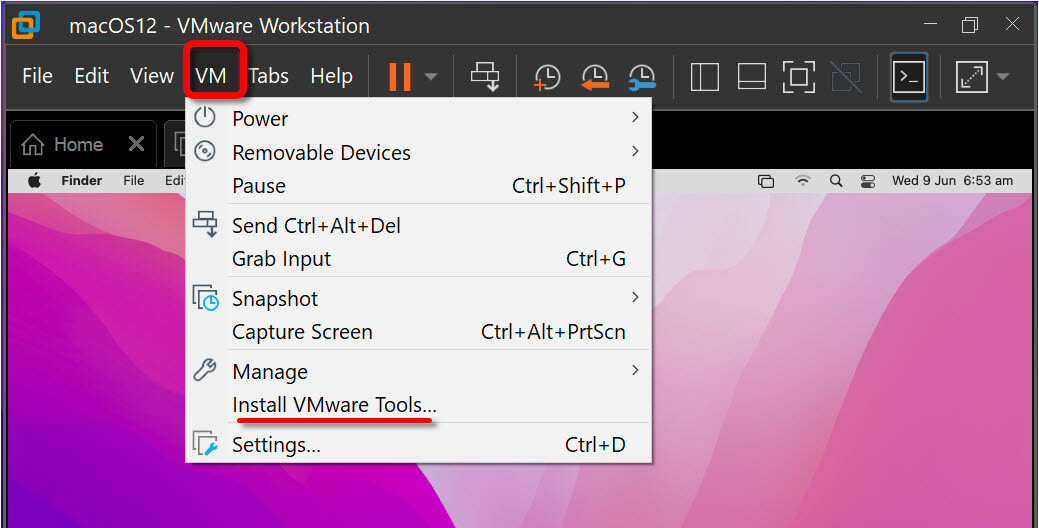
In this guide, I will use the default VMware tools provided by VMware. Right-click on macOS Monterey Tab/Window then click Install VMware Tools.
Step 2: Install the VMware tools
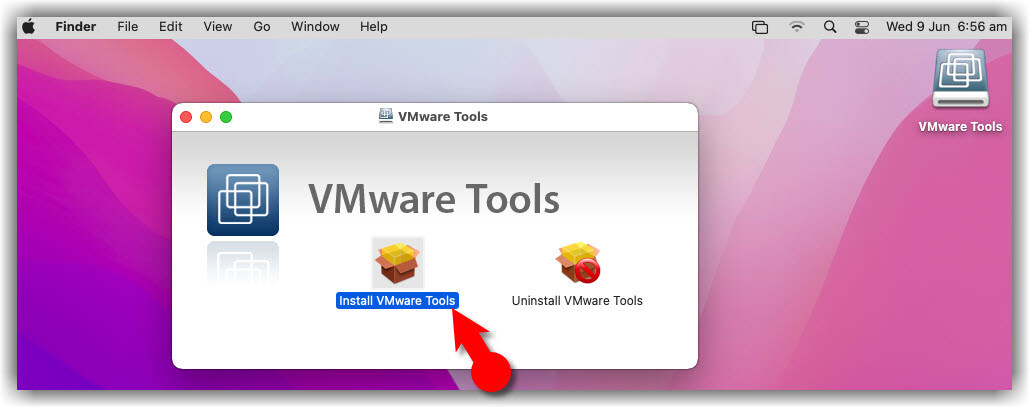
#1. The VMware tools will automatically appear on your desktop. Double-click on Install VMware tools.
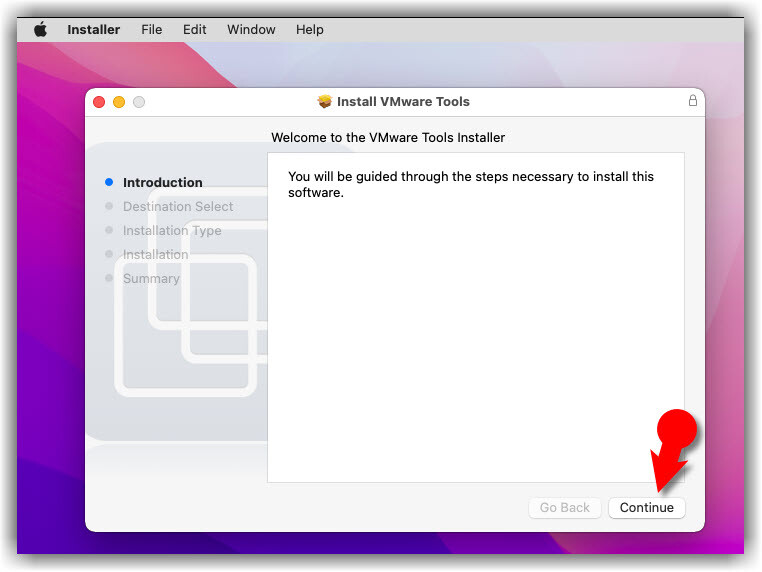
#2. On the Welcome to VMware tools Installer page, click Continue.
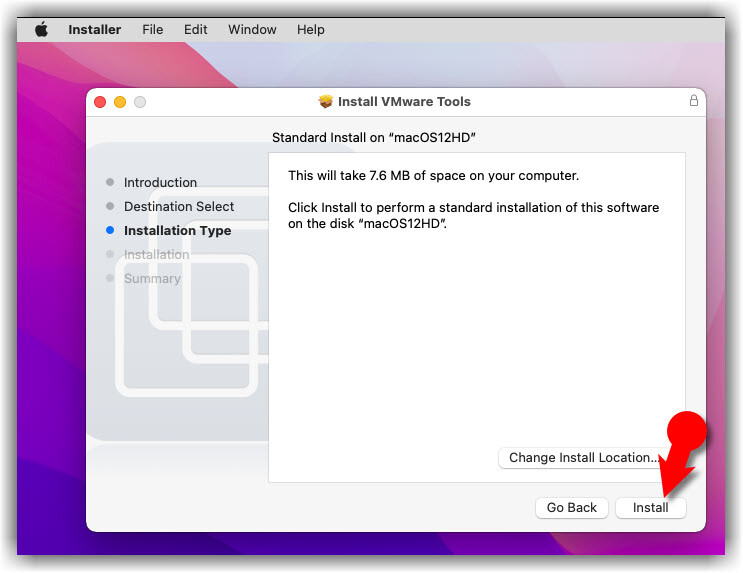
#3. Click on the Install button.
- VMware Tools Installer
- Select Installation Disk
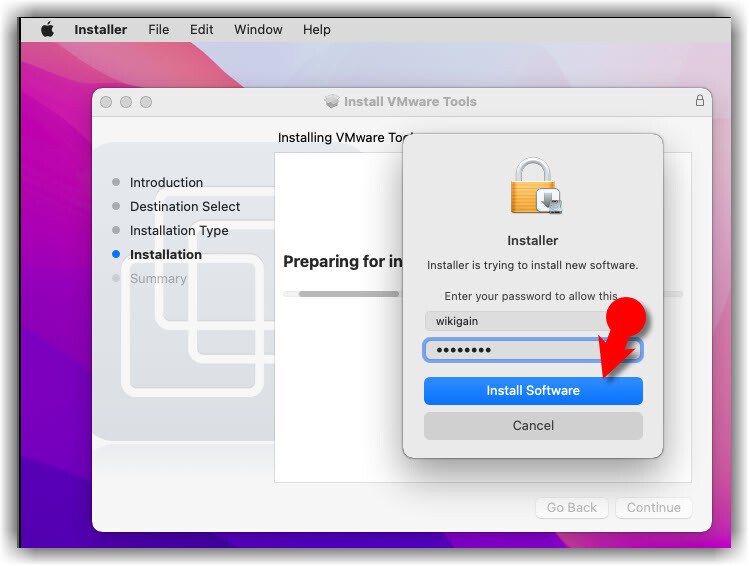
#4. Type your username and password then click Install Software.
Step 3: Allow VMware Tools through macOS Monterey Security Settings
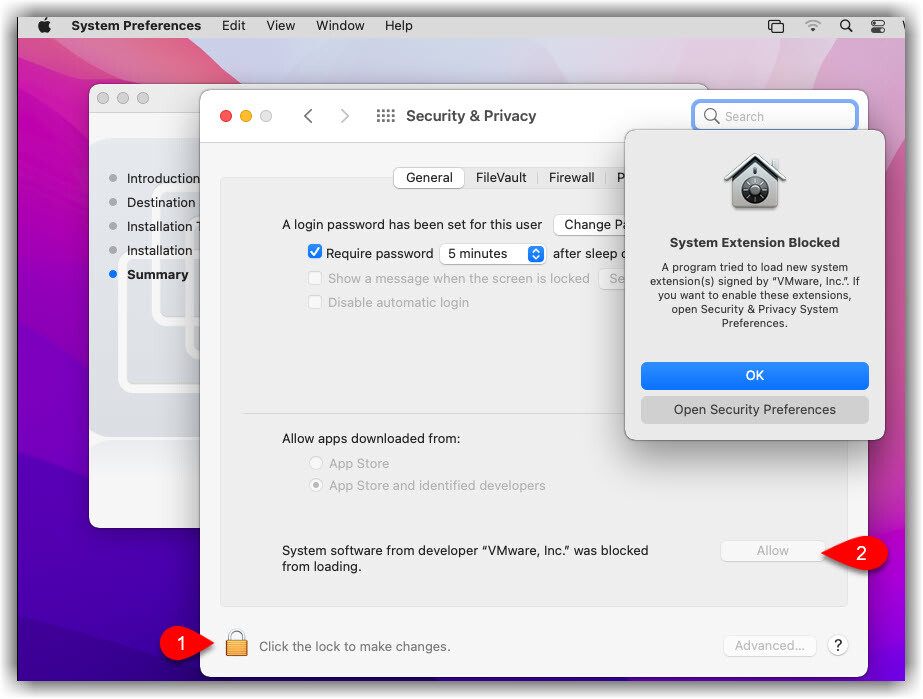
#1. When System Extension Blocked appears, click Open Security Preferences.
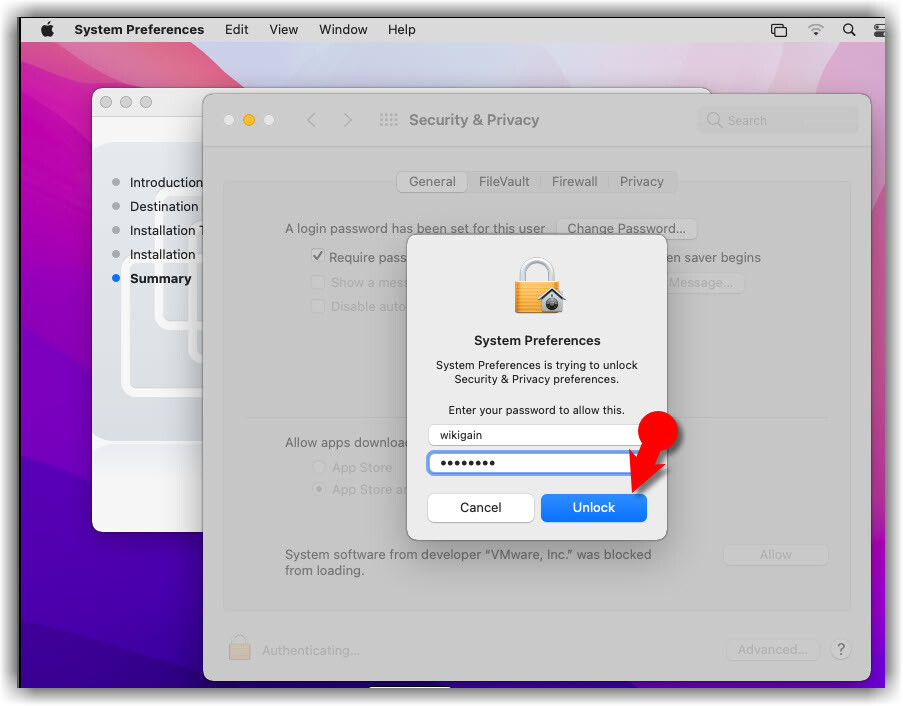
#2. Click on the Padlock icon. Type your password then click Unlock. It allows you to make changes.
#3. Click Allow next to some system software was blocked from loading.
- System Software from Developer VMware was Blocked
- Allow VMware tools through System Preferences
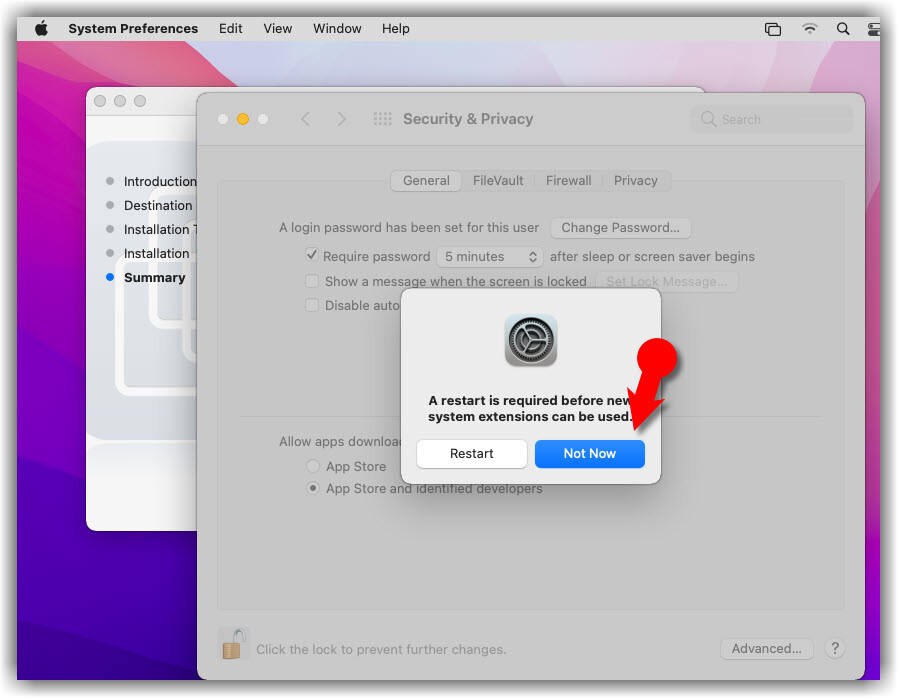
#4. On this Pop-up window click Not Now then close Security & Privacy window.
Step 4: Reinstall VMware Tool if required
Sometimes the VMware tools don’t work when you install it the first time, so If the VMware tools didn’t work, then you need to reinstall it, to make it work. So follow the steps below.
- Attach VMware tools.
- Click on Install VMware Tools.
- Click on Continue.
- Click on Continue Installation.
- Type your Username and Password and click Install Software.
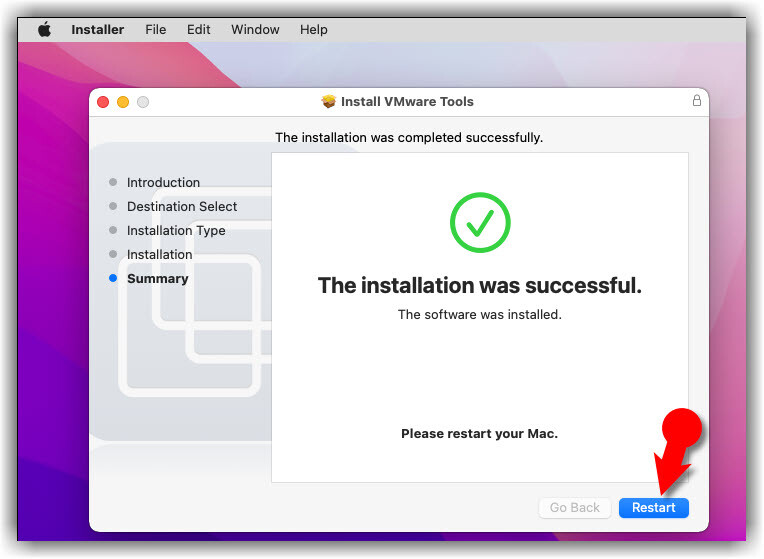
- Click Restart.
- Login to macOS Monterey.
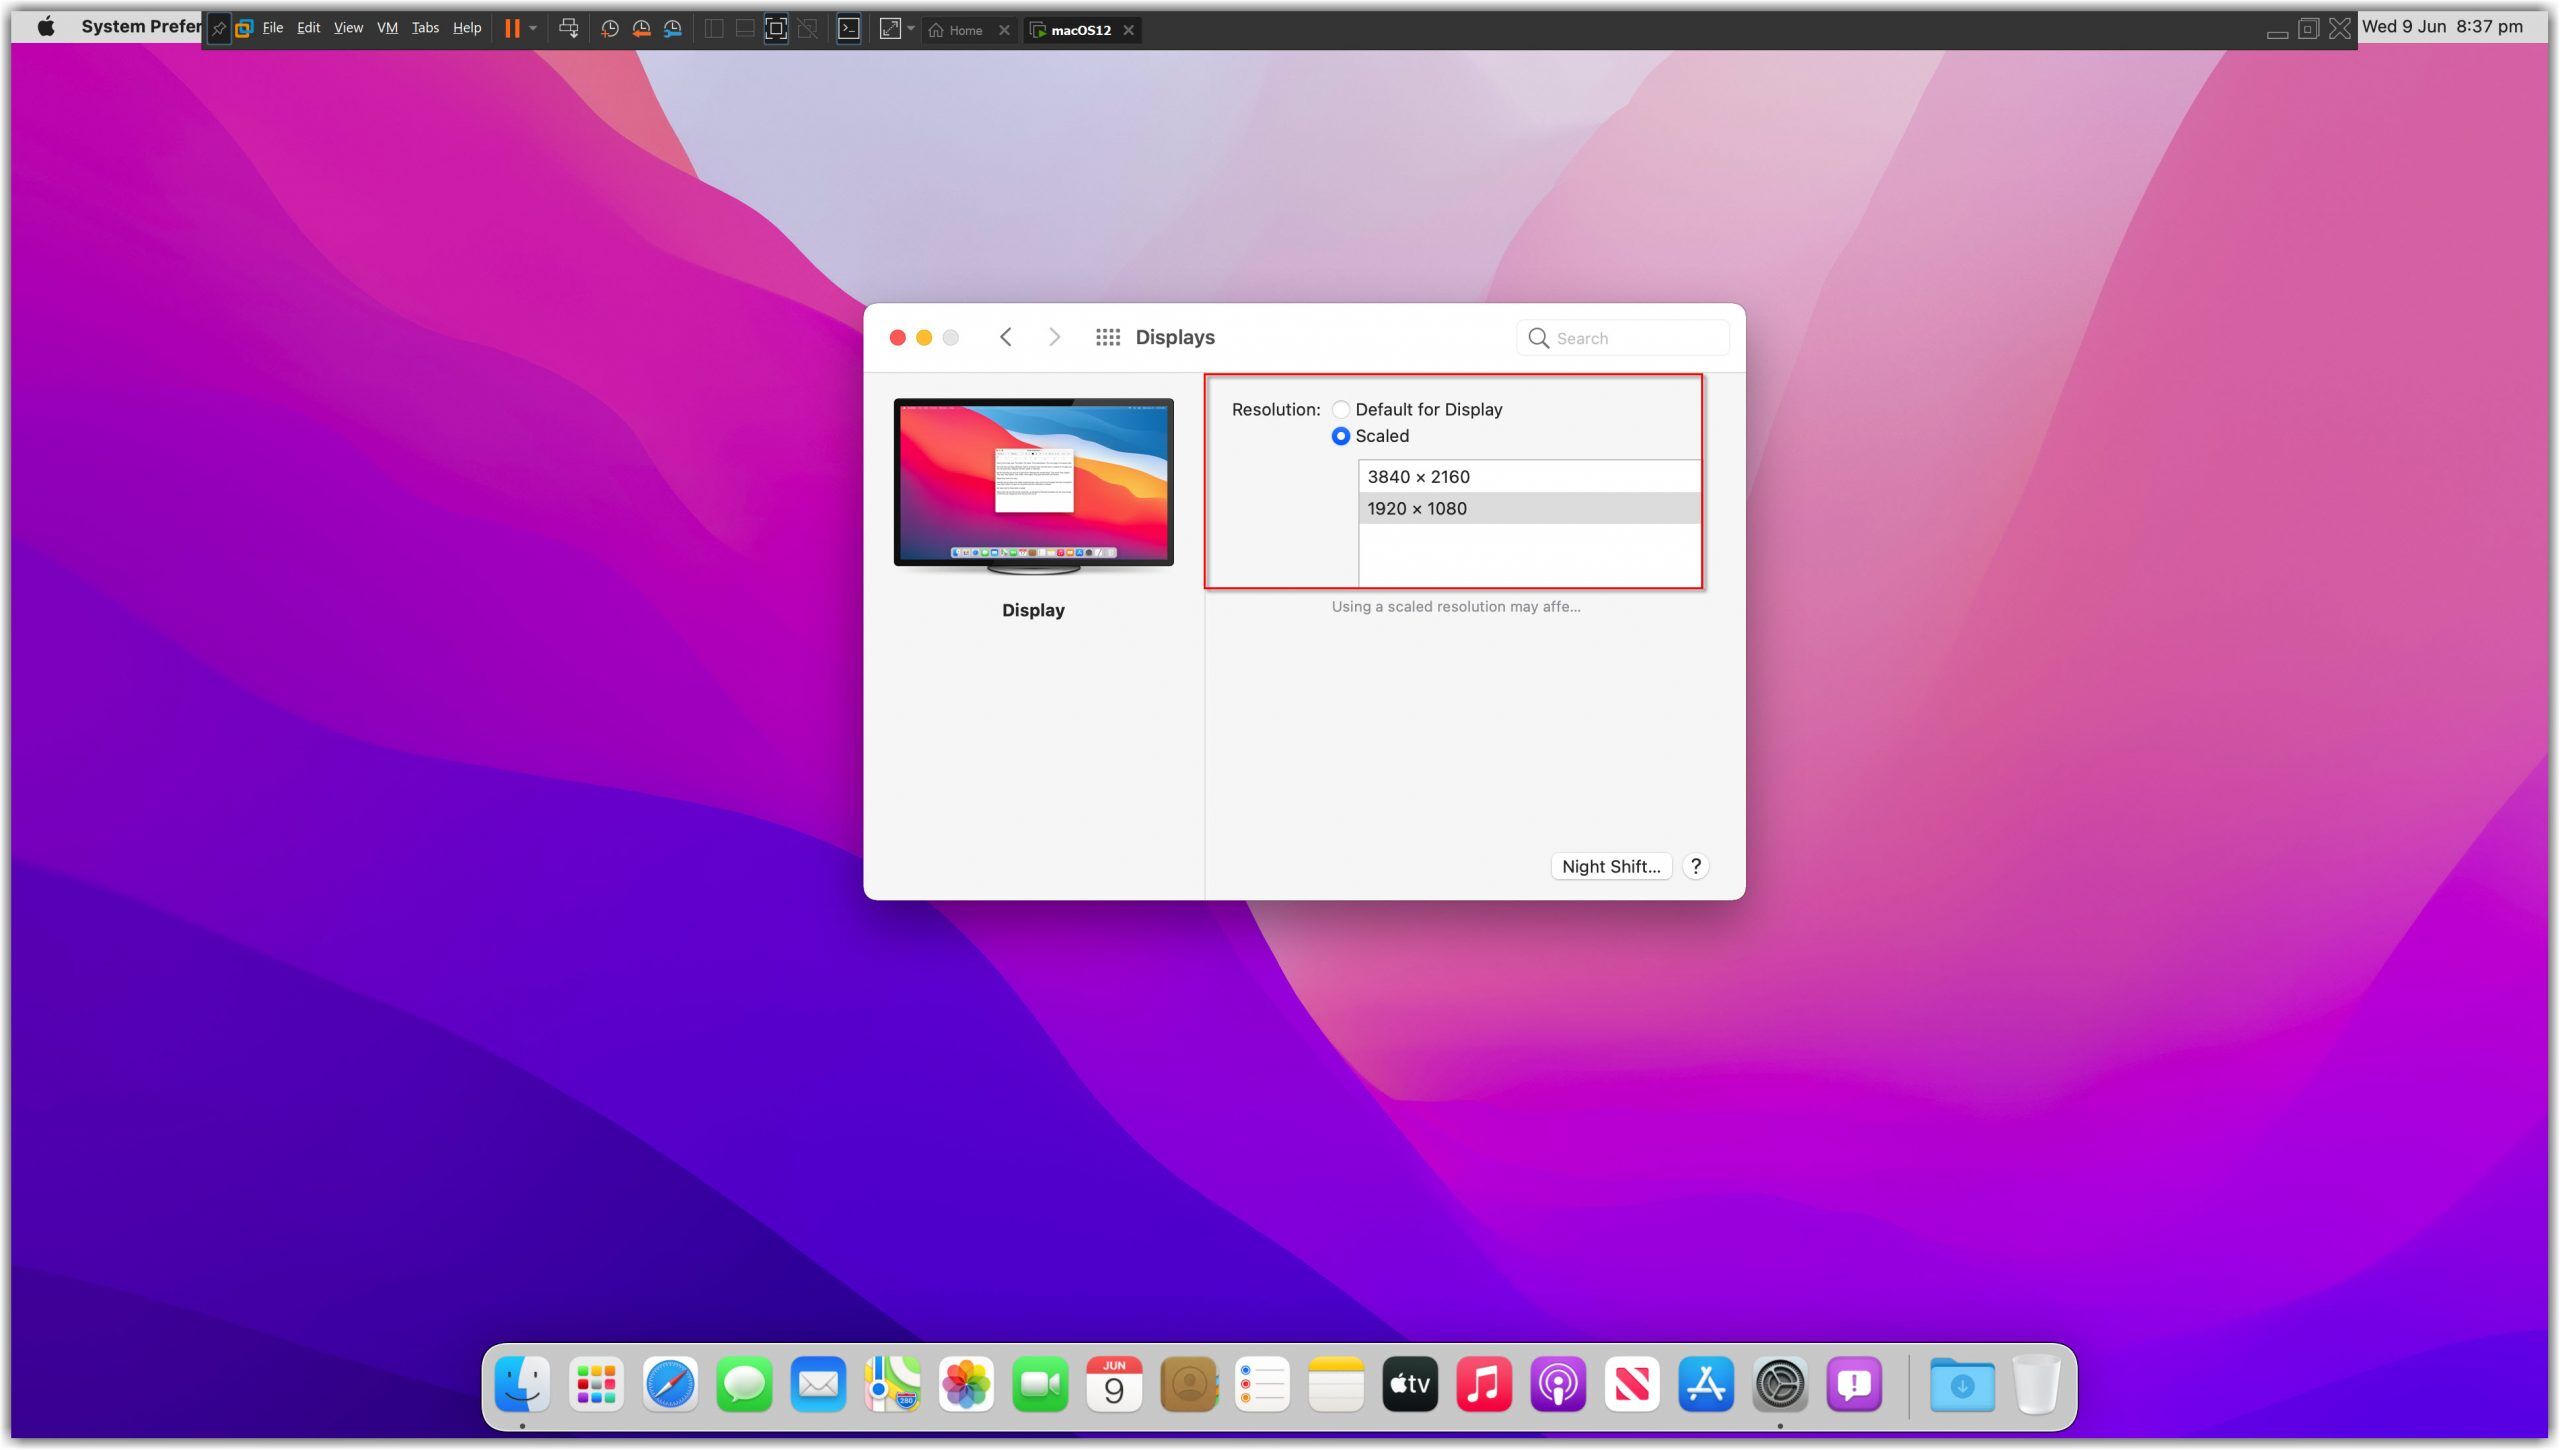
- Fullscreen your macOS Monterey to make sure it’s work properly.
Summary
That’s all about how to install VMware Tools on macOS Monterey. We covered the following:
- Attach VMware Tools ISO to macOS Monterey
- Install the VMware tools
- Allow VMware tools from macOS Security Settings
- Reinstall the VMware tools if required
If I left out something and didn’t mention please let me know by commenting down below this post. We have lots of new posts related to macOS Monterey so stay up to date with us.

Thank you so much for this trick !
initially after installing VMware Tools everything worked well, then I started up the Monterey VM a day or two later and the performance was grinding to a halt (very slow, problems with the cursor & trackpad etc). Running 16.2.2 on i5 10th gen with 2×2 processors & 8GB RAM for the VM, it was choking the whole system. I reinstalled VMware Tools multiple times but it didn’t help, then uninstalled & reinstalled VMware Tools multiple times with different version of VMware Tools (I had initially made a Catalina VM and then updated to Monterey through macOS, so I can rule out problems related to the iso). Uninstalling VMware Tools resolved most of the performance issues, the operation is still less than smooth but at least usable.
When I try to do step 1 (Right-click on macOS Monterey Tab/Window then click Install VMware Tools.) it gives me this error:
https://imgur.com/a/lHbXmqM
“This operation cannot proceed because your Mac OS guest is using the CD/DVD.
Dismiss this message, eject the disc from inside the guest, and retry this operation.”
can anyone help me?
Never mind I fixed it by pressing “eject” on the disc that is on the Mac desktop, The resulotion iis working for me now, but the whole computer is still a bit laggy, like its always on 20hz, really weird since i gave it 16 RAM and 4 cores. does anyone know why?
how have you fixed kindly tell steps…
just goto System preference -> Disk -> Unlock below lock icon for authentication of changes into mac OS -> then restart disk option must be there and while restarting just follow the first step… shown above and after reboot you will see on your mac desktop 1 VM tools icon will be there ….rest of process are same !
goto (in mac os)system preference -> disk option -> unlock lock by double clicking and giving your password as authentication and reset disk and while resetting follow first step given above and after reboot you will see on you desktop(macOS) VM Tools option after that follow steps above and boom your macOS will be full screen and lag free..
Can anyone please share the Sha-256 of an working mas os 12 iso file downloaded from mediafire or the above mentioned website.
I have downloaded the file however just wanted to check whether it is correct or not! Cause installation is not working properly. After less than a minute remaining it gets stuck.
So. Please kindly share the sha 256 checksum values.
Thanks in advance.
By the way thanks for wikigain too.
I mean about mac os monterey iso file.
Thanks again.
I did the steps, after the installation when you reboot the machine, OS does not load and gets stuck on the black screen.
After many searches, I realized that you need to activate the Autologin immediately after installation, otherwise, unfortunately, you need to reinstall the macOS!