In this article, I am going to show you how to install macOS Monterey on VMware on Windows. So, Apple announced its latest and greatest operating systems in WWDC 2021. If you want to give macOS Monterey Beta a try, then you’re in the right place.
macOS Monterey is Currently in Beta, and obviously, it’s buggy. When a new release/version comes out then depending on how many vital fixes it has. We may update the ISO file linked below. Although you can make your own ISO. We have created a step by step guide on how to create your own macOS Monterey ISO. So, without wasting any more time, let’s jump into it.
Required: If you haven’t already then you should enable Virtualization Technology (aka Intel VT or AMD-V).
Step to Install macOS Monterey on VMware on Windows
- Download the prerequisites
- Install the Prerequisites
- Unlock VMware to Install macOS Monterey
- Create a New Virtual Machine
- Edit macOS Monterey VMX File
- Start macOS Monterey Virtual Machine
- Complete Basic macOS Account Settings
- Capture Snapshot of the VM
- Install VMware Tools (Optional)
Step 1: Download the Prerequisites
To begin with, you should download some files, and you may also download & install some applications. These are required later on in this guide. But if you have done any of the followings already, then you may skip it. Here is the list:
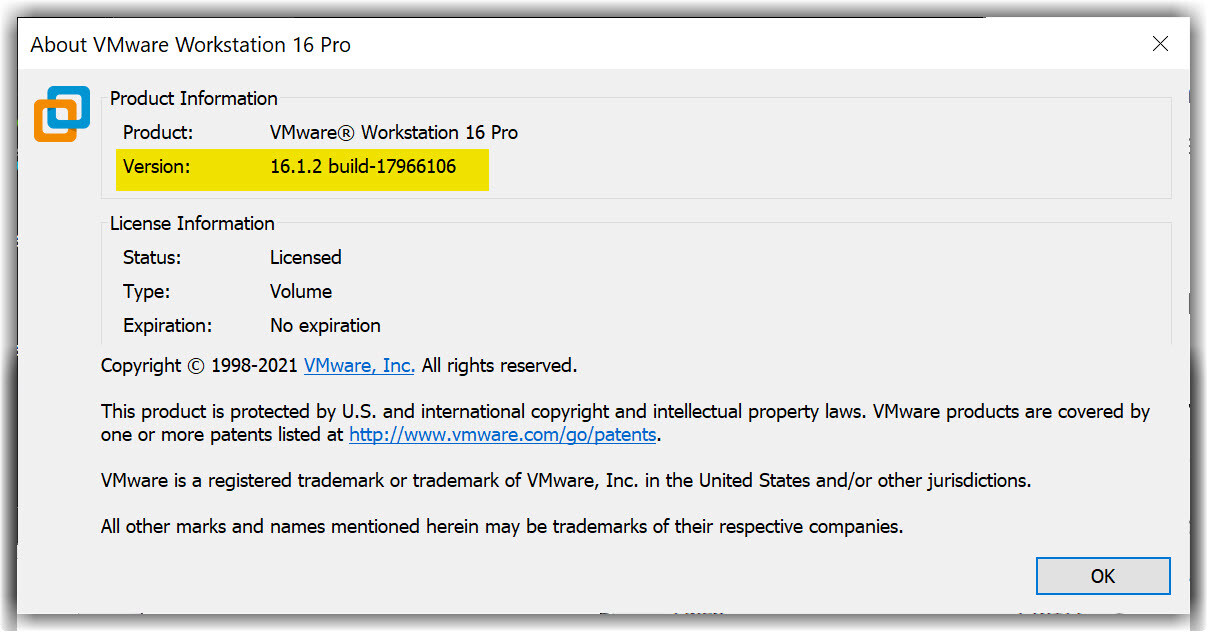
- Download VMware Workstation Pro 16.1.x or VMware Player 16.1.x
- Download the macOS Unlocker V3 for VMware
- Create or Download macOS Monterey ISO
- macOS Monterey Beta 12.0 (21A5248p) Dev Beta 1
- Create macOS Monterey ISO Image
- Download VMware Tools (Optional)
Step 2: Install the Prerequisites
Now, install the VMware Workstation Pro applications, and if you already have it by any chance then you’re welcome to skip. But make sure it works properly, and it’s compatible.
- Install VMware Workstation Pro 16.1.x or VMware Player 16.1.x
After downloading the VMware Workstation pro/player, run the setup and follow the prompt leaving all the options as default.
Step 3: Unlock VMware to Install macOS Monterey on Windows
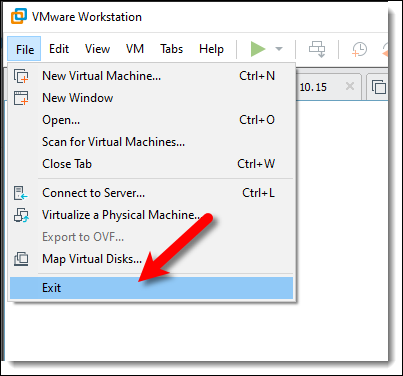
Firstly, make sure the VMware Workstation application is closed completely otherwise the VMware unlocker won’t work. You can do this by Clicking on File Tab > Exit.
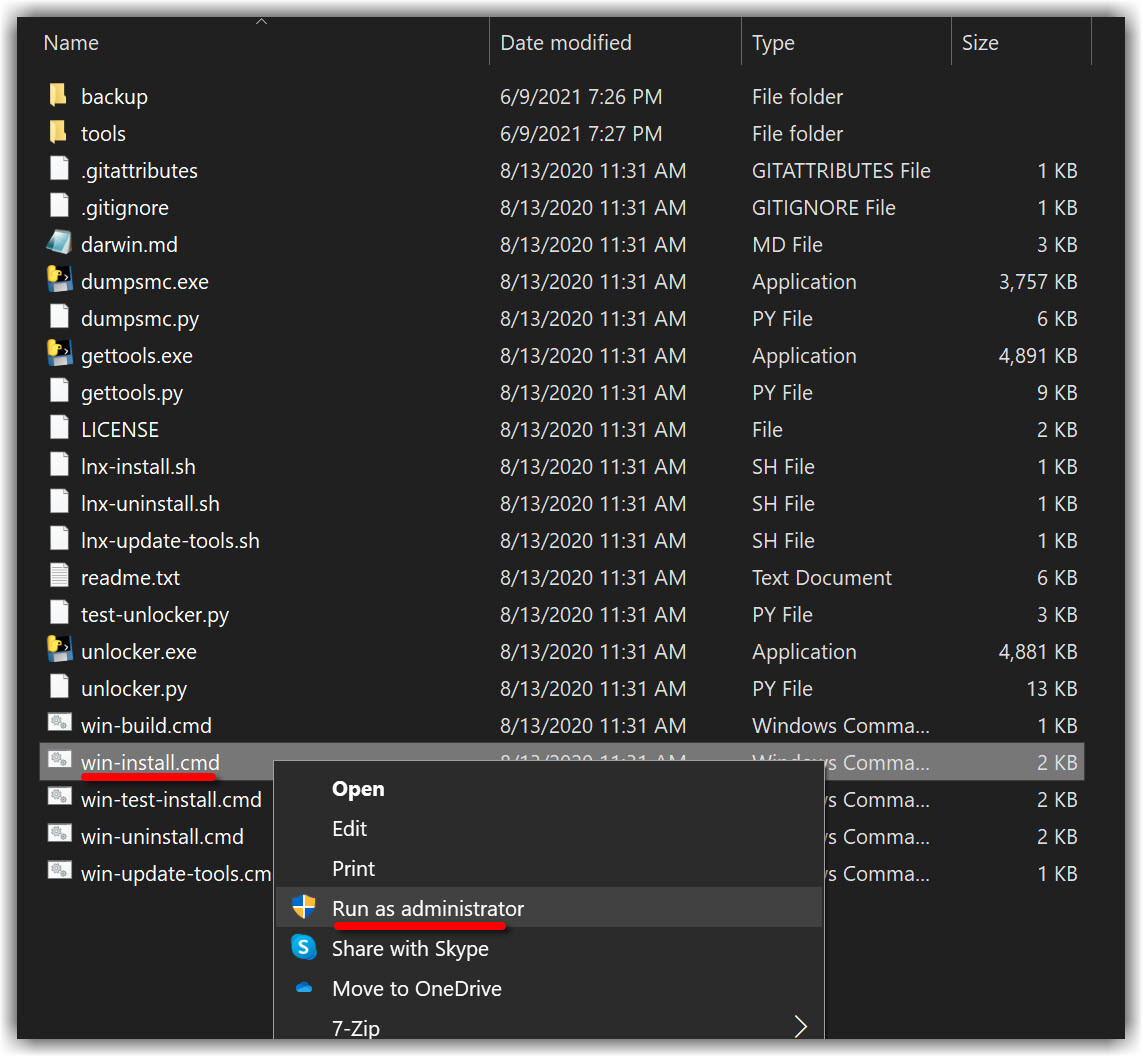
The reason we install win-install.cmd is because the macOS is not listed on the guest operating system list by default. So, we execute this script to enable macOS in the guest operating system list.
Step 4: Create a New Virtual Machine
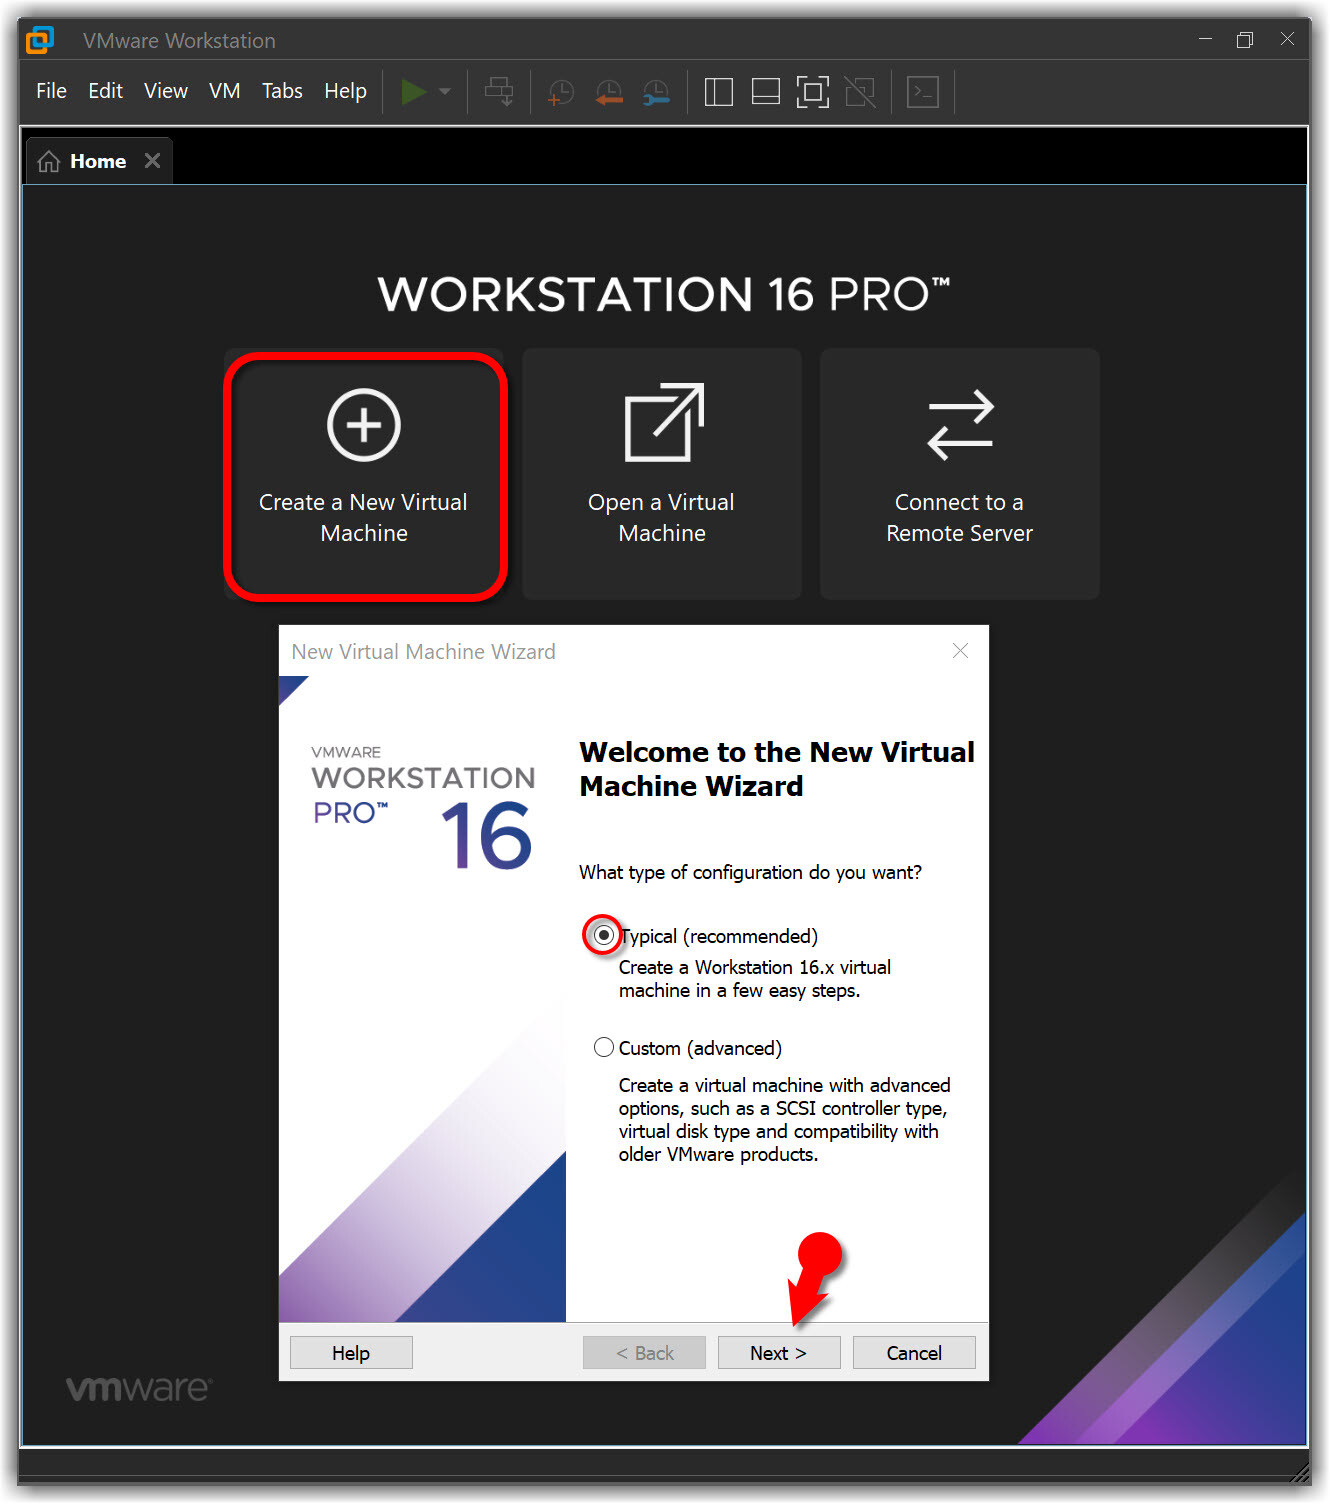
#1. Open VMware and click on Create a New Virtual Machine (Ctrl+N) then select Typical (Recommended) and click Next.
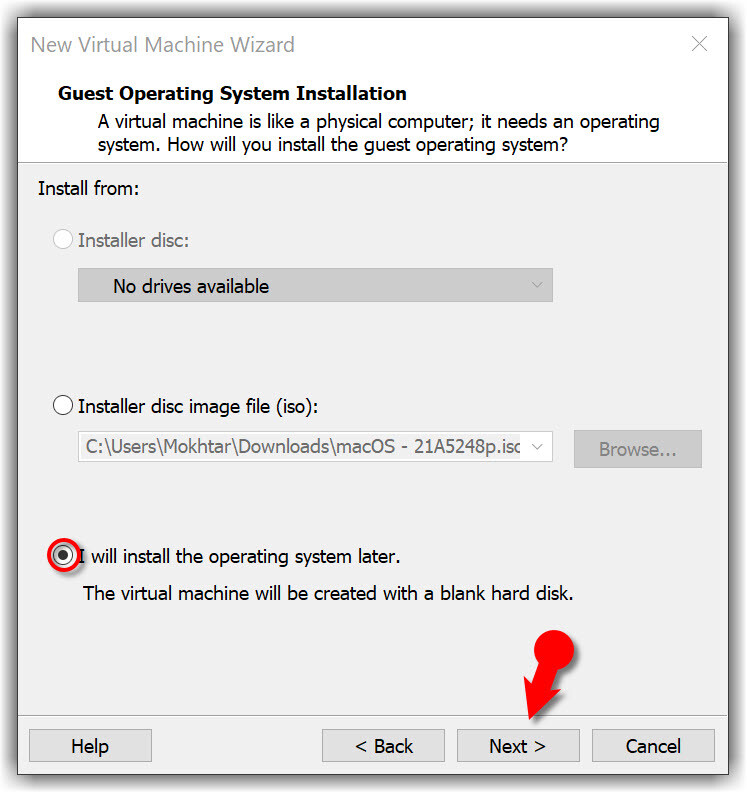
#2. Now, select I will install the operating system later and click Next. Choose Apple Mac OS X from the operating system list then select macOS 11.1 from the version drop-down list and click Next.
- Install the OS later
- Apple Mac OS X
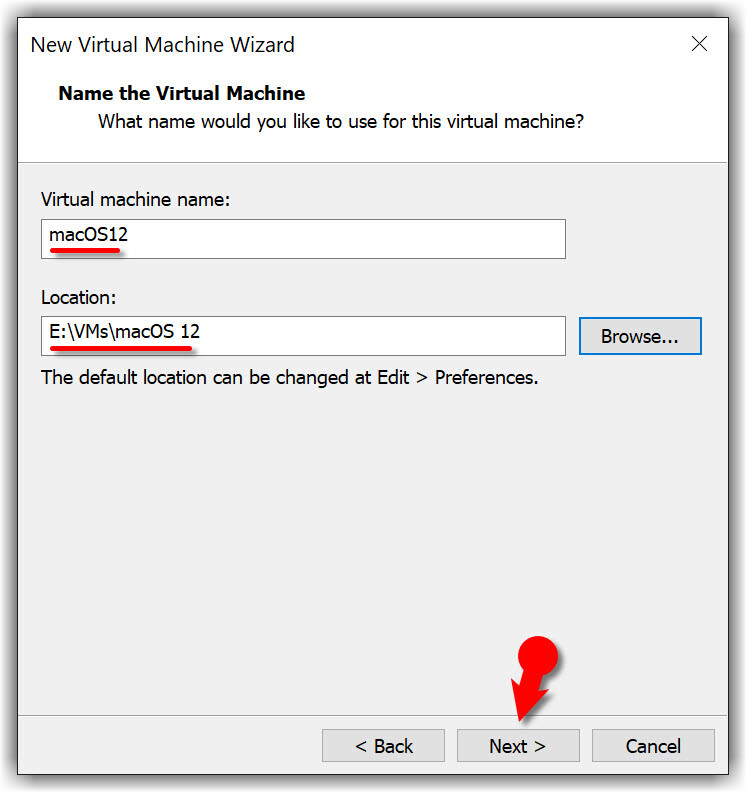
#3. Name the virtual machine as you prefer like macOS Monterey. Click Browse then choose a location to save virtual machine files and click Next, or you may let it as default.
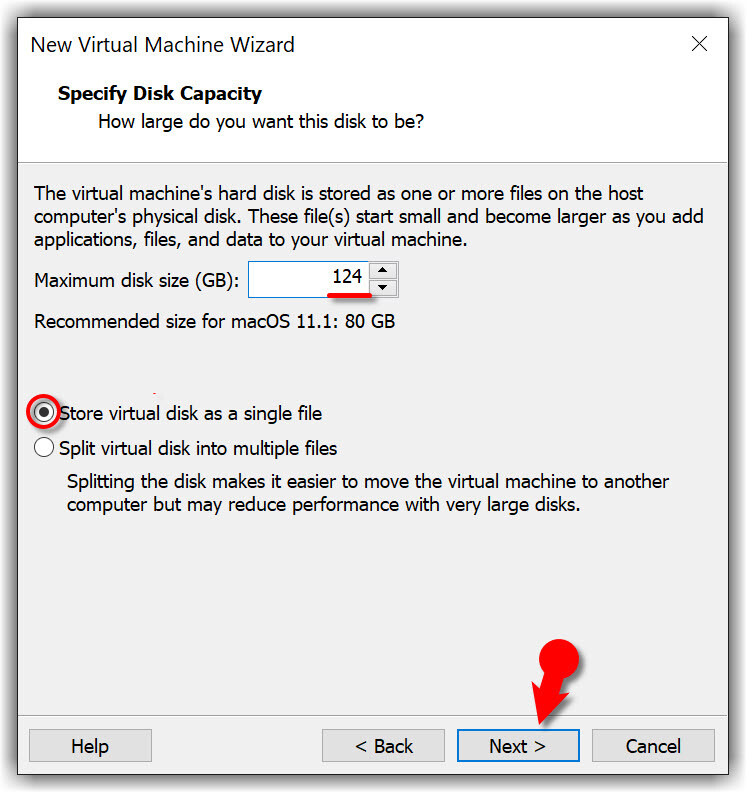
#4. Specify the disk size of 124 GB or more than 50 GB. Then select Store virtual disk as a single file and click Next.
- Name macOS Monterey VM
- Specify Max Disk for macOS Monterey
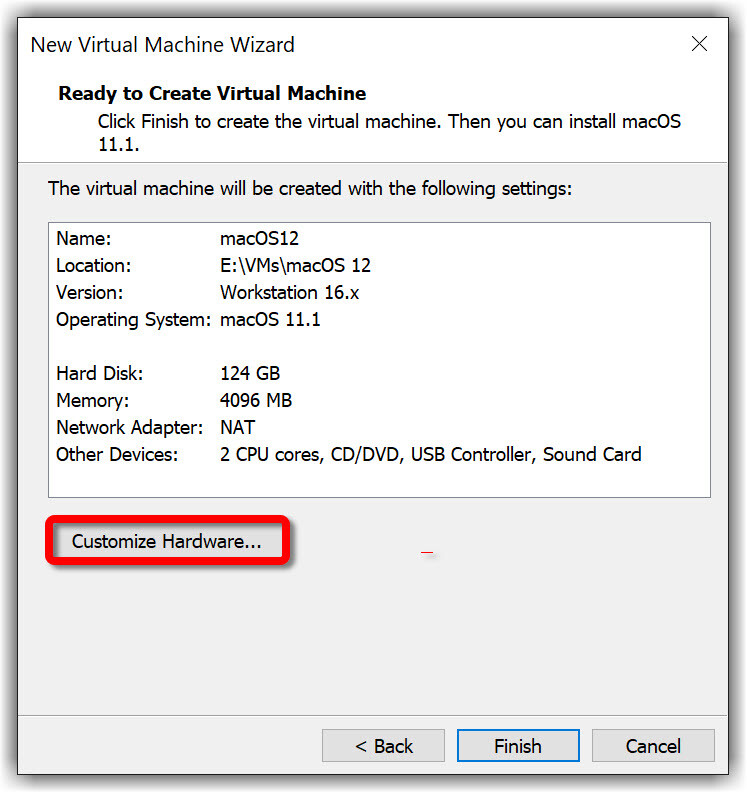
#5. On Ready to Create Virtual Machine, Click Customize Hardware.
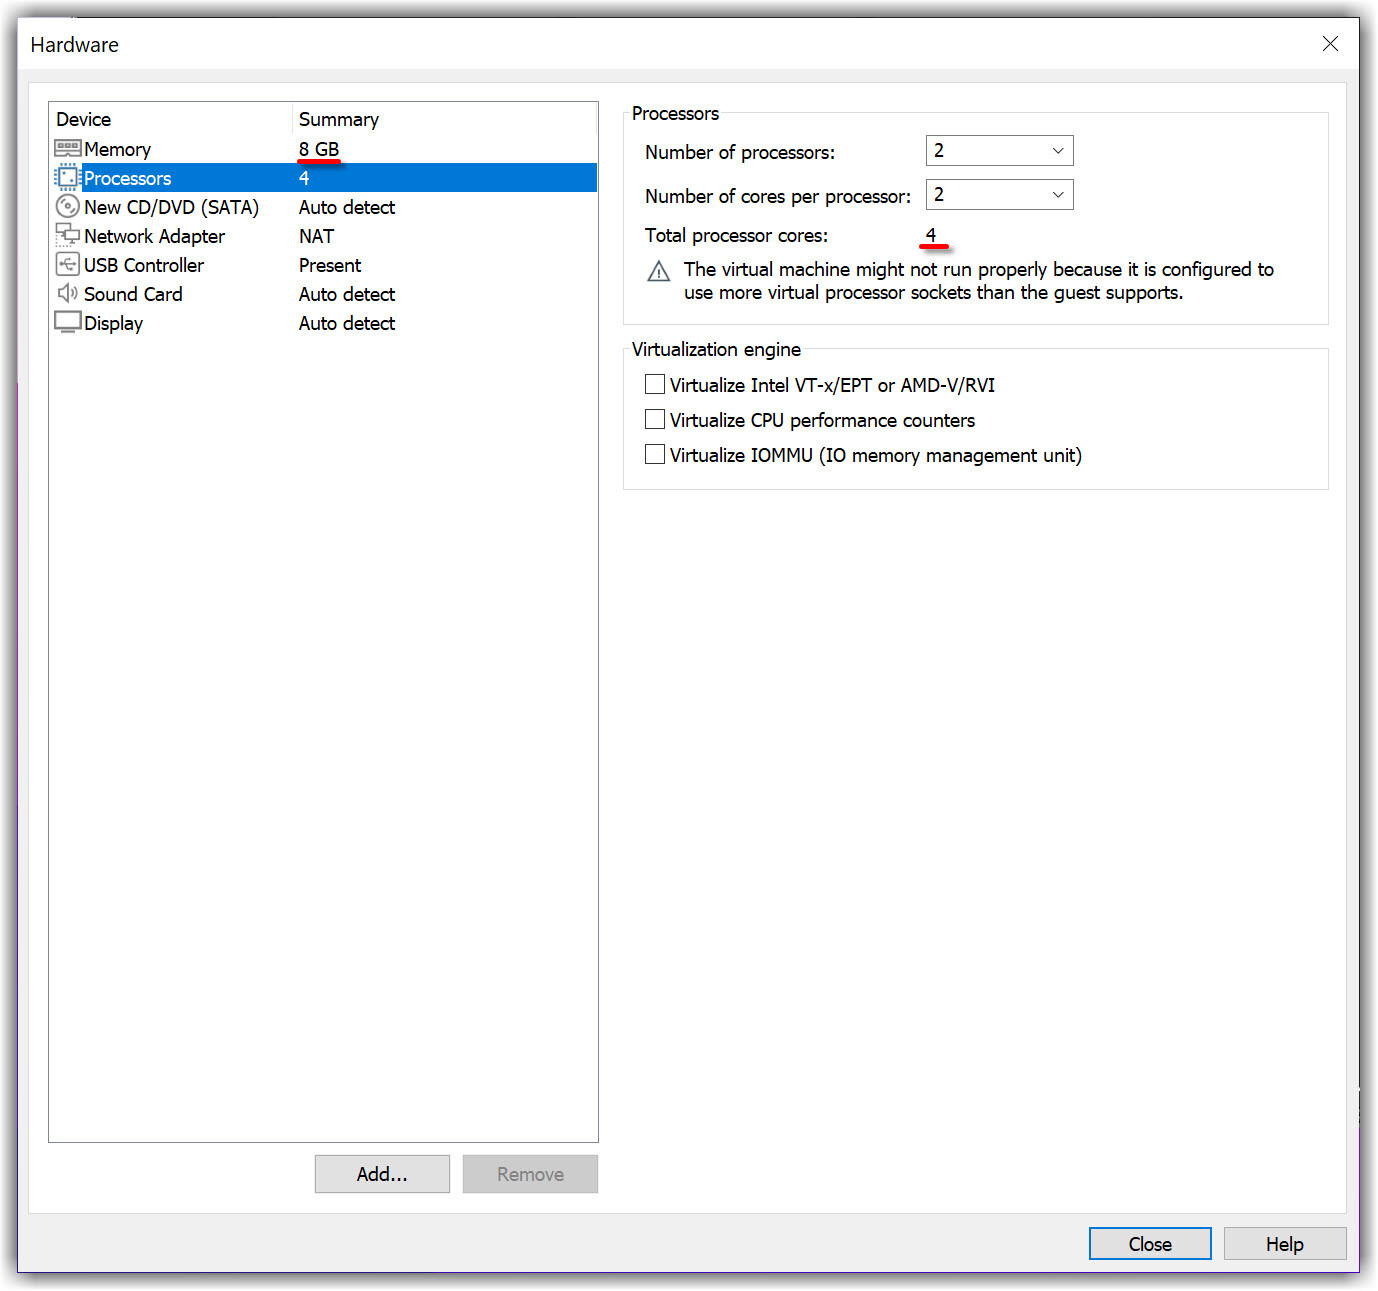
#6. Increase the Memory from 4 GB to 8 GB or higher for better performance.
#7. Select Processors menu then increase the CPU processors core from 2 cores to 4 or Higher cores for better performance.
Note: If you don’t have enough resources then you may not increase the Memory and Processor since the minimum requirement is 4 GB Memory and 2 Cores of Processors.
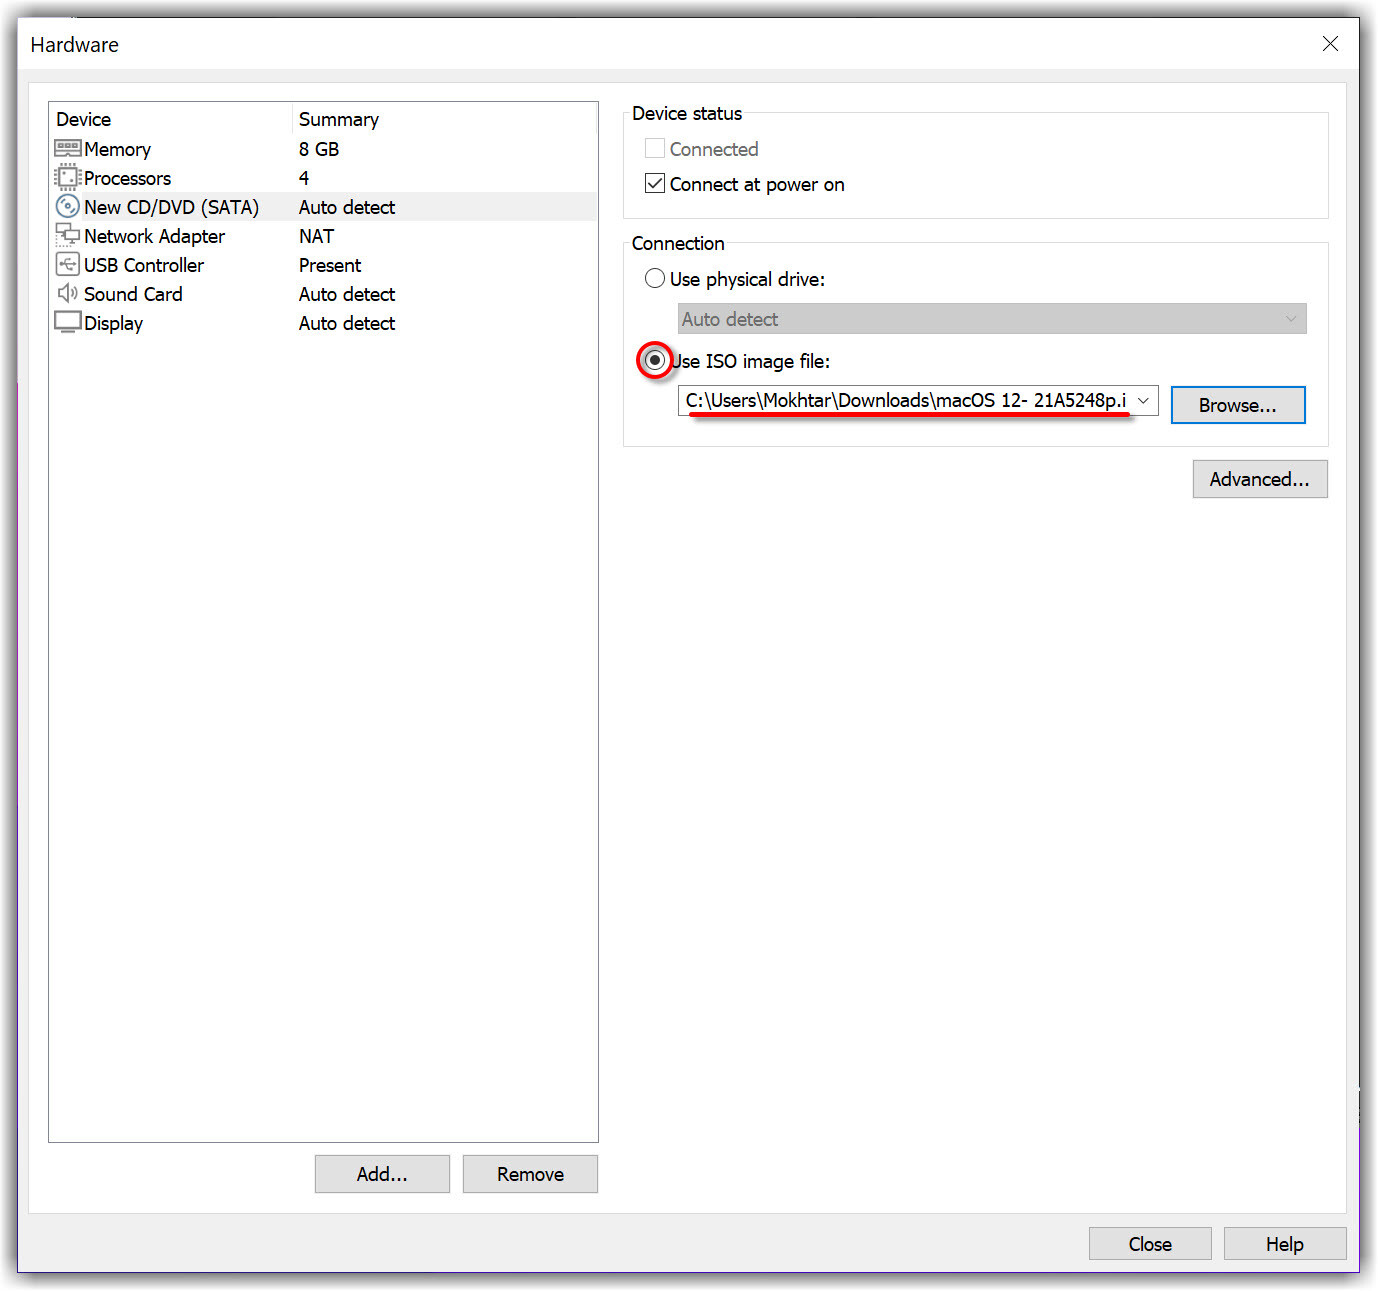
#8. Select New CD/DVD (SATA) from the menu then click Use ISO image file: and click Browse.
#9. Locate the macOS 12- 21A5248p.iso file then click Open. If you don’t have this file then you should download this from Step 1: Download the Prerequisites section.
#10. After selecting the macOS Monterey ISO click Close to save all changes.
#11. Finally, on the New Virtual Machine Wizard Window, Click Finish.
Step 5: Edit macOS Monterey VMX File
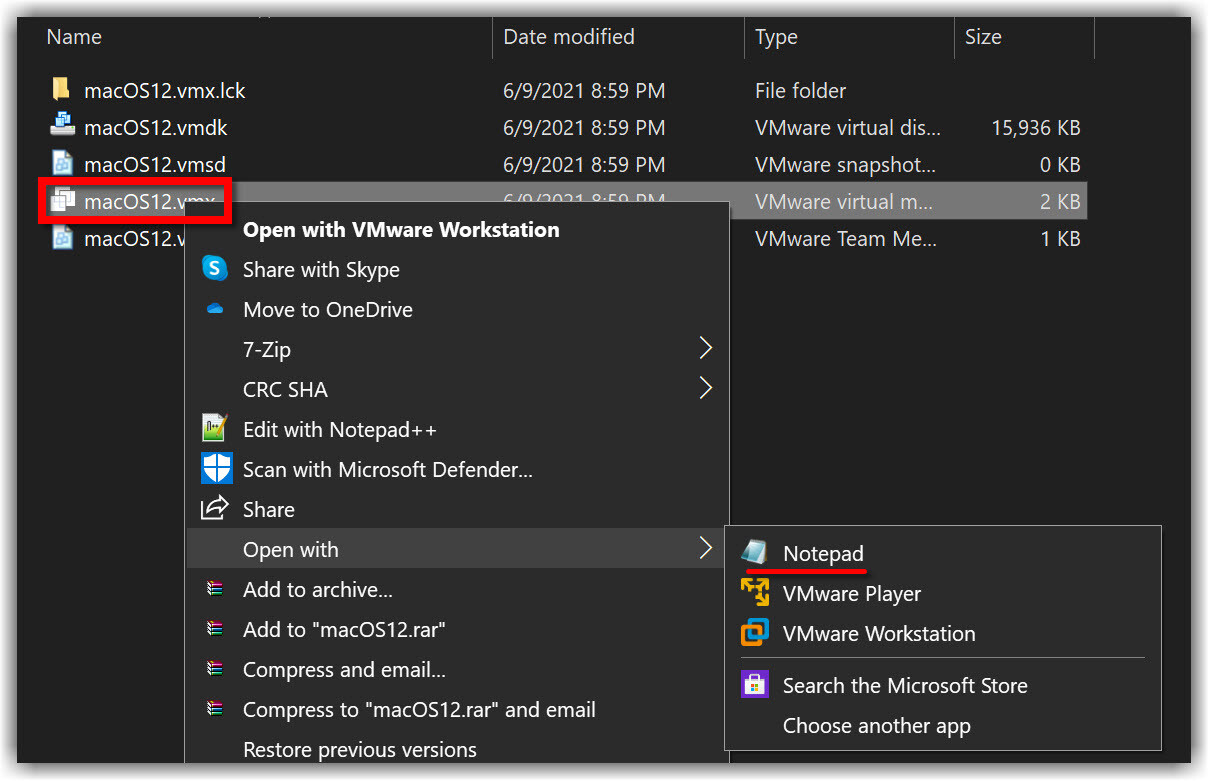
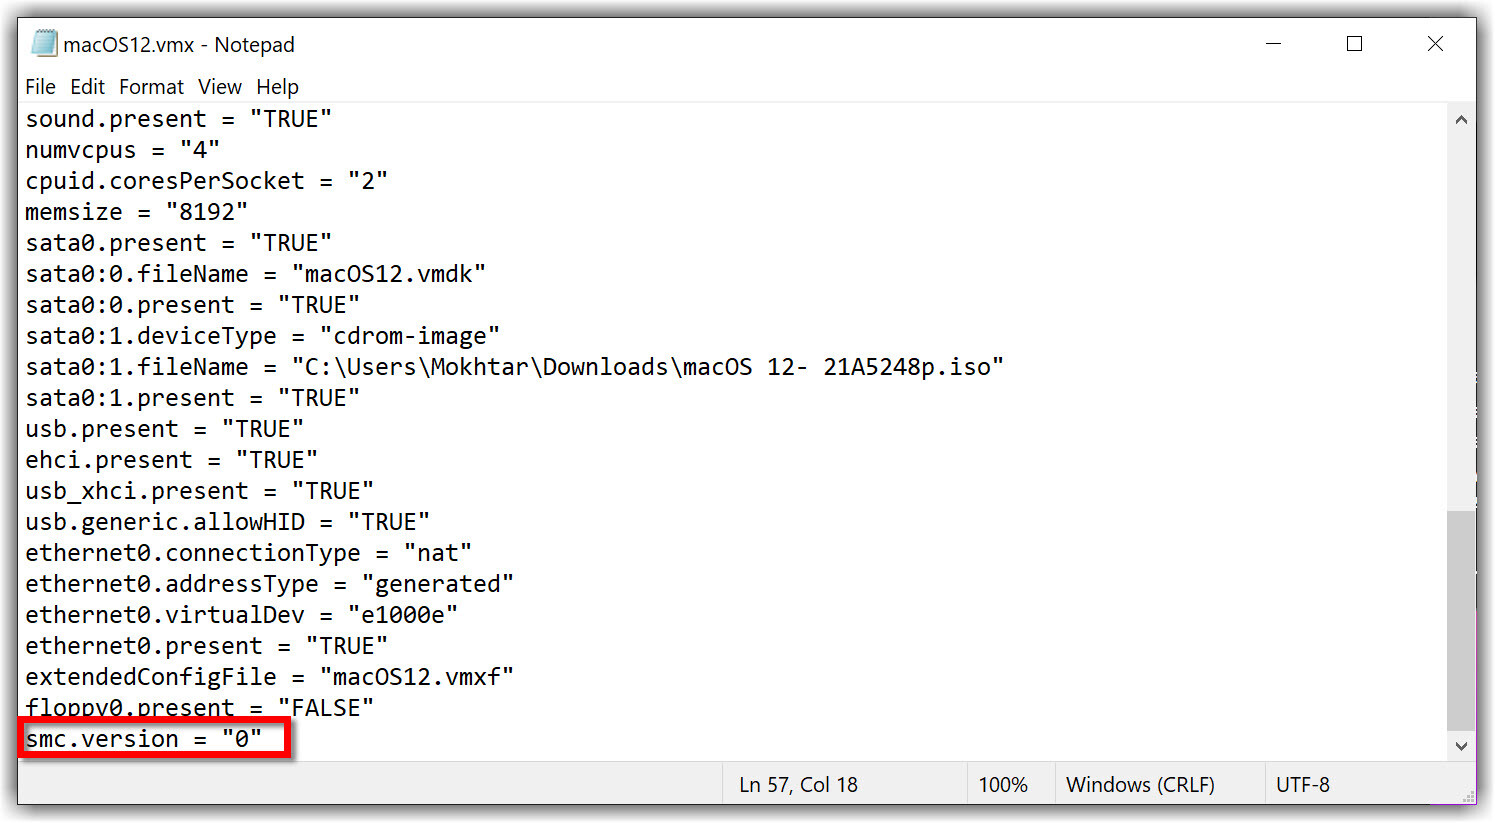
#1. Navigate to the virtual machine folder which you selected in step #4.3 of this guide. If you didn’t specify a new location, then the default location is in Document > Virtual Machine. Right-click on macOS12.vmx then open it via Notepad or any third-party text editor of your choice.
#2. Scroll down to the bottom of texts and add the following code; then click on File > Save. After that, you may close it as you don’t need it anymore.
smc.version = "0"Step 6: Start macOS Monterey Virtual Machine
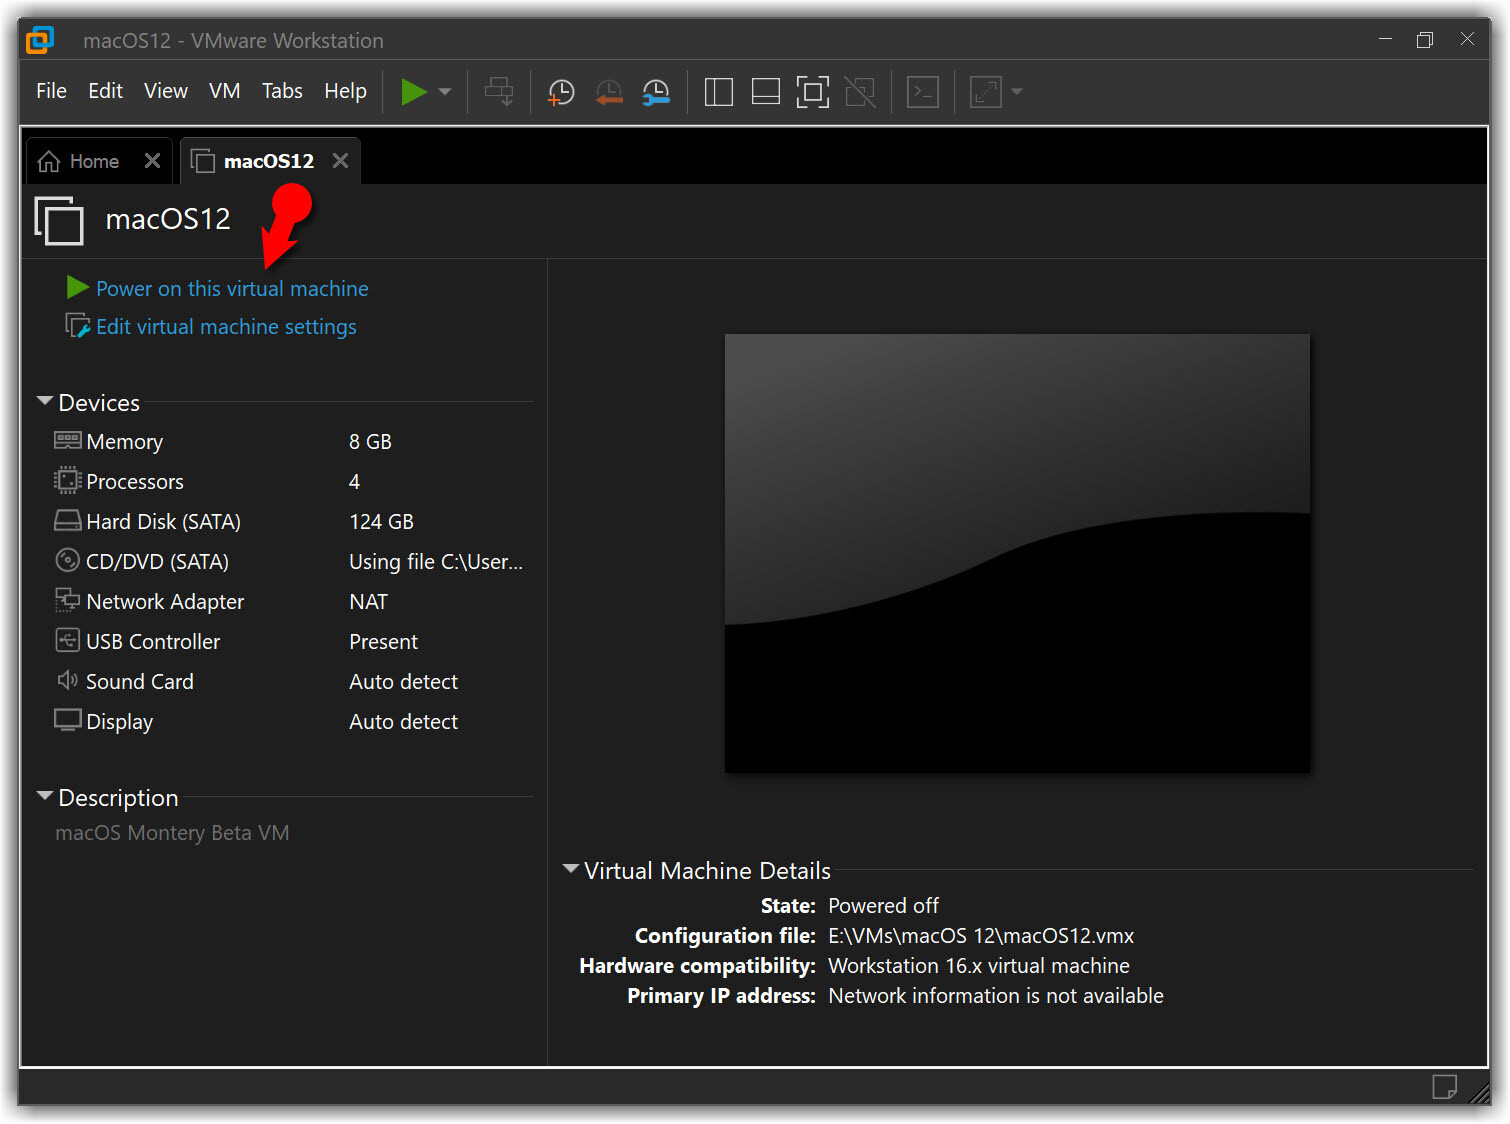
#1. Open VMware and on the macOS Monterey VM window Click Power on this Virtual Machine.
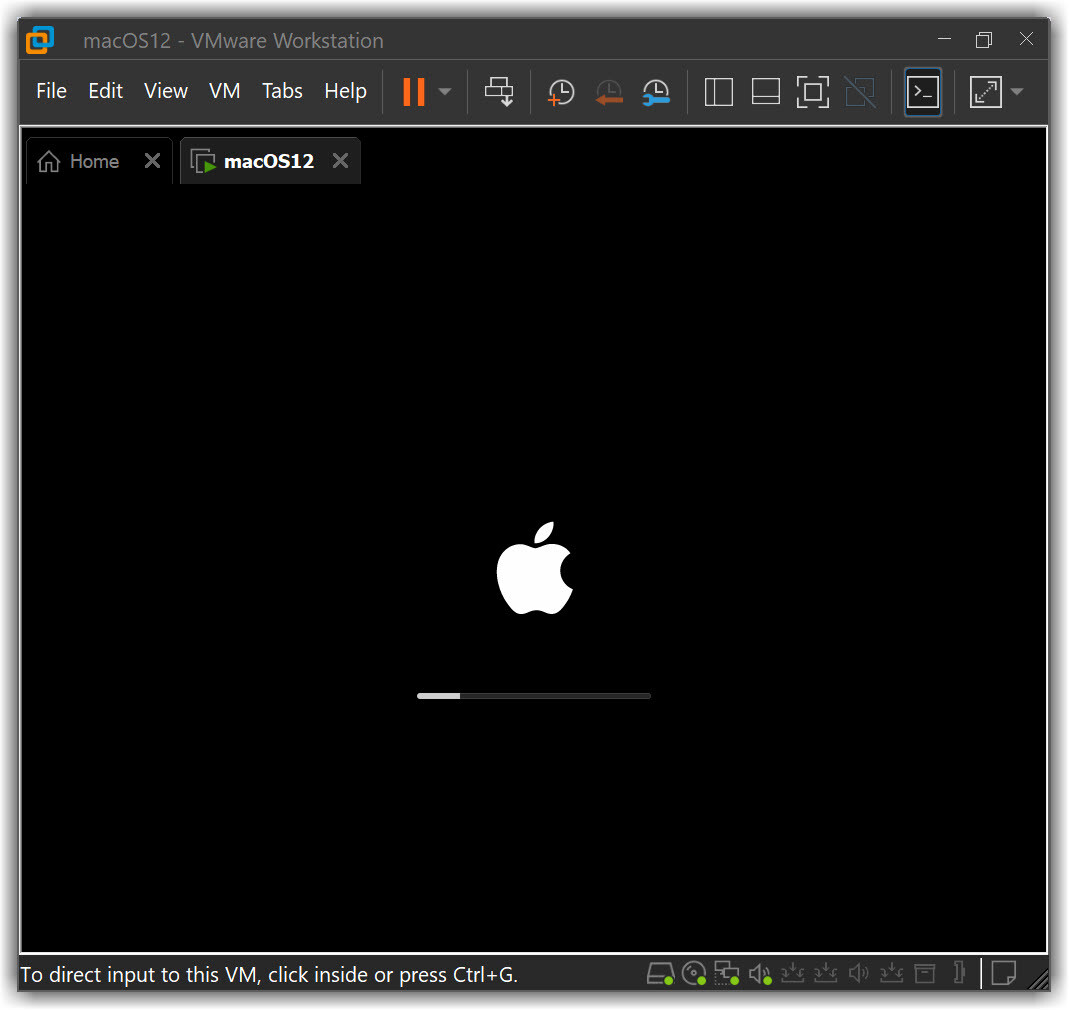
#2. Wait for it to boot up.
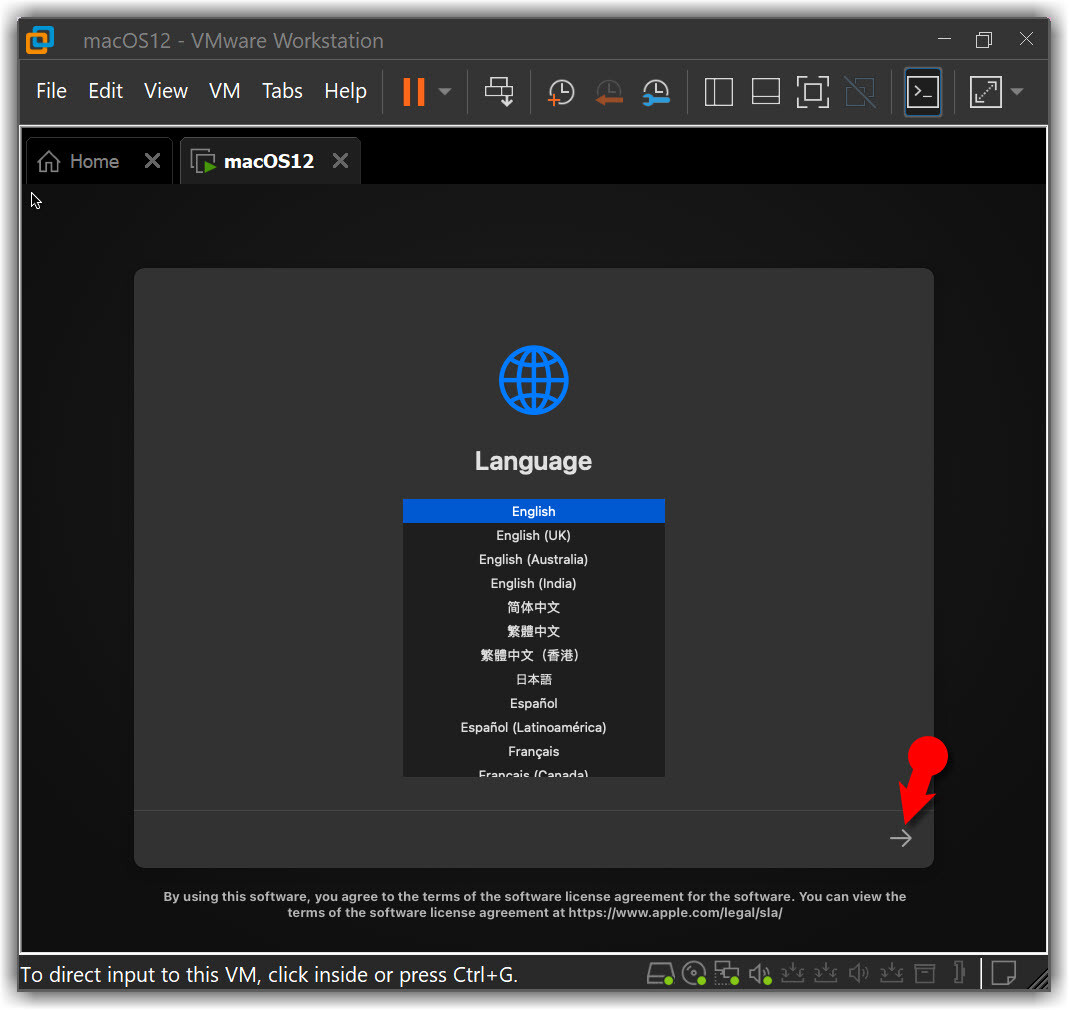
#3. Select English on the language page then click on the Next Arrow icon.
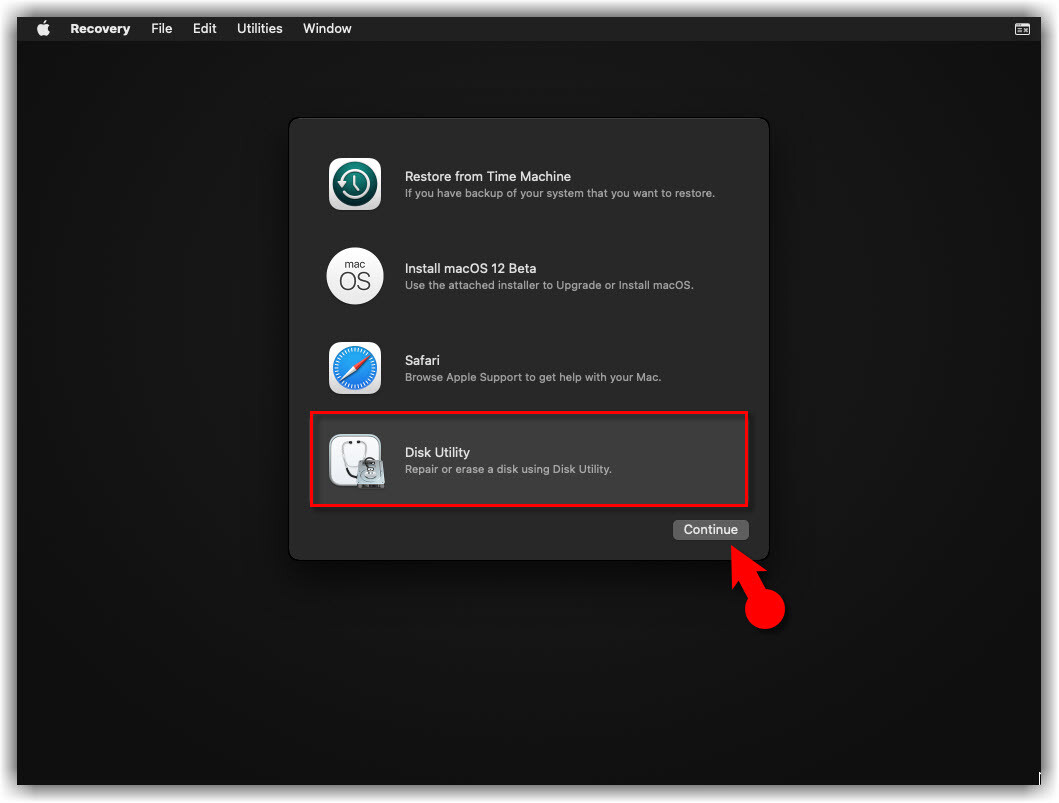
#4. Select the Disk Utility and click Continue.
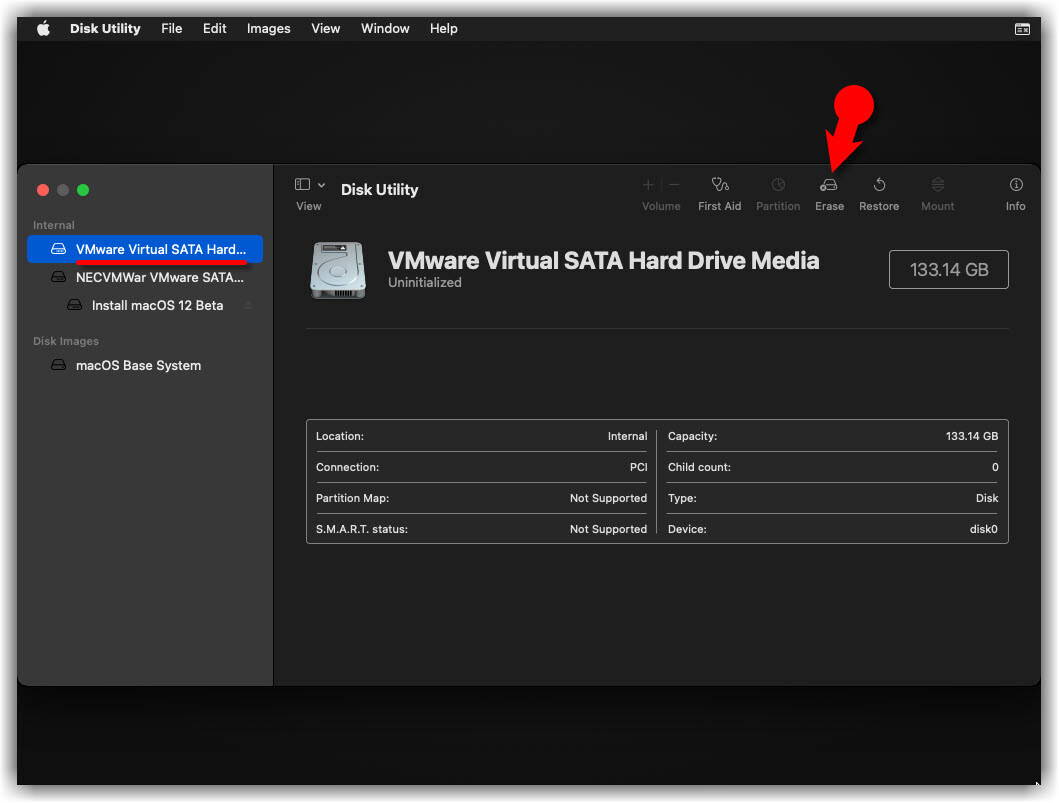
#5. Select VMware Virtual SATA Hard Drive Media then click Erase.
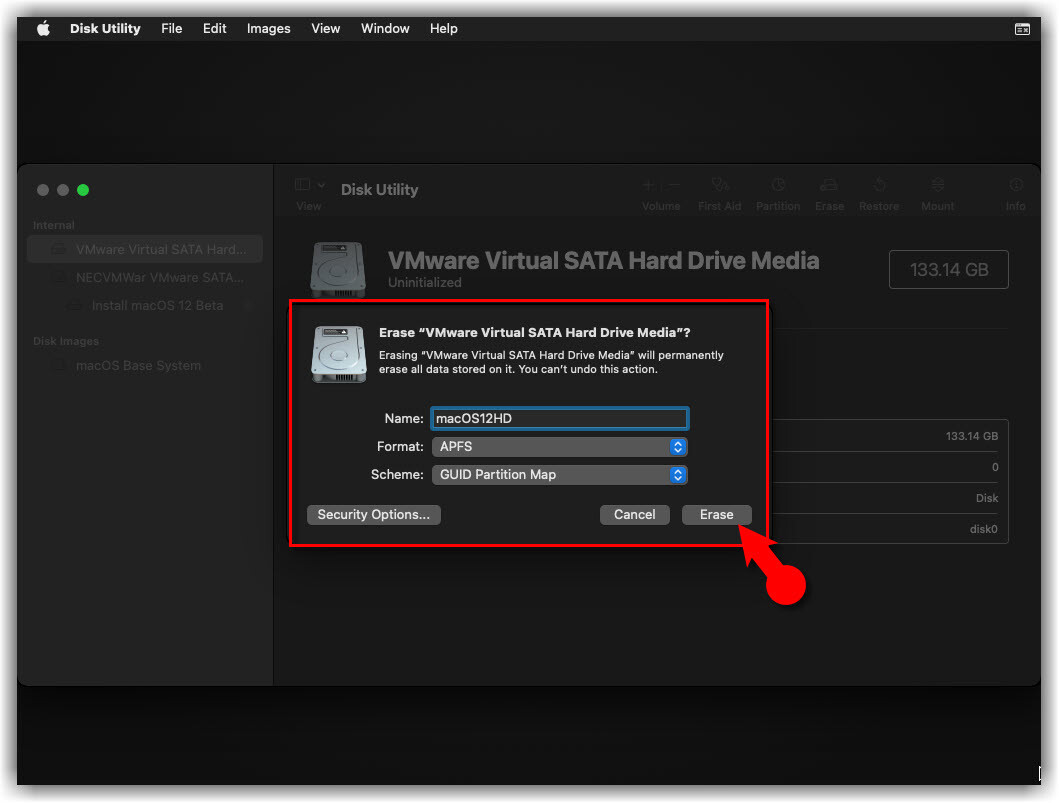
#6. For the Name, type disk macOS12HD then select APFS from Format drop-down list and click Erase.
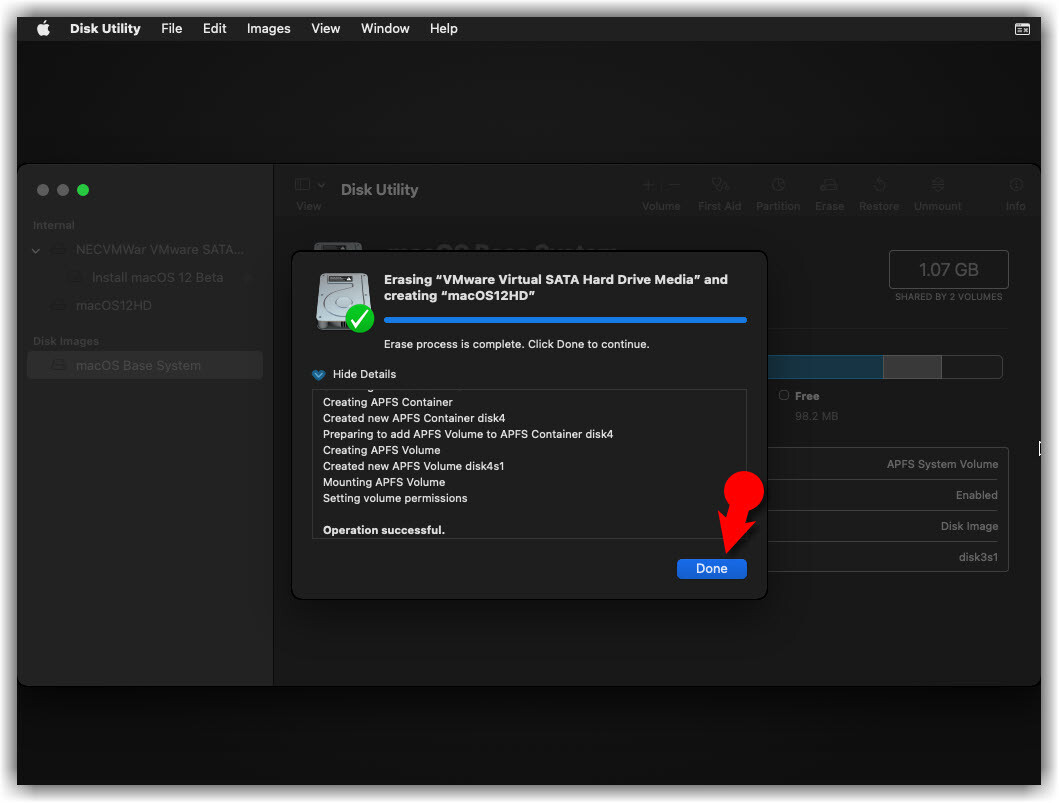
#7. Click Done to close the dialogue box.
#8. From Disk Utility Tab, click Quit Disk Utility.
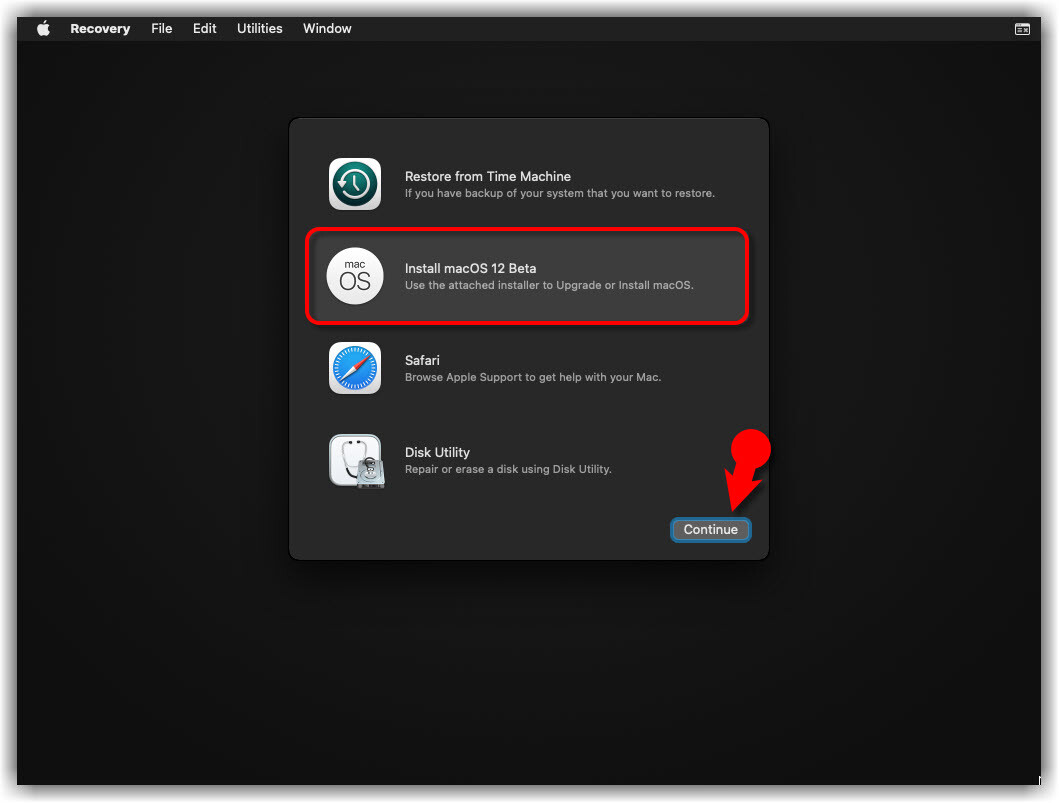
#9. Select Install macOS 12 Beta and click Continue.
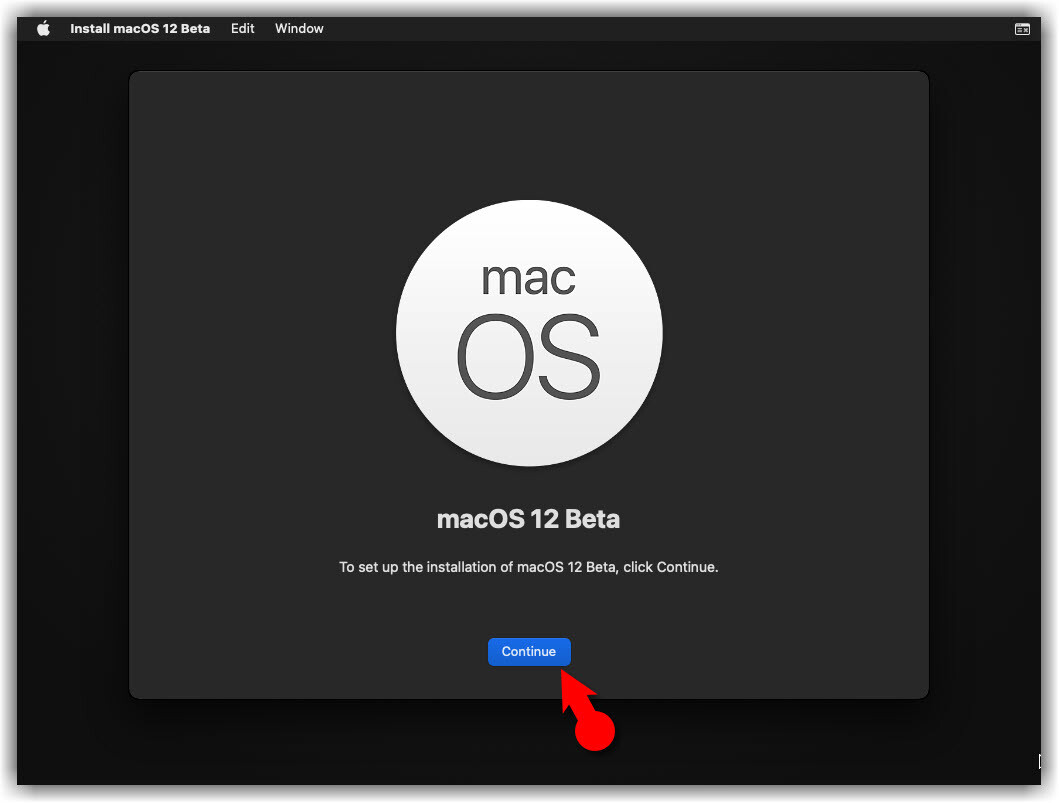
#10. Click Continue.
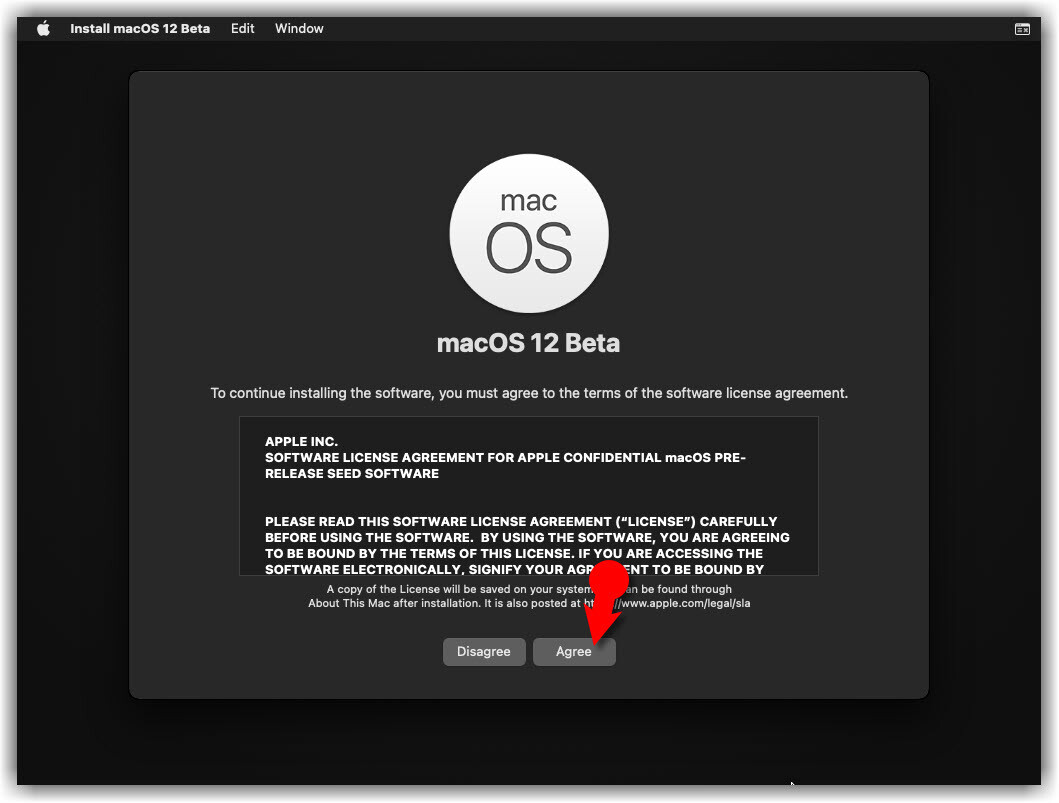
#11. You have to agree to the terms of the software license agreement.
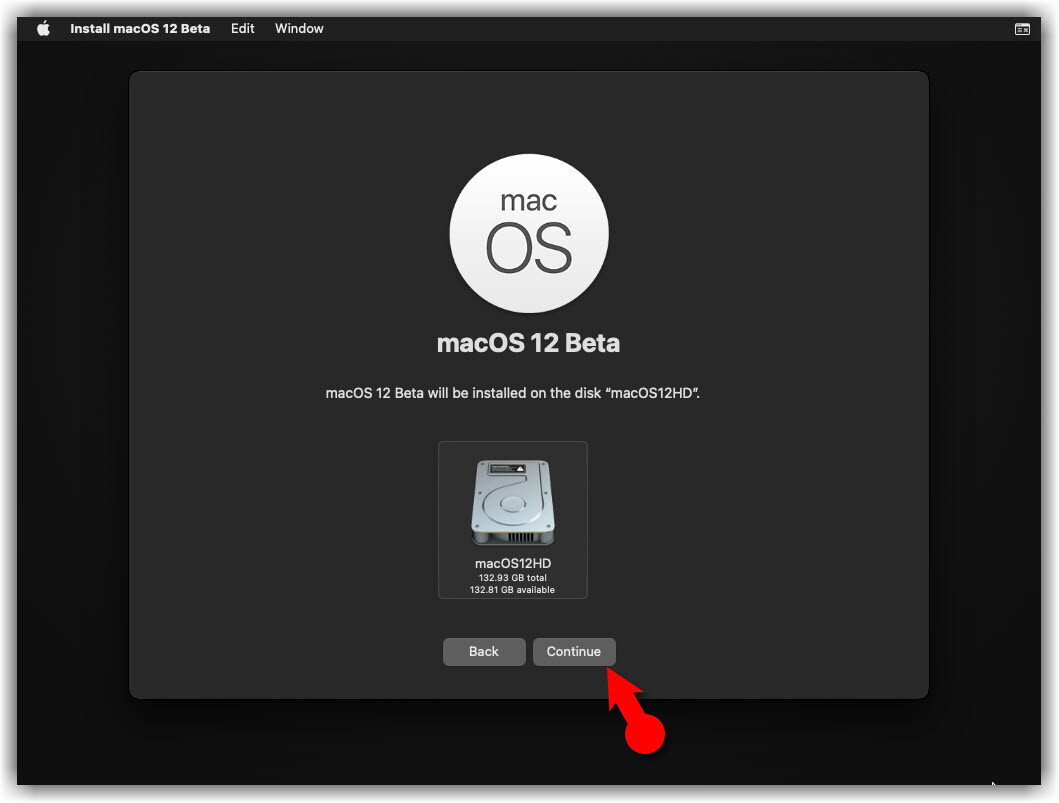
#12. Select the available disk then click Install.
NOTE: If you get the Operation Couldn’t be Completed BiErrorDomain Error 3 then follow this step by step guide to Fix the Operation Couldn’t be Completed BiErrorDomain Error 3.
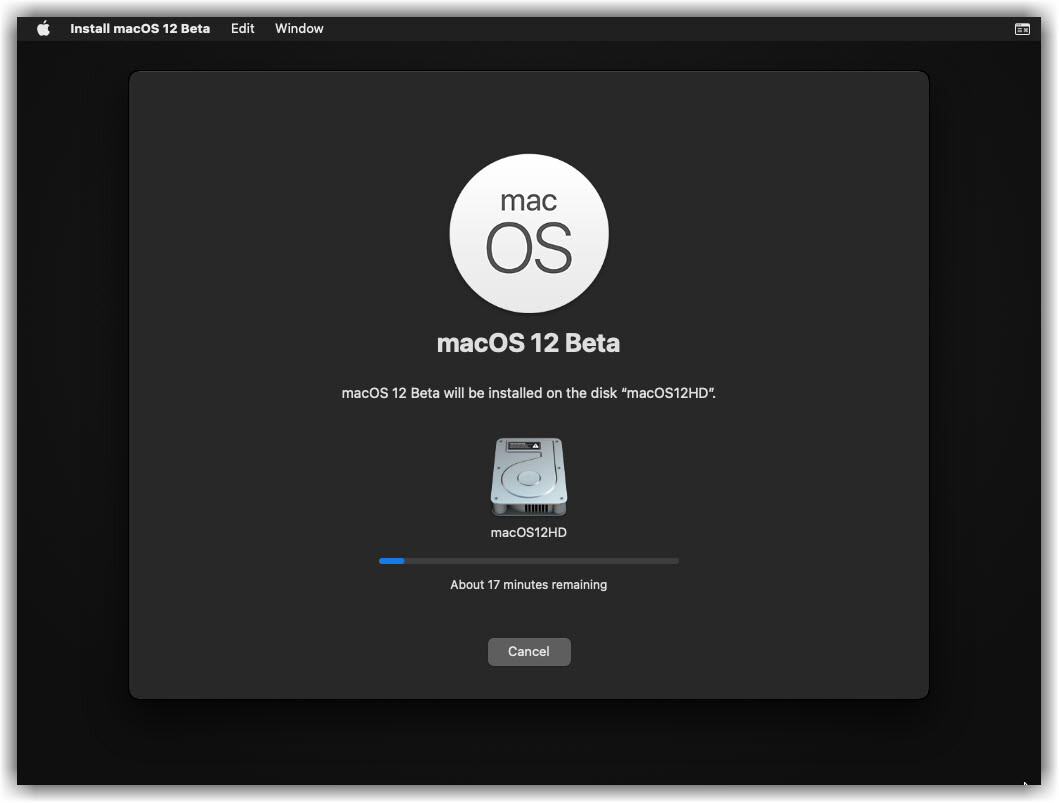
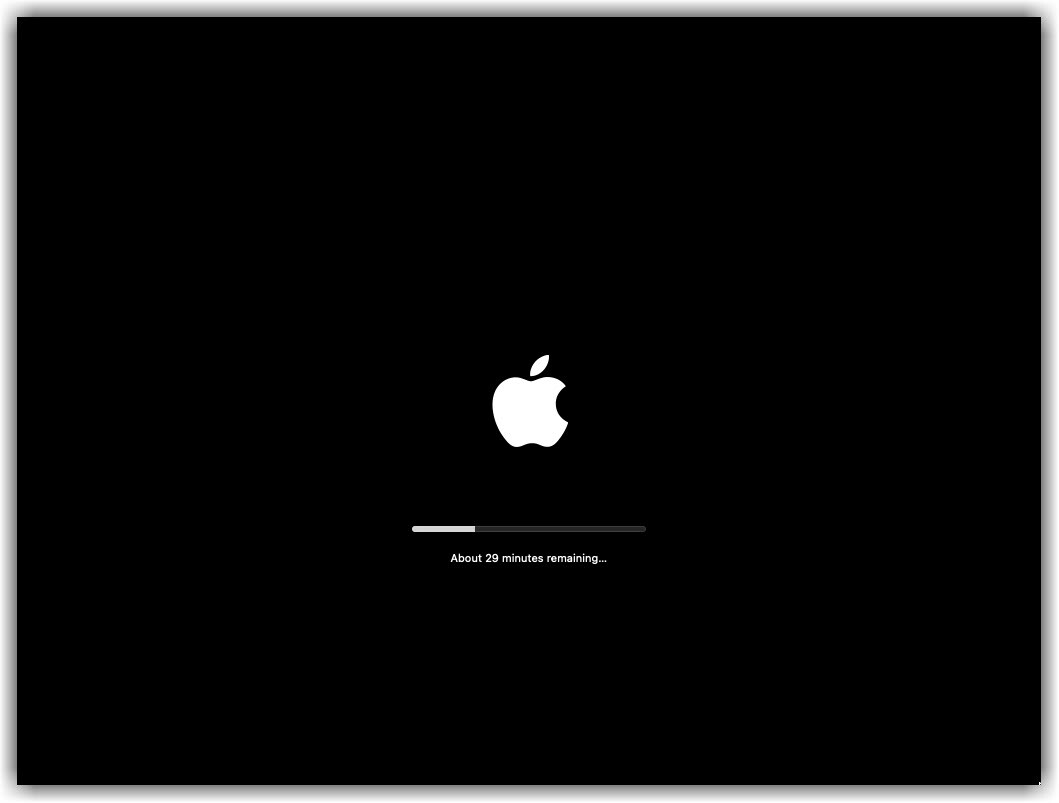
- Installing macOS Monterey on VMware 01
- Installing macOS Monterey on VMware 02
Step 7: Complete Basic macOS Account Settings
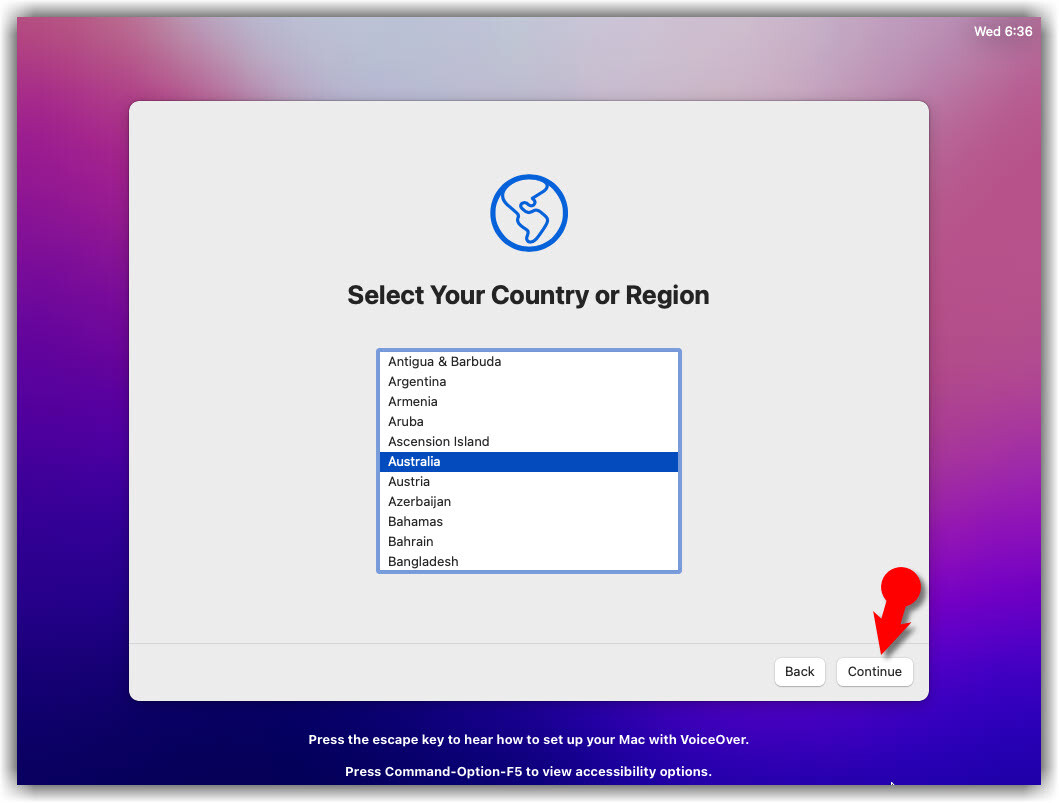
- Select your Country and click Continue.
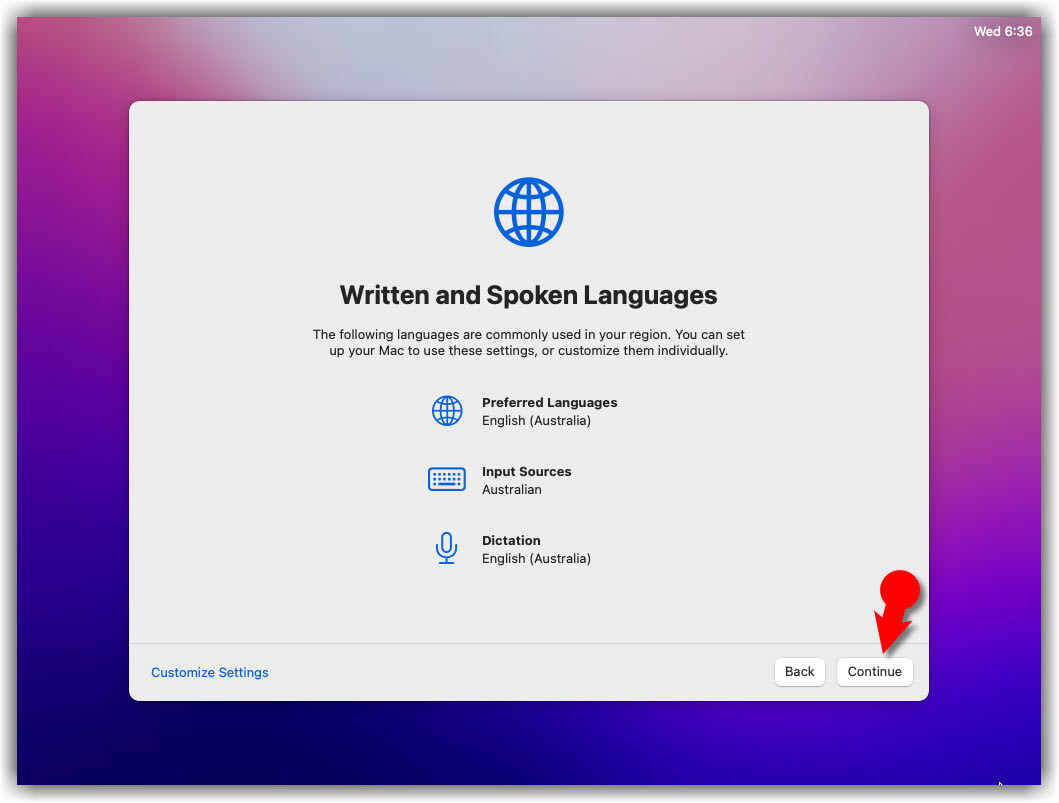
- Choose a Keyboard layout and click Continue. If you don’t agree with preset options then you can customize them. Just click Customize Settings.
- Select Your Country or Region
- Customize Written and Spoken Languages
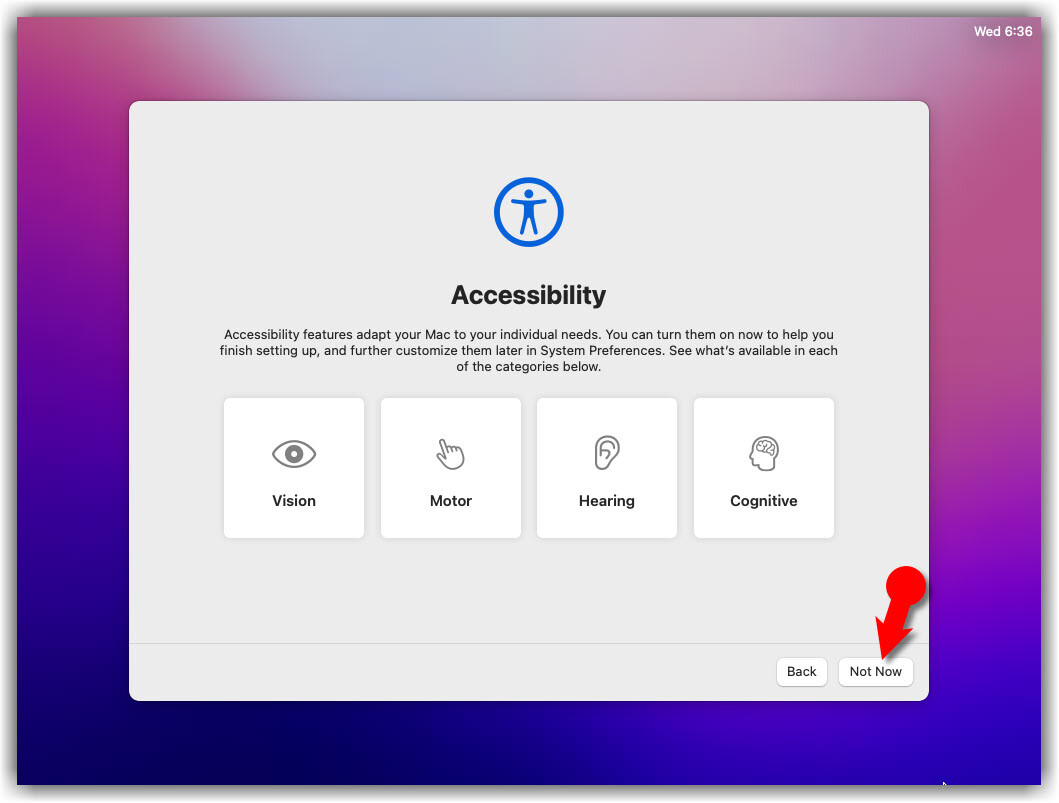
- You can turn on the Accessibility features now with macOS Monterey. You’ve several options with accessibility like vision, motor, hearing, and cognitive. If you don’t want to set it up right now, just click the Not Now button to skip them.
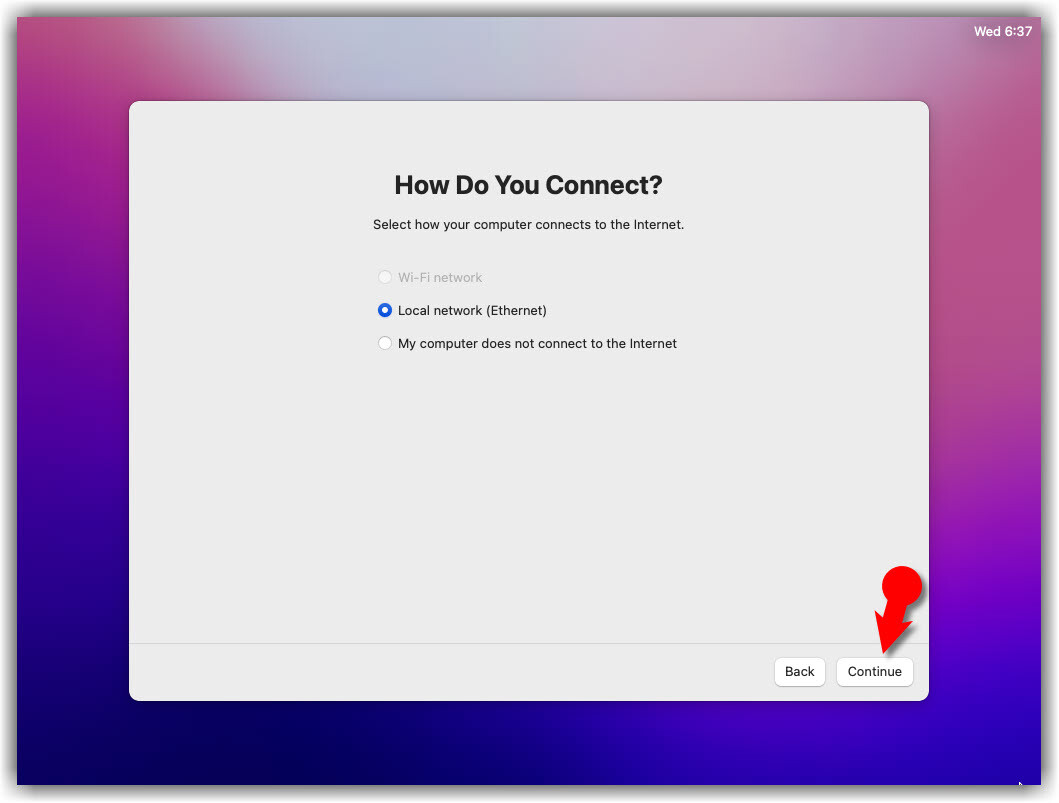
- Select how your computer connects to the internet. I recommend choosing My computer does not connect to the internet.
- Local Network
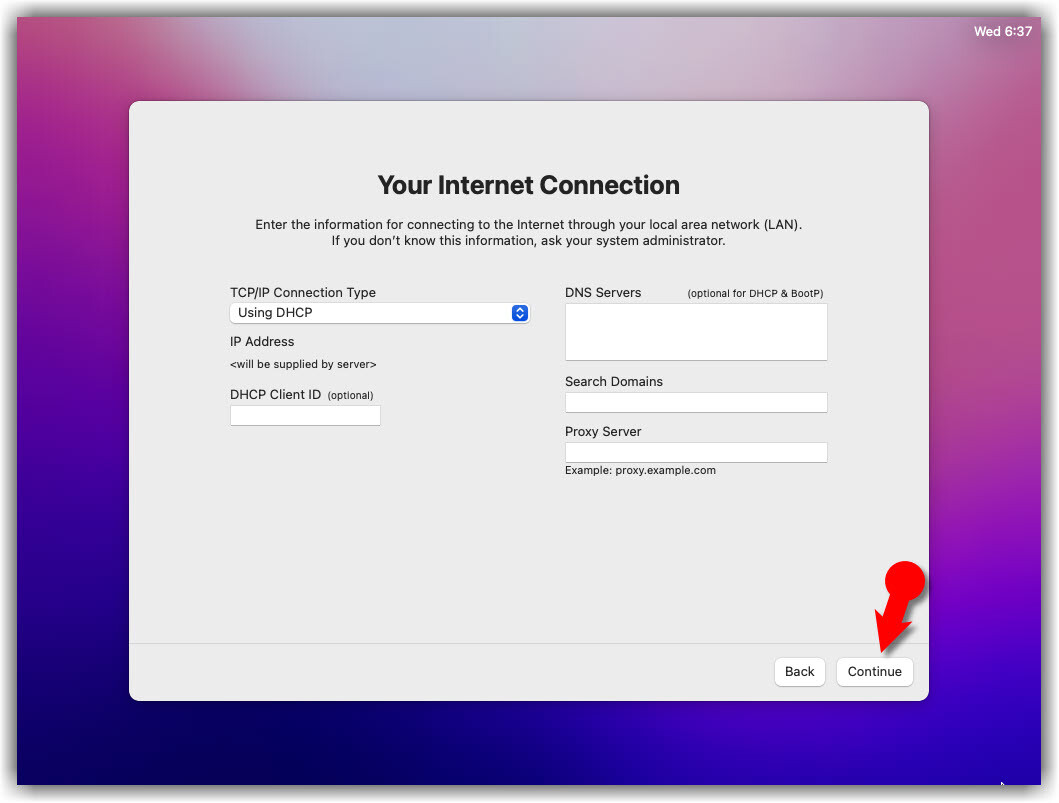
- Your Internet Connection DHCP
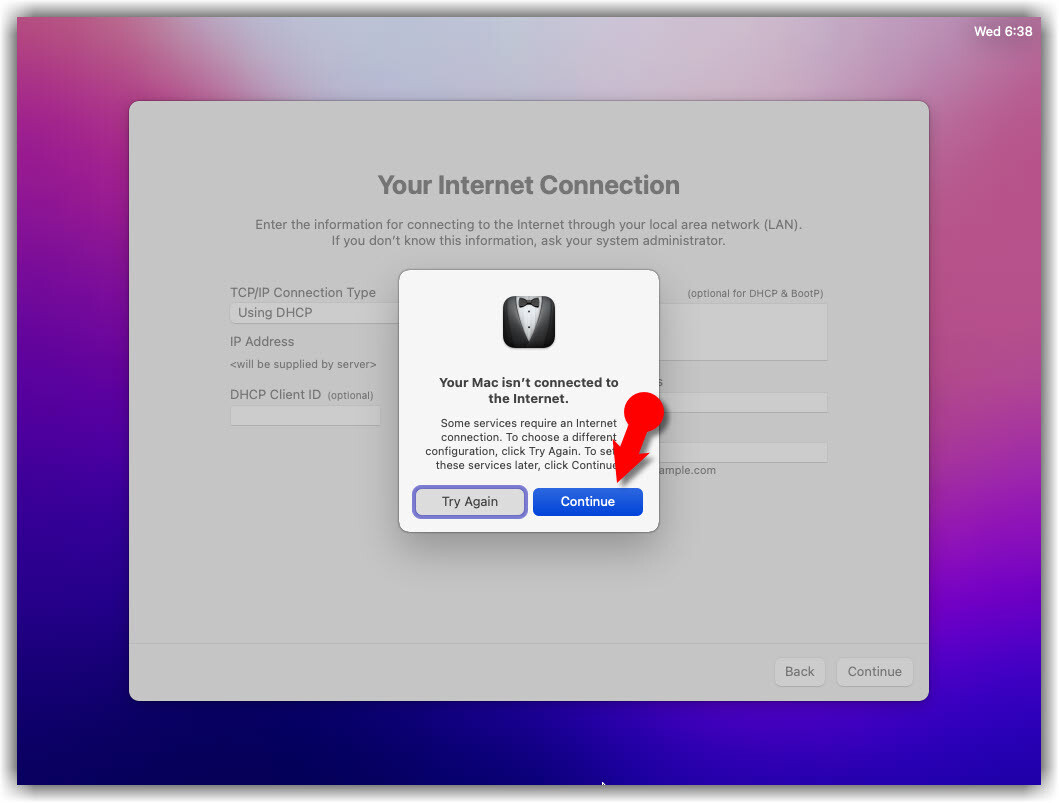
- Your Mac isn’t connected to the Internet
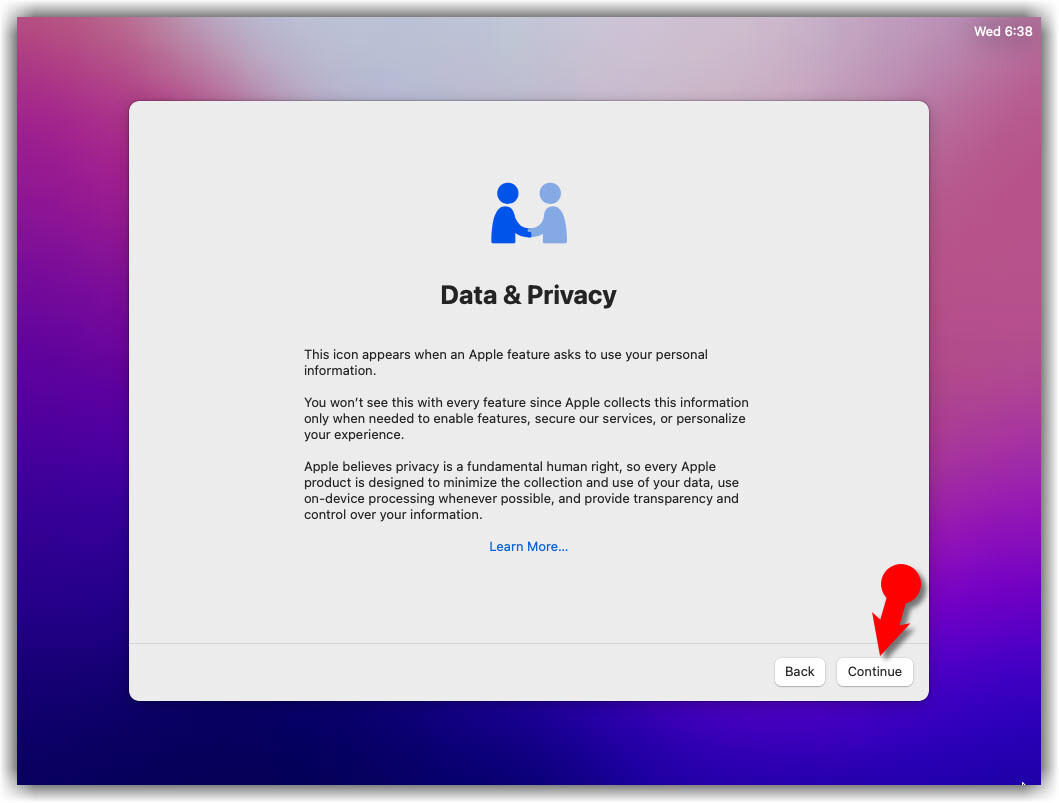
- Read Data & Privacy and click Continue.
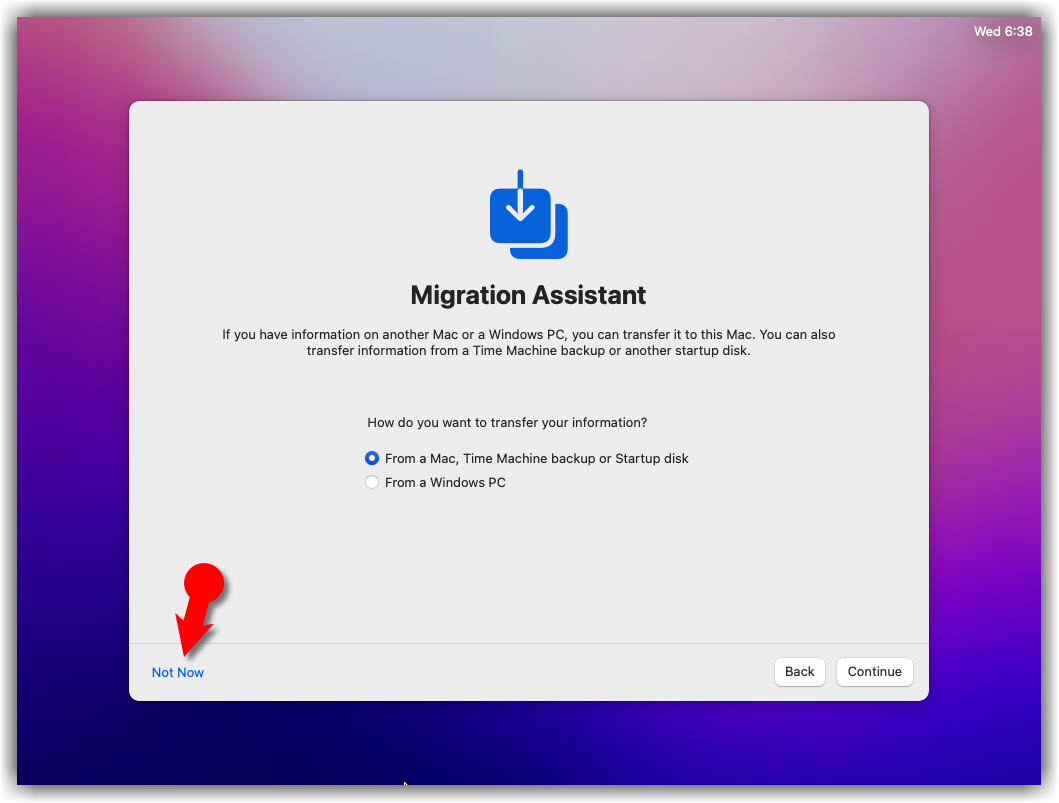
- On the Migration Assistant page, click the Not Now button to continue.
- macOS Monterey Data & Privacy
- How do you Transfer your Information
- Click on Set Up Later then Don’t Sign In. You can add your Apple ID later. IMPORTANT: Don’t sign in with your Apple ID since some people have mentioned in the comments section that they have issues with it.
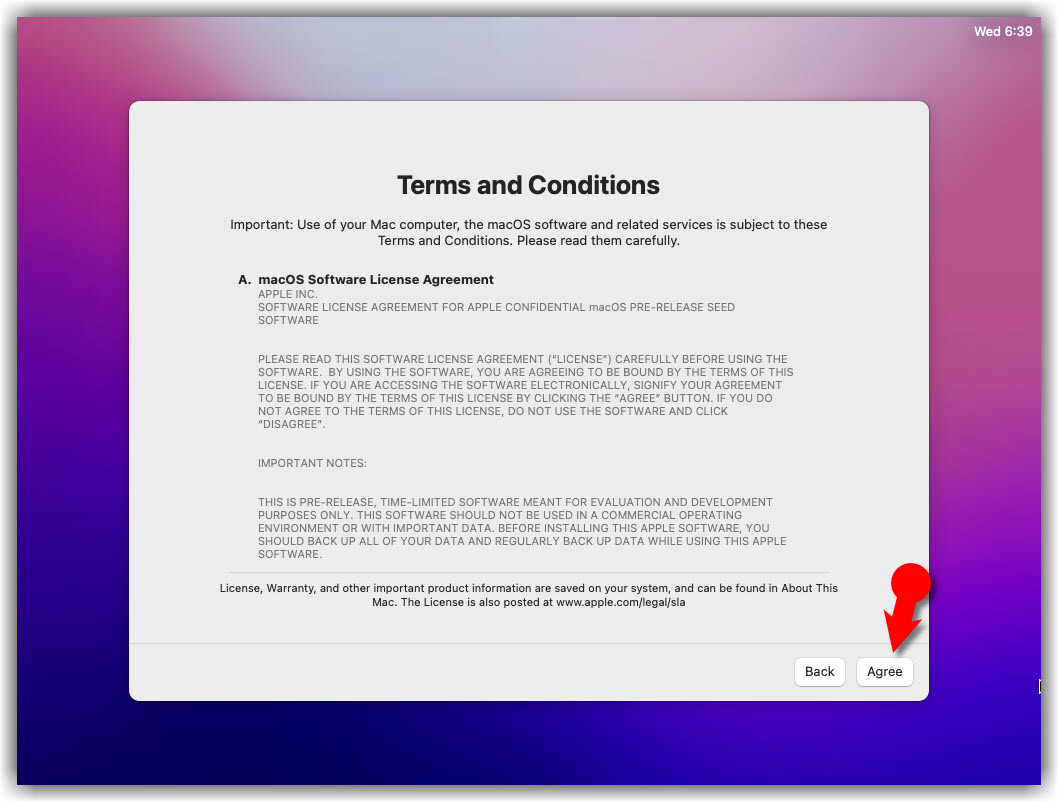
- Click Agree to the Terms and Conditions.
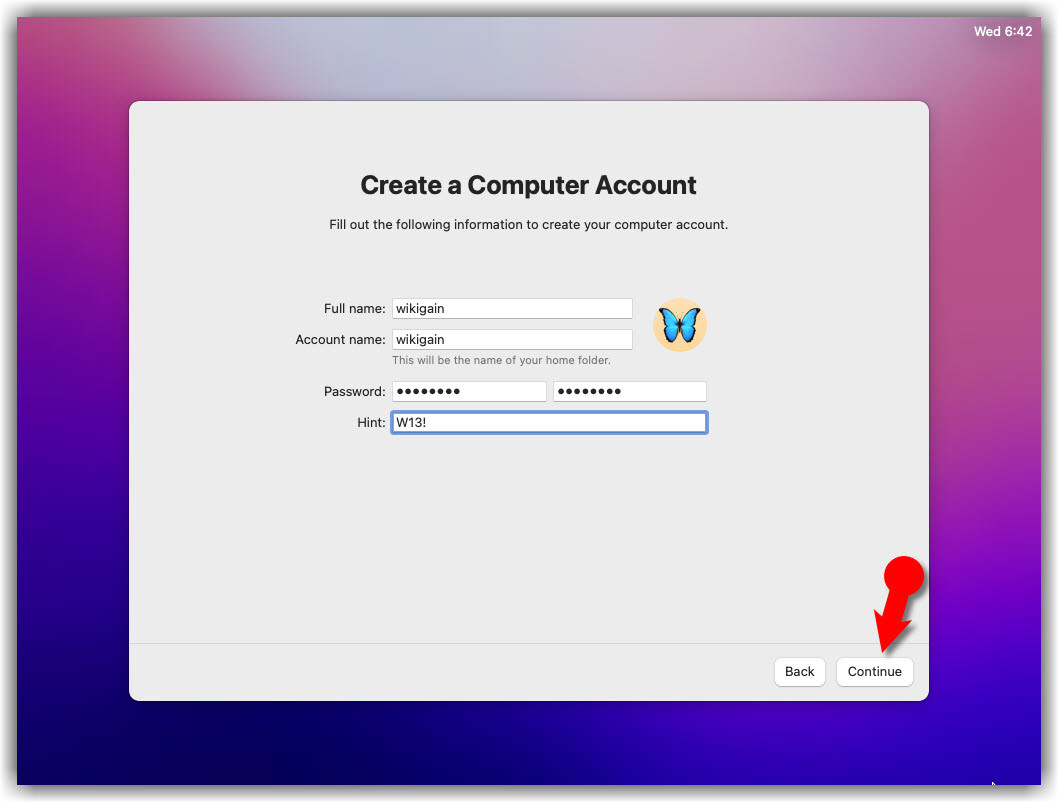
- Fill out the Full name, Account name, Password, and Hint then click Continue.
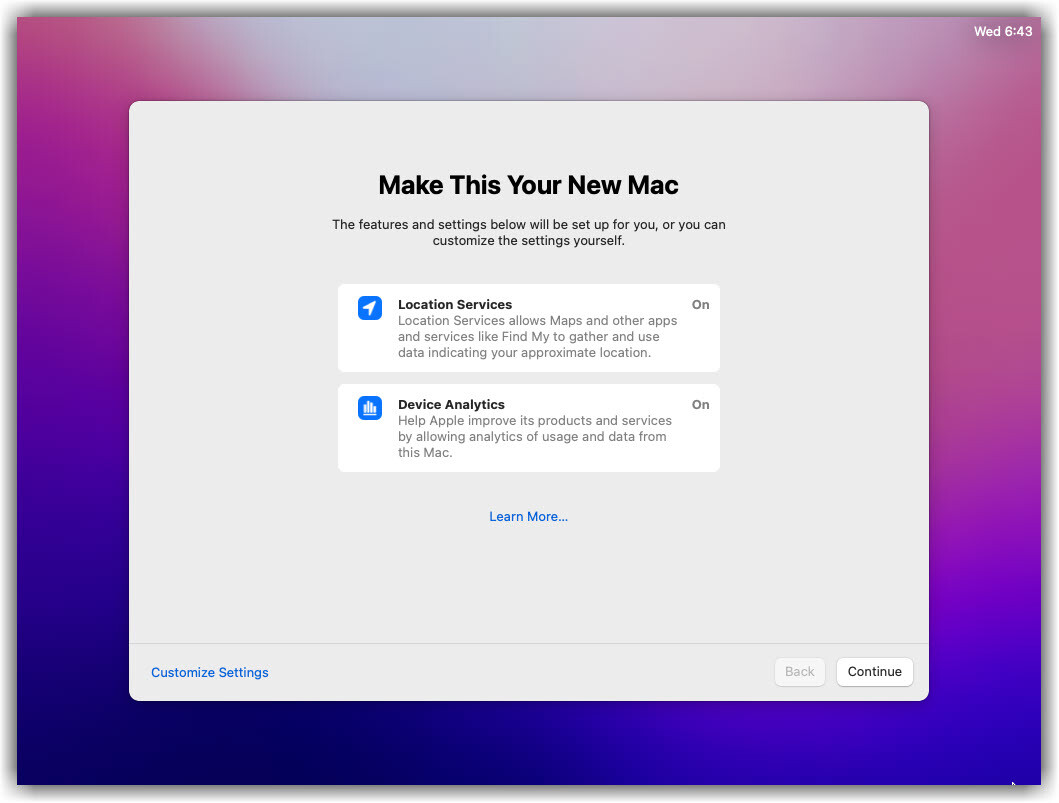
- Click Continue on Make This Your New Mac Window.
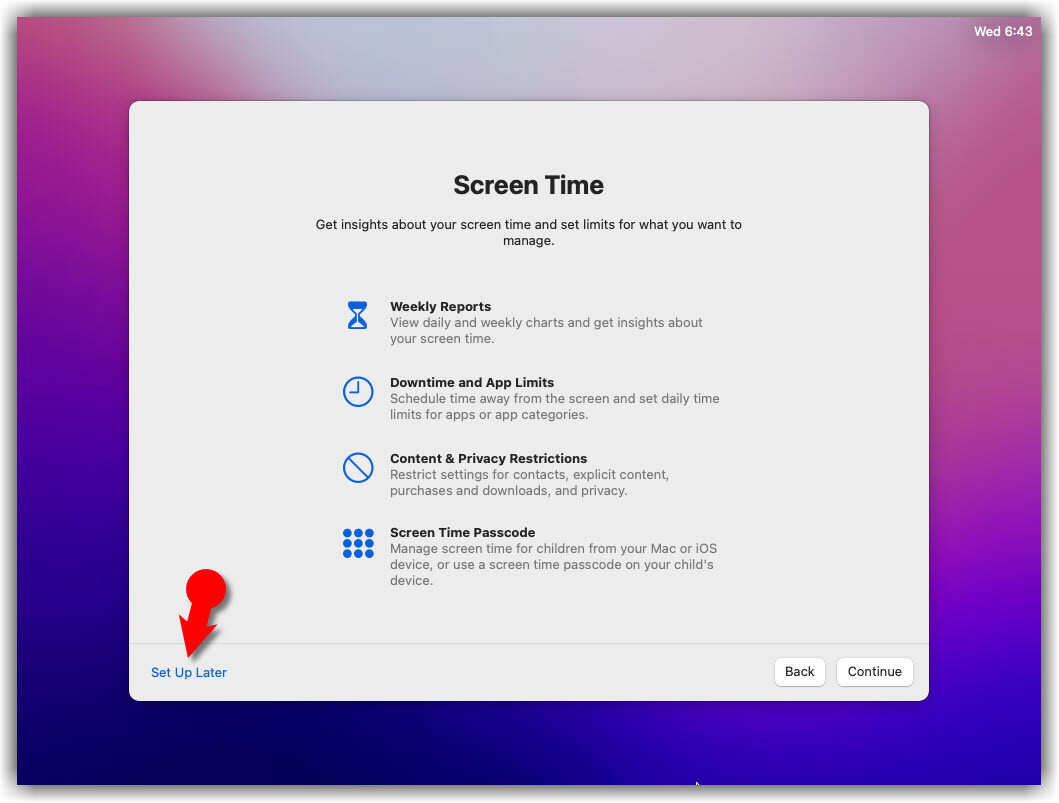
- On-Screen Time, click Set up Later.
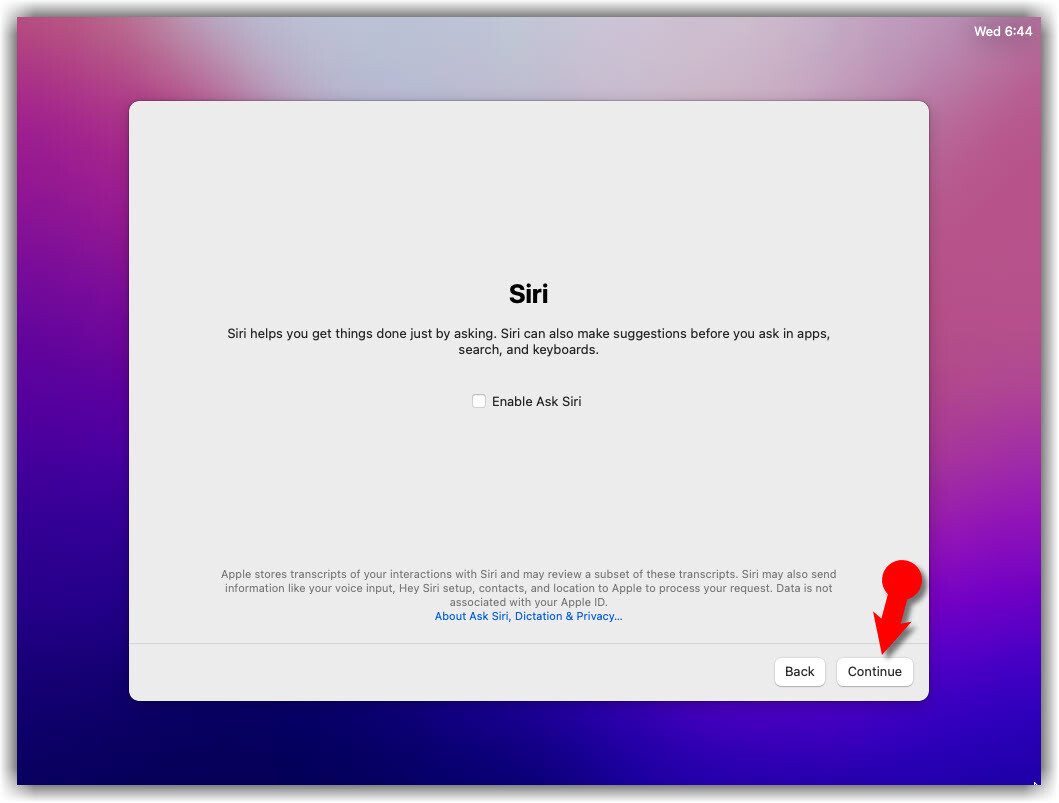
- Uncheck Siri and click Continue.
- Sceen Time
- Disable Siri on macOS Monterey
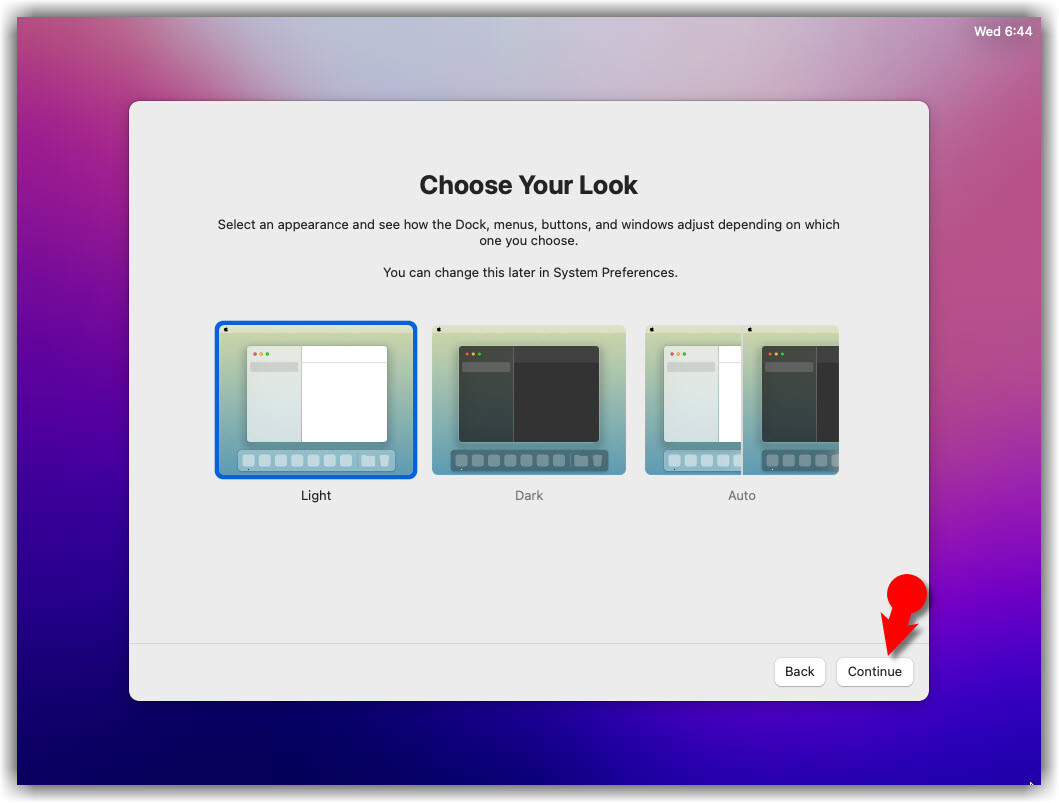
- Select an appearance theme and click Continue. Here you choose your dark mode if you want.
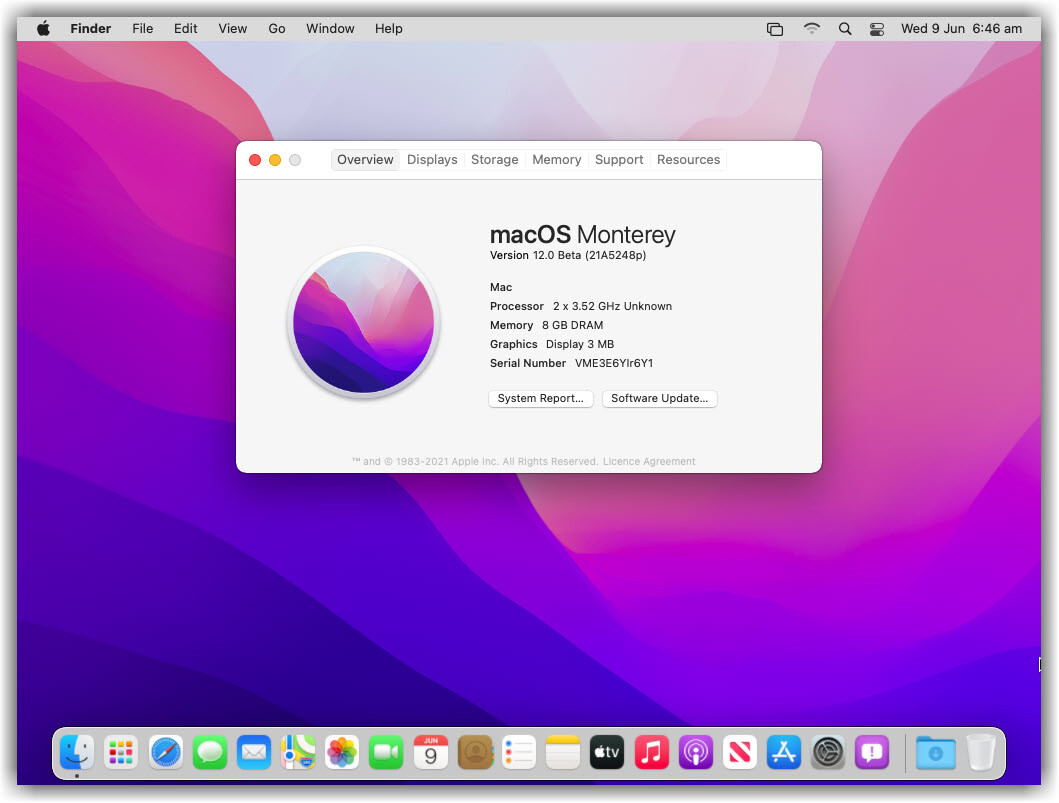
- Finally, wait a little while for macOS to finish setting up then it should boot into the macOS Monterey 12.0 Desktop.
Step 8: Capture a Snapshot of the VM
Pro Tips: If you’re running the Beta 1 version then follow the below steps otherwise, when you power off the VM it won’t load up the second time. This should be fixed in the next update.
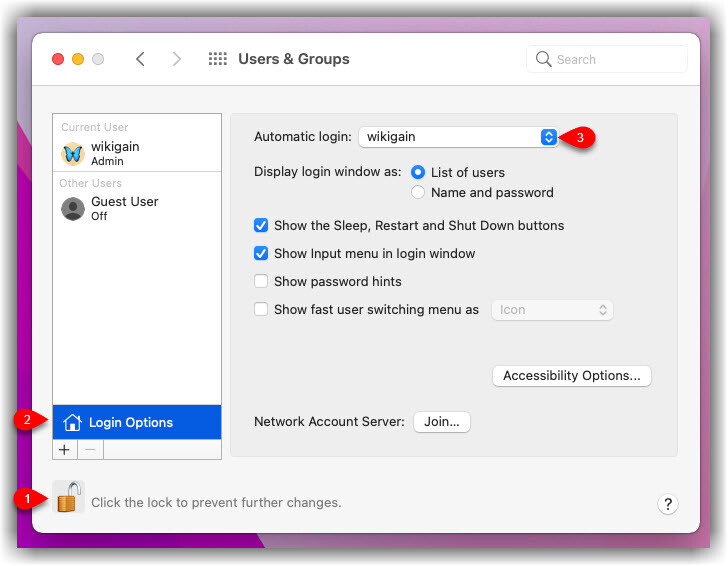
- Open System Preferences> Users & Groups. Click the lock icon and type your password. Click Login Options> Automatic Login should be your username.
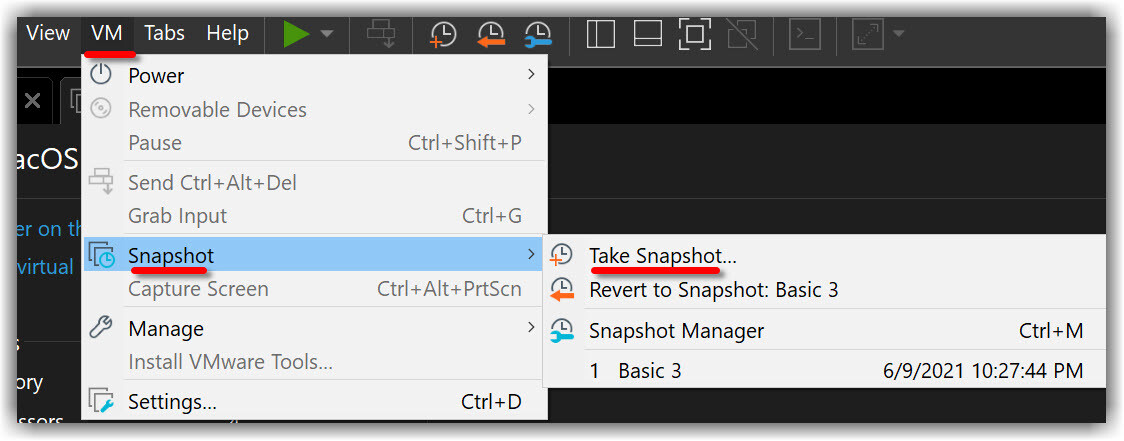
- Take a snapshot of the VM. To capture a snapshot of macOS Monterey, simply click on VM from the Menu bar> Snapshots and Take snapshots. Give it a description so that you understand later on what’s been done so far on this VM.
When something goes wrong then you always can run the snapshot and everything should from that point.
Step 9: Install VMware Tools (Optional)
So now you should have noticed that the resolution of macOS Monterey can’t be changed and it’s not working as smoothly as you expected. To fix macOS Monterey Resolution on VMware or Make it more responsive. You need to install something called VMware Tools. It’s quite easy and straightforward to work with any system. So to do that, we have created a comprehensive guide. Please click the link below and follow the guide Step by step.
See this guide: How to install VMware Tools on macOS Monterey
Conclusion
That’s all on the step by step pictorial guide on how to install macOS Monterey 12.0 on VMware on Windows PC. We covered the following:
- Download the prerequisites
- Install the Prerequisites
- Unlock VMware to Install macOS Monterey
- Create a New Virtual Machine
- Edit macOS Monterey VMX File
- Start macOS Monterey Virtual Machine
- Complete Basic macOS Account Settings
- Capture Snapshot of the VM
- Install VMware Tools (Optional)
If I left out something and didn’t mention please let me know by commenting down below this post. Please share your feedback with us if the above guide worked for you. It would help if you also share some of your system information through the comments section below. We have lots of new posts related to macOS Monterey so stay up to date with us.



1st question is how can i install vmware tools to get full screen of macOS virtual machine
2nd question as I installed macos vm I have an option to upodate software to macos 12.6 or 13 can I do it or it will cause problems
Hi ! i can install this thanks ! but i facing a problem, that my display, only shown 1024 x 768, my real display is 1920 x 1080. anything i can do to fix this ? i rlly need that. thanks!
DOWNLOAD AND INSTALL VMWARE TOOLS!!!!!!!!!!!!!!!!!
Hi
I download iso file from mediafire and start to install on vmware, but when installation is about 50% it show a message that installer is corrupted, and I should redownload installer.
I download iso again, But I get the same error.
What should I do?
hello after installation process given by you my mac os failed to connect with internet
i have done steps shown by you.
please tell solution to enable my internet connection
same problem here. did you solved?
Hello, I have the problems that Mac OS X Monterey crashes after a few minutes under Vmware 15 and that Mac OS X Monterey cannot be restarted and Mac OS X Monterey under Vmware does not get an IP address, it doesn’t matter what IP address is Enter address. Is there no better ISO file?
3d graphics acceleration shows as disabled. There was a fix with Big Sur, but I have yet to find a fix for Monterey.
Quoting user James Walker:
“I found a fix for AMD users, it’s the same sort of issue as Mojave on AMD.
I am running Workstation Pro 16 and had these lines added to the stock vmx file.
I’ve not installed it yet but it’s actually got past the point where it would say that the CPU was halted.
hw.model = “MacBookPro14,3”
board-id = “Mac-551B86E5744E2388”
smc.version = “0”
cpuid.0.eax = “0000:0000:0000:0000:0000:0000:0000:1011”
cpuid.0.ebx = “0111:0101:0110:1110:0110:0101:0100:0111”
cpuid.0.ecx = “0110:1100:0110:0101:0111:0100:0110:1110”
cpuid.0.edx = “0100:1001:0110:0101:0110:1110:0110:1001”
cpuid.1.eax = “0000:0000:0000:0001:0000:0110:0111:0001”
cpuid.1.ebx = “0000:0010:0000:0001:0000:1000:0000:0000”
cpuid.1.ecx = “1000:0010:1001:1000:0010:0010:0000:0011”
cpuid.1.edx = “0000:0111:1000:1011:1111:1011:1111:1111”
featureCompat.enable = “TRUE” “
works but avx and avx2 is not present. i check via cpu z is detected avx and avx 2 is available in my computer. i dont know
Internet is not working…
I was able to install it on mine. The only issue I ran into was that it had no network connectivity. I thought I had gotten something wrong but when I installed it 3 more times and ran into the same issue every time, I knew it wasn’t my own mistake. So I did some googling and found how to fix the network connection on Monterey on VMware:
1. Close VMware
2. Open the vmx configuration file of the installed VM
3. Look for the line called: ethernet0.VirtualDev = “e1000e”
4. Change “e1000e” to “vmxnet3”
5. Save the configuration and start your VM again
Your network should be working now. I don’t know if this will work for everyone but it did for me.
This fixed the internet issue
https://intozoom.com/fix-network-connection-on-macos-monterey-on-vmware/amp/
I used to host Big Sur and wanted to try Monterey. I’m facing issue at start with an AMD Ryzen 7
3800XT : The CPU has been disabled by the guest operating system. Power off or reset the virtual machine.
Tried multiple things such as hiding CPUID but the issue persist. If anyone have or had the same issue, I’m done for a chat. Feel free to answer this comment for follow-up.
Doesn’t work with AMD CPU?
“The CPU has been disabled by the guest operating system. Power off or reset the virtual machine.”
Sorry, forgot to mention I have a 5900x.
same issue with a R7 3800XT.
I tried to hide CPU ID, the issue persist.
any update on your side since your post ?
I have followed all steps correctly. I am stuck at Apple Logo when I press start. Help!
Me too.
Thanks Jared, but it’s not necessary anymore. I have now an ISo made with an iMac. But I had the same issue with an Catalina image before. I can establish it in VMWare w/o problems; but even if I start the machine I have 100% cpu usage and can’t do anything. I already changed the virtual cpu and RAM. But nothing helps.
I use a notebook (HP Elitebook 850 G3) with 32GB RAM and a cpu: Intel(R) Core(TM) i5-6300U CPU @ 2.40GHz. But I think, it is not enough or something like that…
To all those commenting about the internet issues – it just seems to be a driver issue with macOS 12 beta in general. I’ve tried using a different image with the same issue. For now, it’s best to give up and stick with 11 until Apple releases the final builds and the VMWare devs can fix it.
Correction – I now have networking with bridging on Beta 2 🙂
Per Les below:
‘You may want to change the ethernet0.virtualDev = “e1000e” to ethernet0.virtualDev = “vmxnet3” in your VMX file.’
Do not replace the full line. Just remove e1000e and insert vmxnet3
Hi, after following the exact steps, still getting error about cpu stop working. My laptop using AMD Ryzen 5 4500U with Radeon Graphics 2.38 GHz, installed RAM 8.00 GB (5.87 GB usable) and running Windows 11 Pro Insider. Any ideas?
Is Ryzen 5 4500U even supported on the host Windows 11? From what I recall it isn’t, and macOS won’t like it either. You’re running beta software on top of beta software which is a recipe for disaster. Please try running VMWare on a stable Windows 10 build, or if you do not wish to wipe your OS and reinstall. try booting off a Linux Live USB instead.
Thank you for clear instructions. Got it working on a Dell XPS 15 i7-7700HQ.
Its very slow though, VM has 8GB Ram and 2 processors.
No issues here with slowness on an i5 10th gen, 2×2, 8GB RAM
Same specs but having major issues with performance apparently due to the VMware Tools. After first installing VMware Tools everything worked well, but then I ran the VM a day or two later and it was grinding to a halt (very slow, problems with the mouse/trackpad etc). Running 16.2.2 on i5 10th gen with 2×2 processors & 8GB RAM for the VM, it was choking the whole system. I reinstalled the VMware Tools multiple times but it didn’t help, then uninstalled & installed different version of VMware Tools (I had initially made a Catalina VM and then updated to Monterey through macOS, so I can rule out problems related to the iso) but no luck. Uninstalling VMware Tools resolved most of the performance issues, the operation is still less than smooth but at least usable.
This fixes the Ethernet issues:
You may want to change the ethernet0.virtualDev = “e1000e” to ethernet0.virtualDev = “vmxnet3” in your VMX file.
Thank you so much for this solution. It works great for me 🙂
Did not fix for me using NAT or bridging 🙁
Correction – this is now working for me with bridging on Beta 2 🙂
I also cannot get the Ethernet Interface to work like others here.
I have deleted the interface and re-added. Changed from NAT to bridge. Setup manual IP addresses, etc. No go on the Network. Too bad because this was very responsive for me and seemed to be interesting. But without a Network, computers are worthless to me. Hopefully someone will post a fix for this.
I had a similar issue but this should fix the network connection issue for you.
1. Close VMware
2. Open the vmx configuration file of the installed VM
3. Look for the line called: ethernet0.VirtualDev = “e1000e”
4. Change “e1000e” to “vmxnet3”
5. Save the configuration and start your VM again
Your network should be working now. I don’t know if this will work for everyone but it did for me.
Great article! I was able to install Monterey on VMware workstation without issue
WiFi not working. Any Idea how to fix ?
I had a similar issue but this should fix the network connection issue for you.
1. Close VMware
2. Open the vmx configuration file of the installed VM
3. Look for the line called: ethernet0.VirtualDev = “e1000e”
4. Change “e1000e” to “vmxnet3”
5. Save the configuration and start your VM again
Your network should be working now. I don’t know if this will work for everyone but it did for me.
Thank you for putting this together. it is really helpful. I did run into one issue. the DHCP client macOS could not get the IP address. I tried NAT, Host only. it did not work. I also tried to setup IP address manually to match the configure with other VM I have inside vmware workstation 16 pro. no luck at.
How is you instance, have you gotten the network to work?
Hi, thanks for this step by step procedure. very usefull.
I have an issue : I have vmware installed on a laptop with internet (of course) but the vm cannot access internet (WiFI): How can I fix this problem.
Thanks again
Hi, thanks for this step by step procedure. very usefull.
I have an issue : I have vmware installed on a laptop with internet (of course) but the vm cannot access internet : How can I fix this problem.
Thanks again
After installing macOS, it could not connect internet. Would you please let me know what is the problem?
I’ve installed the os but I can’t get it to connect to the the internet or wifi.
Hey, great description; thanks. Do you have another download possibility for the macOS image? The link above takes too long to get it.
BR,
Andreas
I can start a torrent with a VMWare image if that helps.