In this article, I’m going to show you how to initialize New Hard Drive on Windows operating system. It doesn’t matter if you are using Windows 10 or Server operating system. This method is going to work for both OSs.
Related: Create New Local Drive in Windows 10 and Delete it Back
When Do We Need Disk Initialization?
When you install a new hard drive on your system or on VMware Virtual Machine so it doesn’t appear by default or automatically. So we need to do some configuration to make it up and running. Also, when you shrink a volume and want to split a large disk into two small disks then you need to initialize the new volume. In this guide, I’ll show you step by step to do it. Just follow the steps below.
Initialize New Hard Drive on Windows or VMware
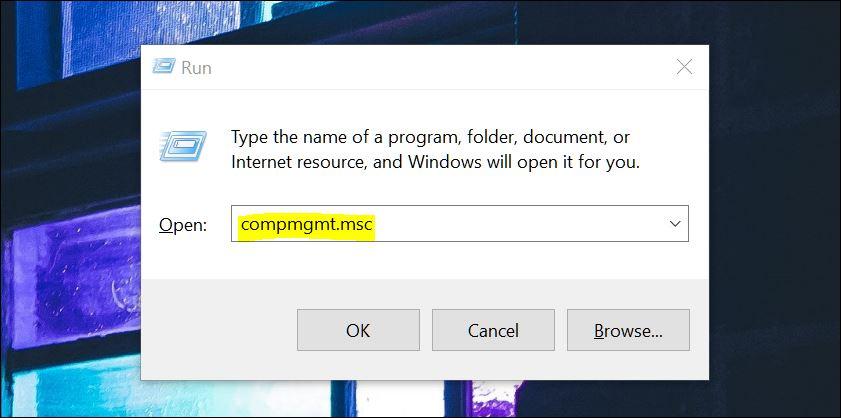
Step #1. First, you need to open up the Disk Managment or computer management. In this case, I open computer management. Press Windows key + R. In RUN window type compmgmt.msc. This command will open computer management.
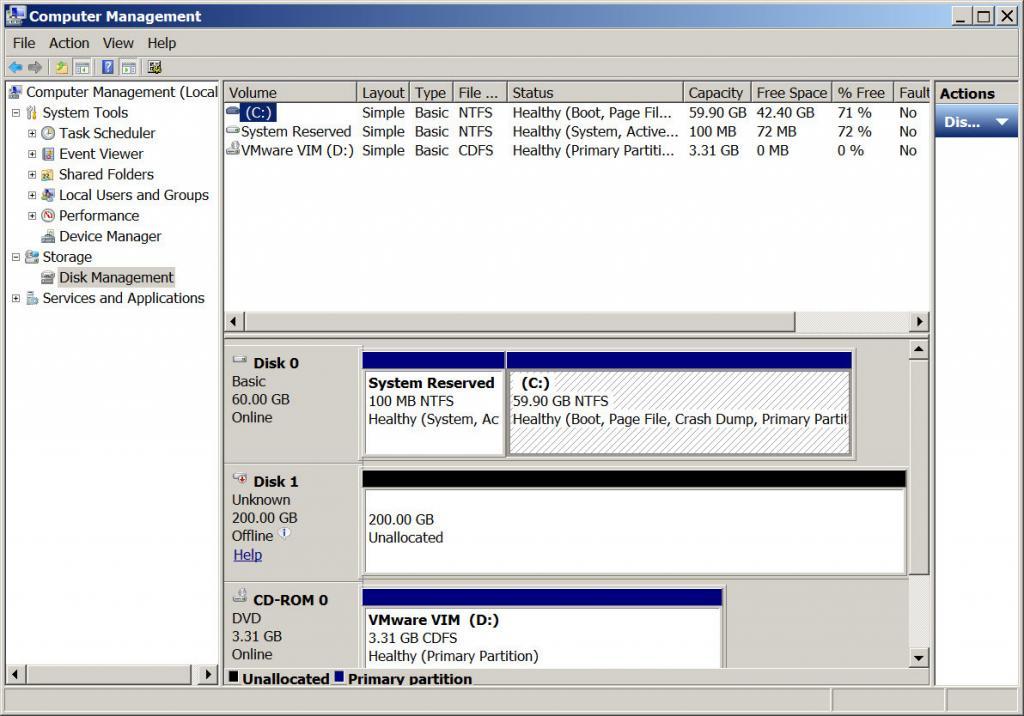
Step #2. From computer management select disk management. As you can see that my new disk is offline. Right-click on the Disk which is offline and clicks Online.
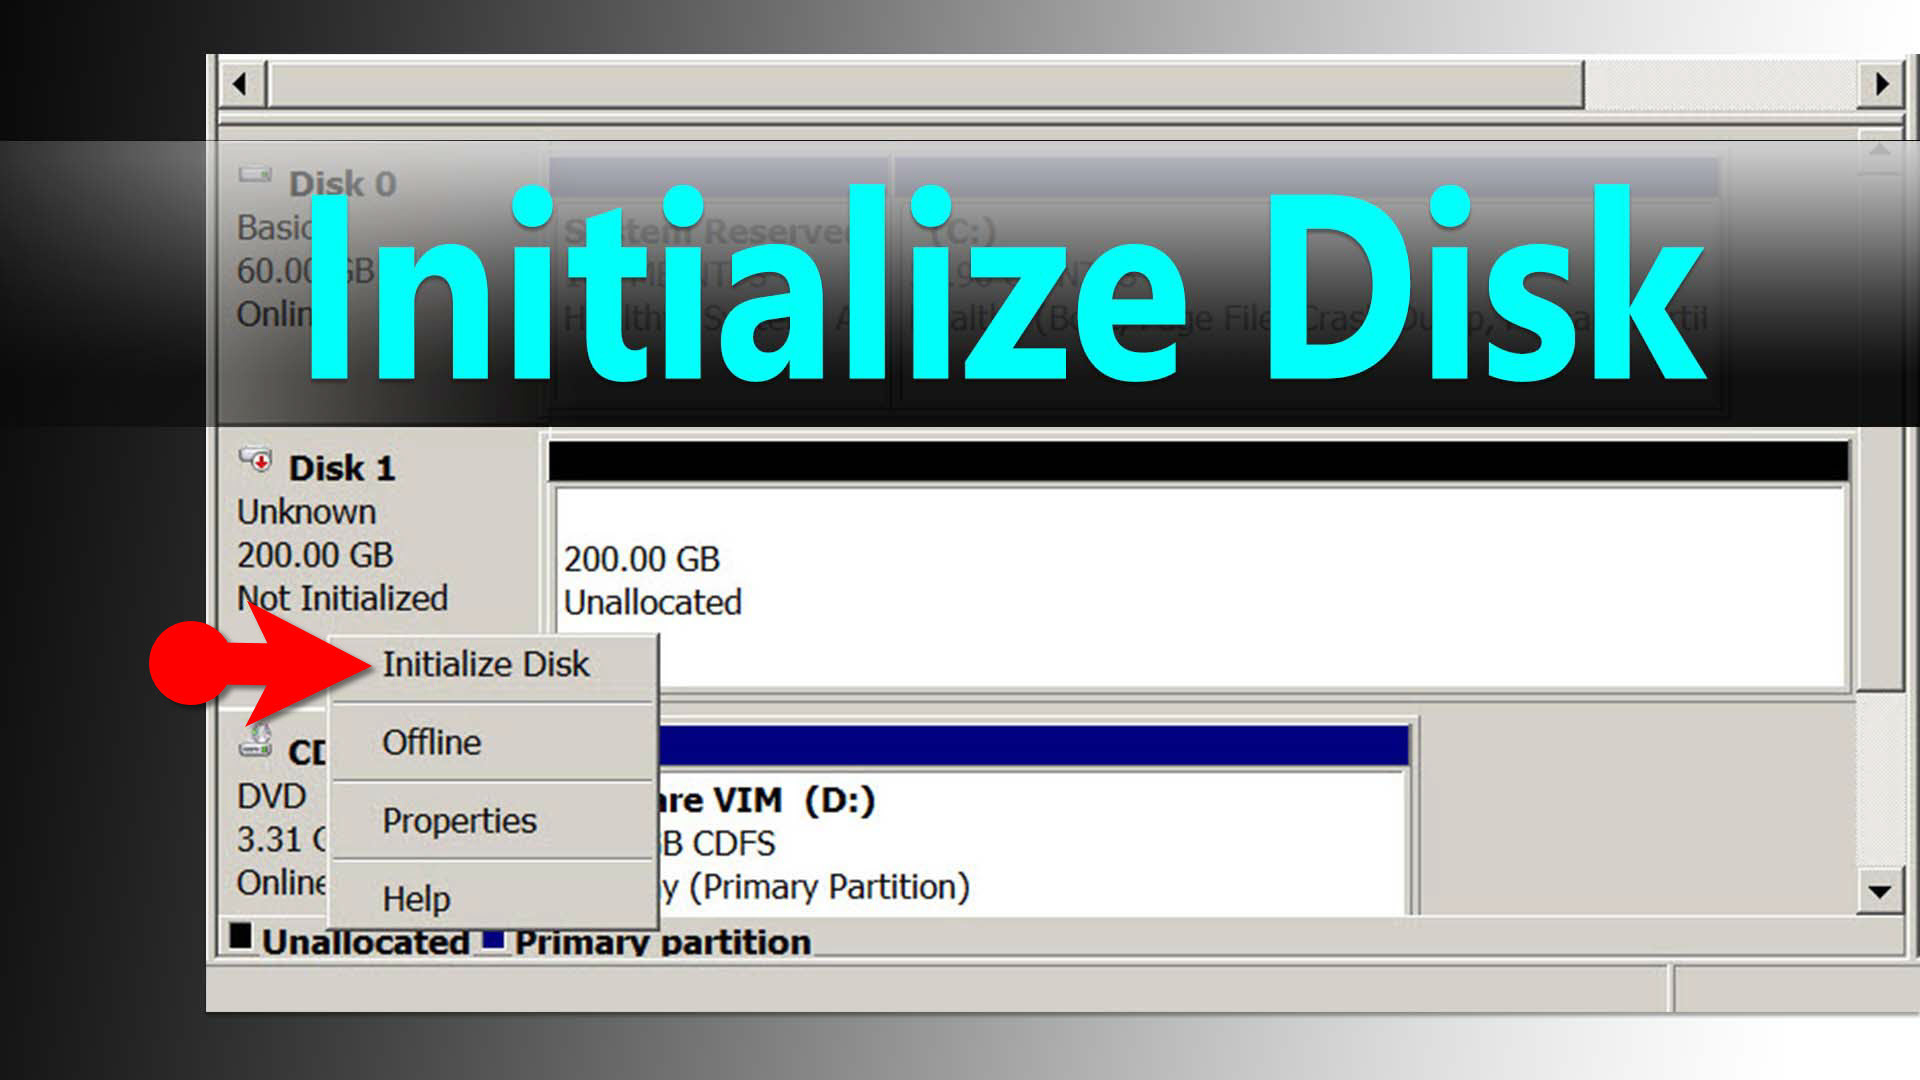
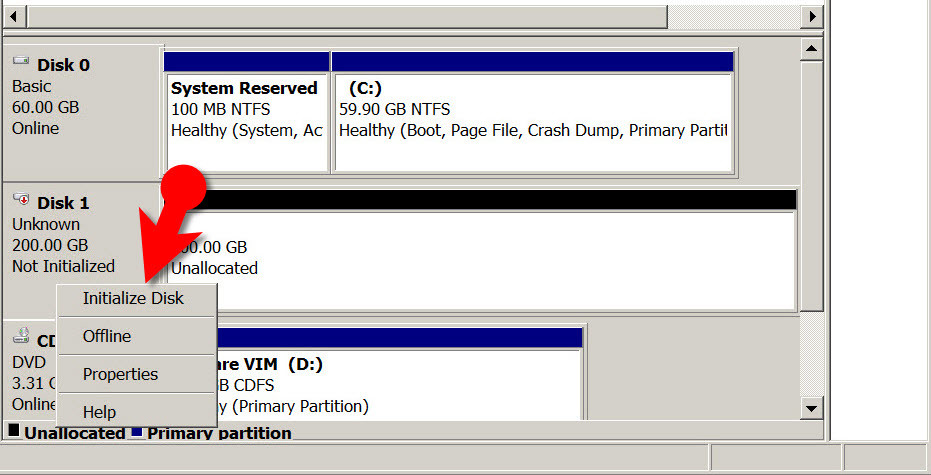
Step #3. Once the disk becomes online then again Right-click on the disk and select Initialize Disk. Click Next and finish the task.
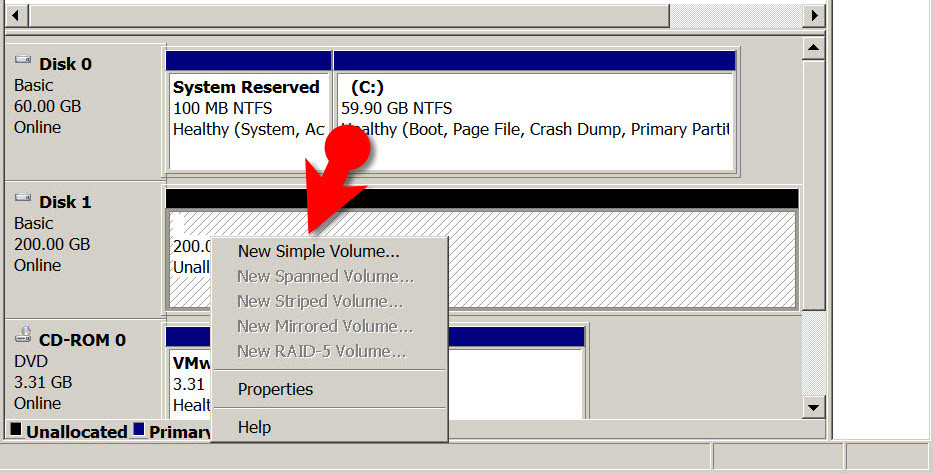
Step #4. Again Right-click on the Disk and this time select “New Simple Volume“. Click Next.
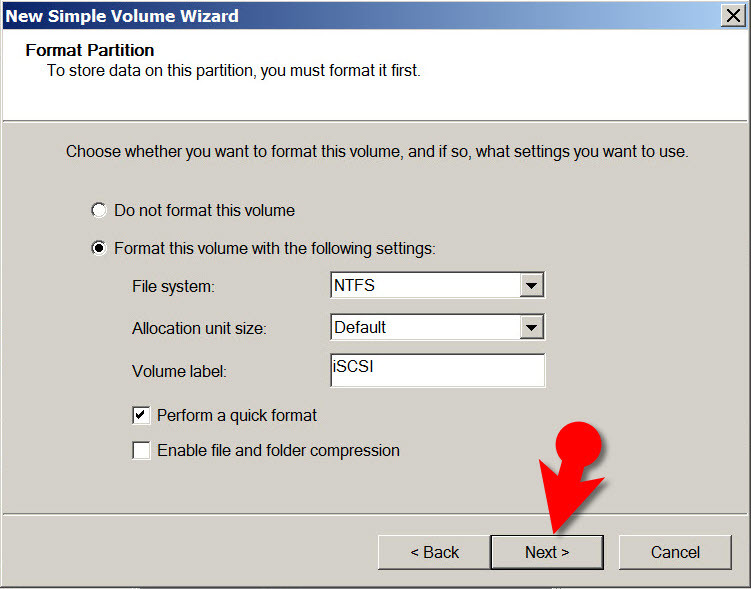
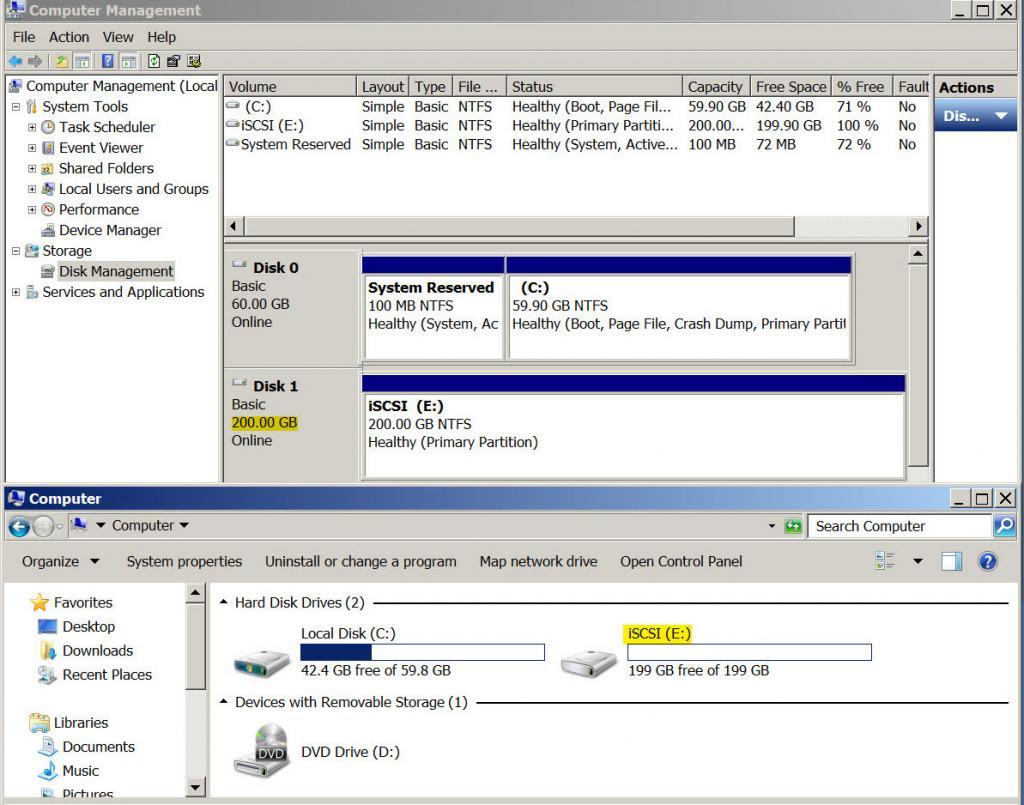
Step #5. Name the Volume anything you like. In my case, I’m going to name it iSCSI and select NTFS as a file system. Click Next and Finish.
Conclusion
In this guide, I’ve shown you how to initialize new Hard Drive on Windows server and you can follow the same steps on Windows 7, 8 and Windows 10. It’s not a big problem. If you have any question please feel free to hit a comment below this post and we try to answer them within 24 hours.
Video Guide: https://www.youtube.com/watch?v=uA7bEOTVinw

Leave a Reply