In this article, I’m going to show you how to backup your macOS data to an external drive using Time machine. Backing up your data and your system is an extremely important task to do regularly. Especially in this era that there is a high chance of system interruption due to system or hardware upgrade. Read more here about the importance of backing your data. In this post, I’m going to use the default macOS Time Machine backup solution which is an amazing free tool to backup your data to an external drive or another drive on your macOS if available.
Why you Should Back up your Mac
You might probably know a few things about why you should back up your data and your system. However, I’m going to outline a few reasons why you need to back up your files.
- Because you or someone else might tip over a drink on your Mac.
- Because your system drive could fail.
- Because it can be particularly challenging to recover data from SSDs.
- Because you could lose your Mac.
- Because someone might steal your Mac.
- Mac malware is rare, but if you get hit, you can recover your data from before the infection.
- Because you could have access to your data from another device.
- You might be able to access an earlier version of a document.
- If you get a new Mac you can easily recover all your data onto it, essentially clone your old Mac onto your new one.
Related: Backup your Windows 10 Machine to External Drive
Time Machine: What Items it Backup?
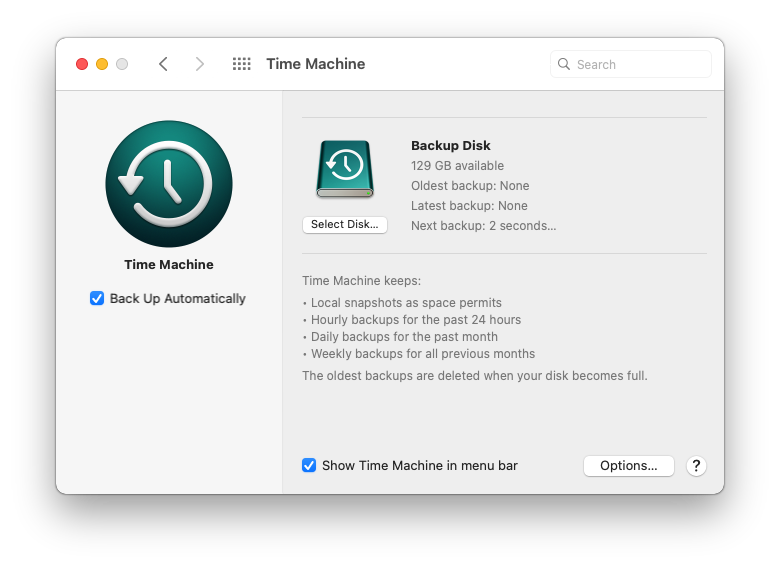
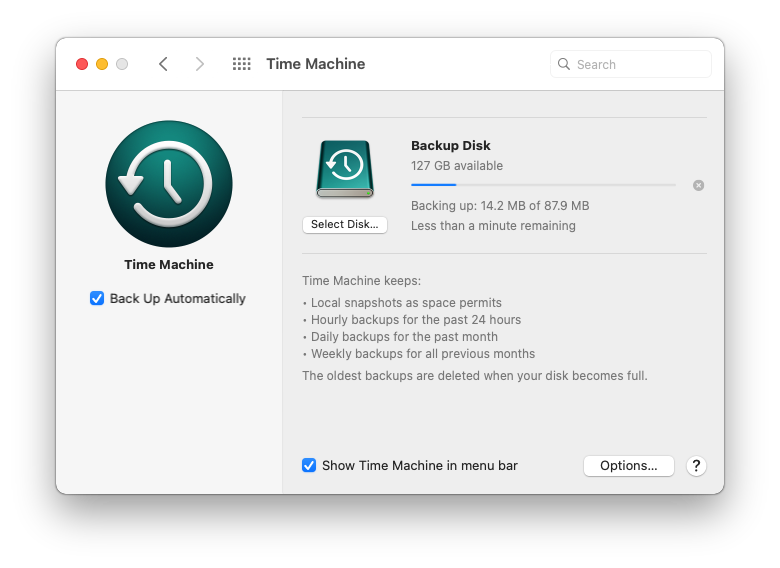
You can use Time Machine, the built-in backup feature of your Mac, to automatically back up all of your files, including apps, music, photos, email, documents, and system files. Also, you can exclude any specific folder that you don’t want to backup. Time Machine has the feature to exclude a specific folder in order to not back it up. Time machine keeps;
- Local snapshots as space permits
- Hourly backups for the past 24 hours
- Daily backups for the past month
- Weekly backups for all previous months
In addition, the oldest backups are deleted when your backup disk becomes full.
Backup your macOS Data to an External Drive (Time Machine)
Without any further details let’s get started on how to backup your macOS Data to an External Drive using Apple default backup solution software “Time Machine”. It’s highly recommended to backup your data to an external hard drive.
- Connect your External Drive to your Mac Device.
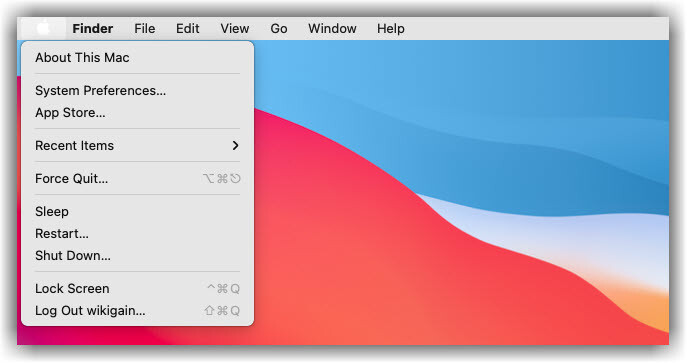
- Turn on your macOS and click on the Apple icon at the top-left corner of the screen and select System Preferences.
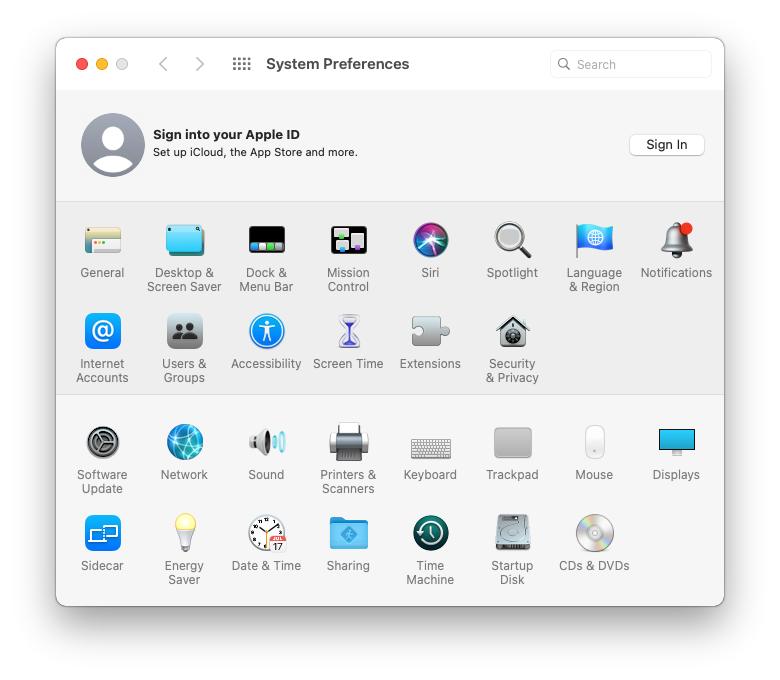
- Select Time Machine from System Preferences.
- Check “Back Up Automatically” if you want to regularly backup your data. Also, you can add Time Machine to the Menu bar for easy access.
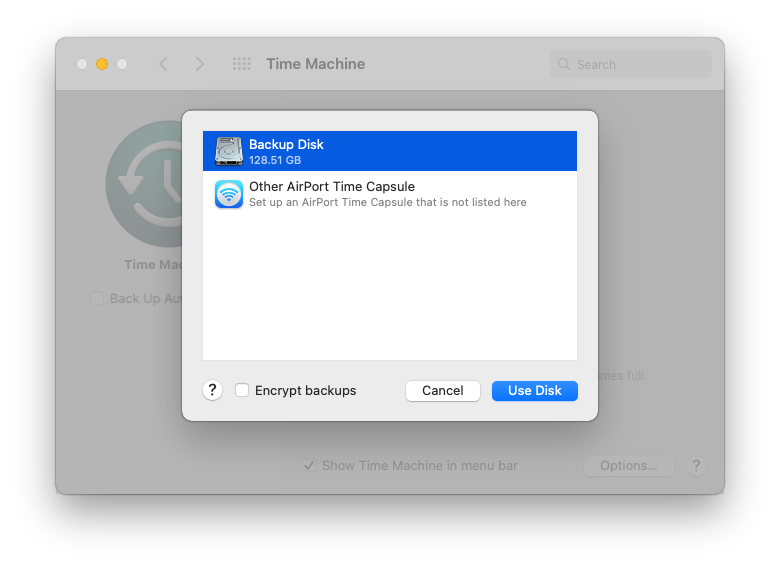
- Click Select Disk under the backup disk.
- Choose a Backup Disk you want to back up your system (Data) onto it. Click Use Disk once you’ve selected your back up disk.
- After selecting your disk, the backup process will start automatically. Wait for a few minutes or even hours depends on your data size.
- Once the backup complete, you’ll a backup complete notification.
You can also visit our related guides about backing your data;
- How to Backup iOS Devices Wirelessly
- How to Backup iPhone Photos to Google Photos?
- How to Backup and Restore Samsung Phone Data?
- What’s the Difference between iCloud Backup and iTunes Backup?
Summary
In this post, I’ve covered how to backup your macOS Data to an external drive using Time Machine. This software is a free tool to backup your data and restore it later on. If you use the Time Machine backup tool, you can restore it whenever you buy a new Mac device. In addition, I’ve mentioned the reasons to back up your data and what items the Time machine backs up. What backup solution you guys use? Let us know in the comment section below.


Leave a Reply