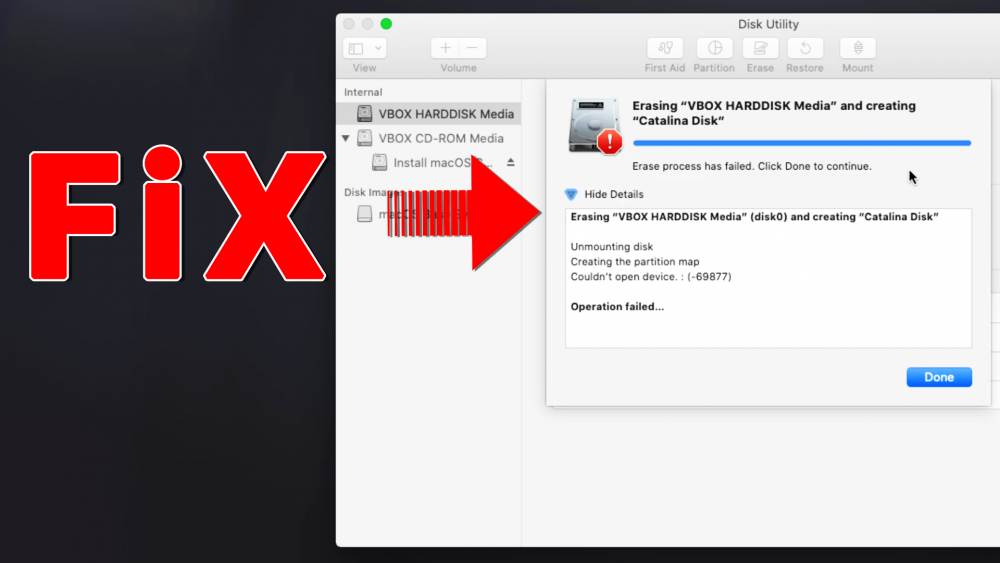
In this article, I’m going to show you how to fix Erase Process Has Failed during partitioning macOS High Sierra hard drive on Disk Utility. You might have experienced this issue on the later version of macOS (macOS Sierra, Mac OS X El Capitan, Mavericks, Yosemite”. I’m not really 100% sure that why this error occurs sometimes. In some cases, it’s because of the disk scheme and format. In this guide, I’m going to show you two methods that really help you to sort out this frustrating problem.
Related: Fix erase process has failed while erasing the disk
Fixed Erase Process Has Failed Click Done to Continue
This error occurs differently for the people but the solution is almost the same. This guide is going to assist you to figure out this matter.
- Erasing “Untitled 3” and creating “Untitled 3”
- Erase process has failed. Click Done to Continue
- Erase process has failed couldn’t unmount disk
- Erase process failed. “press say to continue
Method 1: Erase a Volume
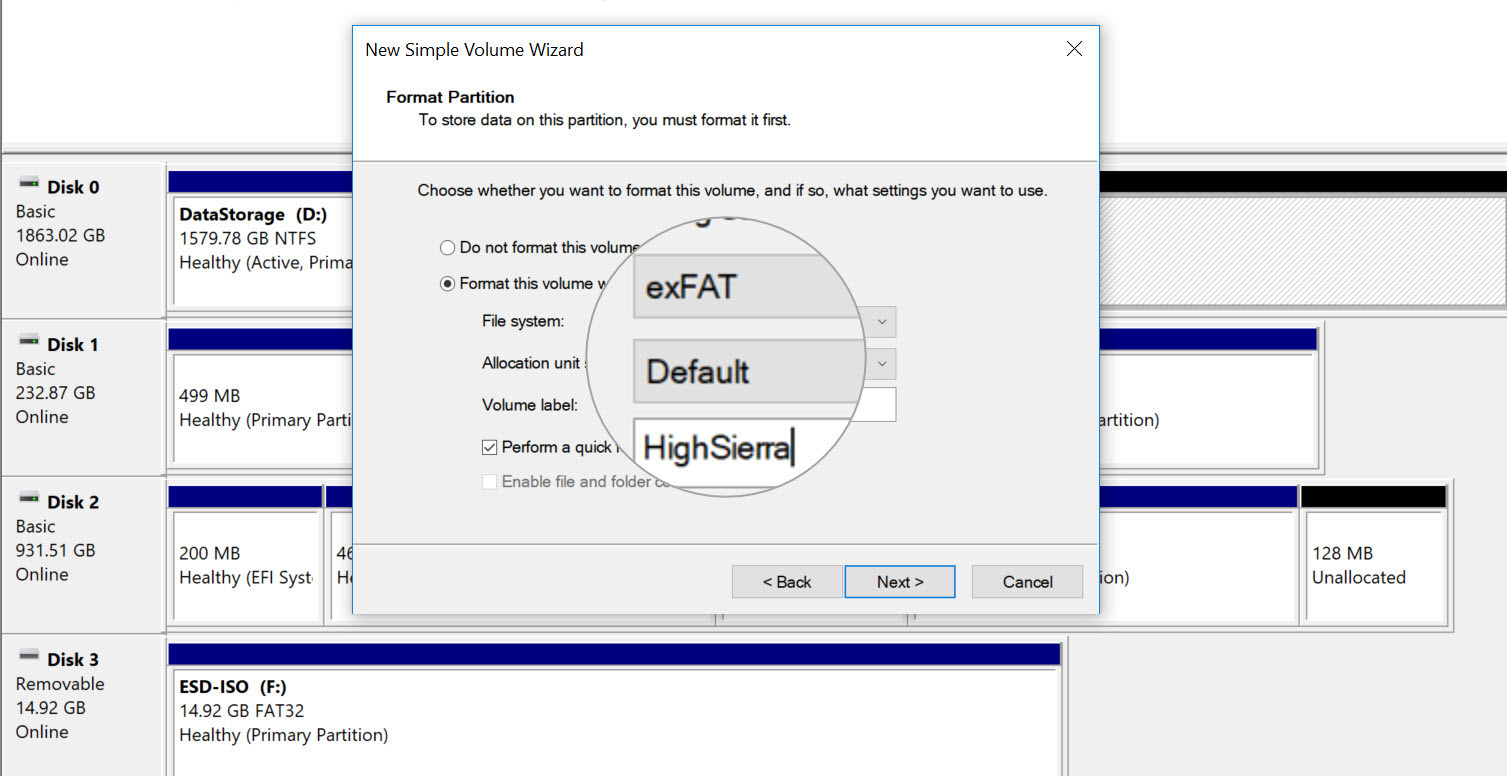
You see this error message when you want to erase a partition on Disk Utility. If you want to fix it then navigate to your windows operating system and open Disk Management. Create a new volume and choose the File System “exFat“. Check the step by step guide on how to create a new volume on Windows 10. Once the partition has been created, boot into the macOS High Sierra Bootable USB installer. Or if you are trying to build a Hackintosh and having this problem then boot via USB installer.
On the Disk Utility window select the partition you’ve created on Windows then click on the Erase tab. As a name, choose any name for the volume you want and as a format select “MacOS Extended Journaled“. Select the scheme “GUID Partition Map” and click on the Erase button.
If this solution doesn’t work for you or even you run the Windows operating system and you’re on an actual Macintosh environment so follow the 2nd method that I’m pretty sure will ease you.
Method 2: Erase the Whole Drive
If the first method didn’t work for you, just backup or transfer all your data from the target drive to save a place like an external HDD. Once you’re done, follow the step below.
Step #1. Click on the small down arrow at the top-left corner of the Disk Utility window and select Show All Devices.
Step #2. Select the main hard drive, not the volume then click on the Erase tab. A small window will appear now. As a name type any name you want and as format select Mac OS Extended Journaled, as a scheme select GUID Partition Map. Click the Erase button and wait for a while.
As you can see the screenshot down below has formatted successfully without any issue.
Video Tutorial:
https://www.youtube.com/watch?v=qa5KWgRtF_s&t=40sConclusion
In this guide, we’ve covered some tips and tricks Fixed Erase Process Has Failed, Click Done to Continue on macOS High Sierra or latest version of Mac Operating system on Disk Utility Window. Again, if you’ve got any kind of issue on this topic or you know another method please let us know in the comment section down below this post. We’ll be so happy to hear any kind of feedback from you guys.


Thank you! Worked great.
Salam mukhtar,
Any answer to Brad’s query, same here as well first aid is OK but when erasing giving the error as unable to write to the last block …
Also if you guys are interested in video tutorial please visit our video on Youtube
I have a Sandisk Ultra USB Flash Drive that became Read Only on my Mac . I can use and access what is on it but can not add or delete Files. Sandisk accepted my Warranty request for a new Flash Drive . They sent Me a RMA Shipping Label to return the Drive . The trouble is I have a lot of Private information on it so I don’t want to send them the Flash Drive .
I’ve tried Erasing the Drive using the Disk Utility several Times and always it fails to Erase or reformat .
Unhappily I continue to get “failed”, with the log saying “Couldn’t unmount disk: (-69888)
You are the MVP!! This worked FLAWLESSLY! Had issues with a new SSD and couldn’t get it after tons of videos i had no hope for this but it worked! Thanks!
Thank you for this. I am mostly commenting to help people who got the “couldn’t modify partition map” error — try Solution #2 above here, it worked for me!
Hello, nice detail with chosing the entire drive as opposed to just the partition, however – mine stays at “waiting for partitions to activate”, what kind of timeframe is expected?
i have a 256gb ssd that was new, but for some reason it has ended up with a mbr not a guid,
im running catalina on a late 2012 macbook pro 13″, i5 8gb
and it worked fine until my old ssd crashed.
The timeframe is between 1 to 3 minutes. It should not take so long.
Thanks a lot this problem stressed me out
Thank you for sharing your feedback
Thank you for answer, in the meantime I have tried several differentiere options.
What is most Strange is when new ssd is internal and I boot from old via usb, I manage to install on the new drive, however booting from this is not possible.
Also I can make “partition scheme” to be GUID on new Ssd when it is in external usb dock, but when putting it in internal hdd bay in the MacBook it shows up as MBR and no installation is possible, so I’m lost for options, formatting new in the internal bay does not work
I am now at the stage that I have reinstalled on the old ssd and crossing fingers it will work
when i try to erase I get an error that says “Unable to write to last block of the device”
Did you select the main drive?
Yes. I can’t see any volumes on the drive, just that main top USB level. When I try First Aid it completes and says there are no issues. When I try to erase, it tells me I’m unable to write to last block of device
THANK YOU Mukhtar! You have helped solve a very frustrating dilemma. The most important step was to select the whole drive not the volume!
That’s really cool that this thing works for you