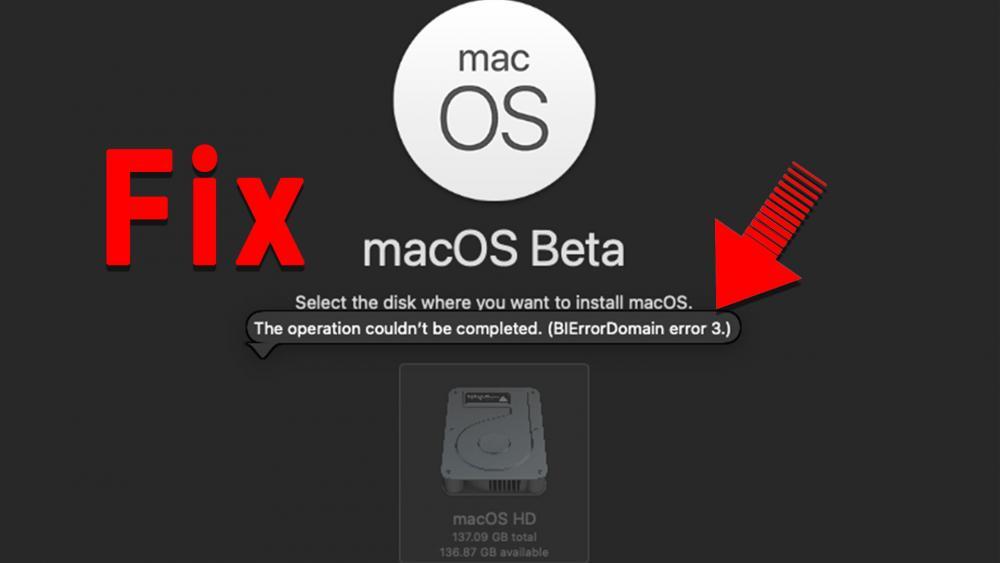
In this article, I’m going to show you guys how to Fix the operation couldn’t be completed BiErrorDomain Error 3. This error occurs when you try to install macOS Big Sur 11.0 beta on VMware/Parallels. This is the latest version of the Apple Mac operating system. Lots of developers having the issue to install it but can’t, due to facing BiErrorDomain Error 3. In this post, I’ll show you how to bypass this issue and install macOS 11.0 beta on your VMware or Parallels. To fix this issue you need to do the following procedures.
Related: Install macOS Big Sur on VMware on Windows
Fix the Operation Couldn’t be Completed BiErrorDomain Error 3
Source: “When I select the main disk to install to, I get the error message: “The operation couldn’t be completed. (BIErrorDomain error 3.)” Has anyone else experienced this? I wanted to try out the Big Sur beta, but didn’t want to risk rendering my daily MBP unusable.
Thanks!”
A user from the apple.com developer forum has given a great solution to this error which has worked for almost everyone that has tried his method. So I’ll list hist steps down below and thanks to @danfry. He said “I was able to get past the “BIErrorDomain error 3″ issue in Parallels as follows:”
#1. On a real, supported Mac, run this command in Terminal.
ioreg -l | grep board-id#2. Make a note of the board ID (mine is Mac-551B86E5744E2388, for example)
#3. Run this command in Terminal
sysctl hw.model#4. Make a note of the hardware model (mine is MacBookPro14,3)
#5. In the VM configuration, under Hardware -> Boot Order -> Advanced Settings -> Boot flags, enter the following (inserting the information noted above where shown):
devices.mac_hw_model=""
devices.smbios.board_id=""
Example:
hw.model = "MacBookPro15,3"
board-id = "Mac-1E7E29ADo135F9BC"
smbios.reflectHost = "TRUE"
hw.model = "iMac19,1"
board-id = "Mac-551B86E5744E2388"Fix BiErrorDomain Error 3 on VMware Workstation on Windows
You can use this tip for the VMware workstation as well. Just find a real Mac device and find it’s model and board-id then use it on VMware workstation. Alternatively, You can use one of the following code and insert it into your VM configuration file. The file extension is .vmx
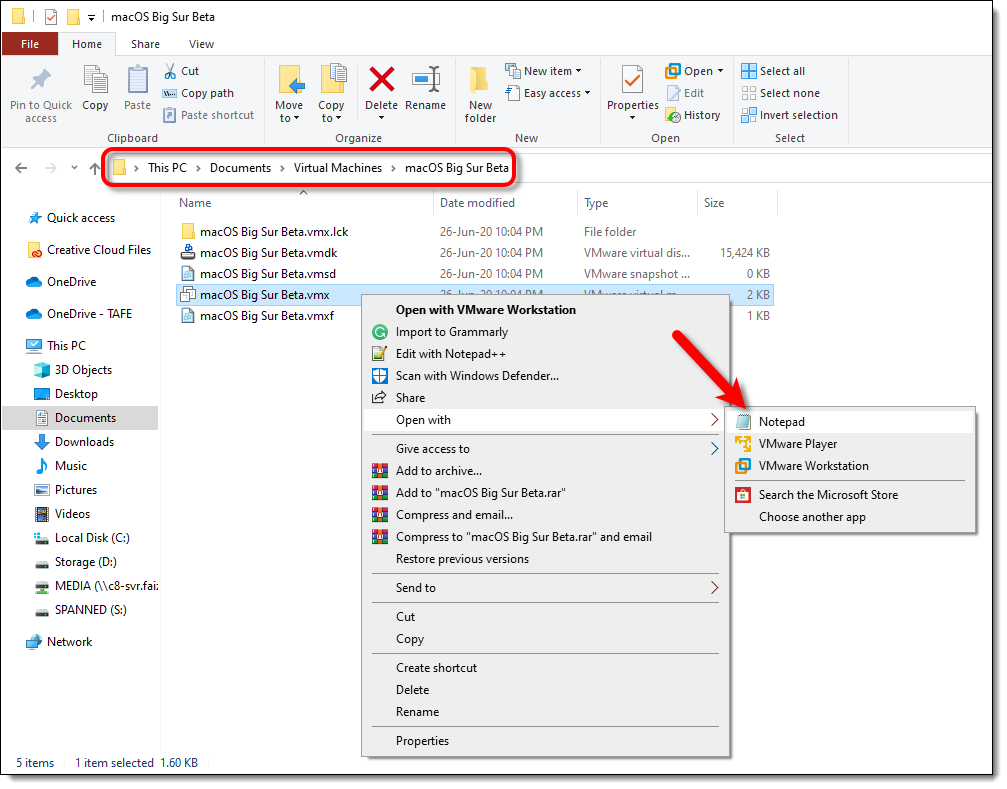
Navigate to the virtual machine folder which you select while creating the VM. If you didn’t specify a new location, then the default location is in Document > Virtual Machine. Right-click on macOS Big Sur Beta.vmx then open it via Notepad or any third-party text editor of your choice.
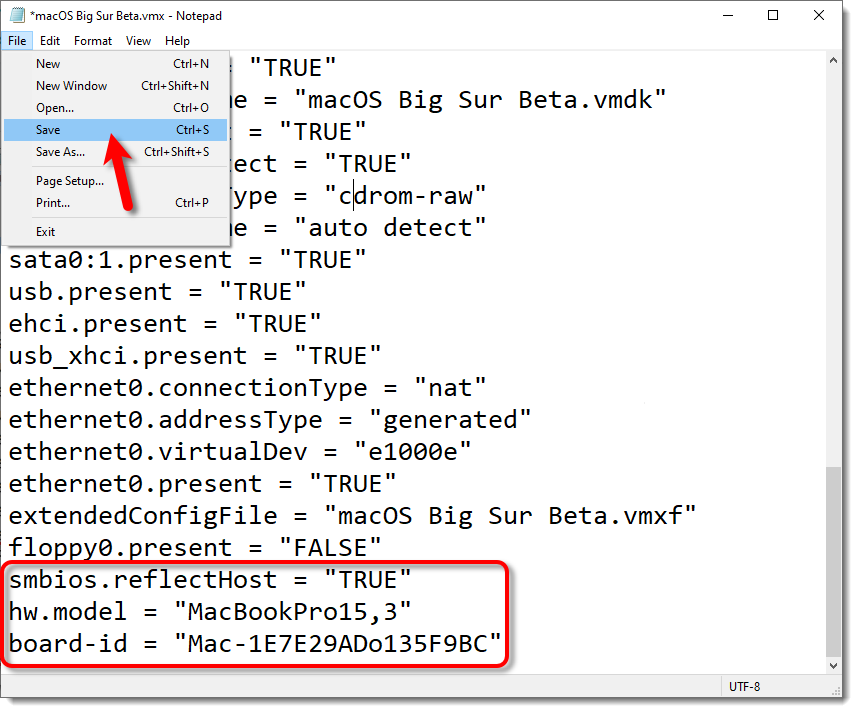
#2. Scroll down to the bottom of texts and add the one of the following code; then click on File > Save. After that, you may those it as you don’t need it anymore.
smbios.reflectHost = "TRUE"
hw.model = "iMac19,1"
board-id = "Mac-551B86E5744E2388"smbios.reflectHost = "TRUE"
hw.model = "MacBookPro15,3"
board-id = "Mac-1E7E29ADo135F9BC"Note: If inserting the above code didn’t solve the issue, then you may have to delete the VM and start over since macOS caches the VM information and does not allow macOS to be installed as VM.
Fix BiErrorDomain Error 3 on Virtualbox
If you have BiErorroDomain Error 3 on VirtualBox then you follow the guide below to fix it.
First, make sure to Exit Virtualbox software. Also, you have to change the Virtual Machine Name if it’s different from the codes below. Once, you changed the virtual machine name and ready, execute the following code using command prompt.
Do one of the following on the command prompt (Run as Administrator):
cd “C:\Program Files\Oracle\VirtualBox\”
VBoxManage.exe modifyvm “macOS Big Sure Beta” –cpuidset 00000001 000106e5 00100800 0098e3fd bfebfbff
VBoxManage setextradata “macOS Big Sure Beta” “VBoxInternal/Devices/efi/0/Config/DmiSystemProduct” “iMac19,1”
VBoxManage setextradata “macOS Big Sure Beta” “VBoxInternal/Devices/efi/0/Config/DmiSystemVersion” “1.0”
VBoxManage setextradata “macOS Big Sure Beta” “VBoxInternal/Devices/efi/0/Config/DmiBoardProduct” “Mac-AA95B1DDAB278B95”
VBoxManage setextradata “macOS Big Sure Beta” “VBoxInternal/Devices/smc/0/Config/DeviceKey” “ourhardworkbythesewordsguardedpleasedontsteal(c)AppleComputerInc”
VBoxManage setextradata “macOS Big Sure Beta” “VBoxInternal/Devices/smc/0/Config/GetKeyFromRealSMC” 1
cd “C:\Program Files\Oracle\VirtualBox\”
VBoxManage.exe modifyvm “macOS Big Sure Beta” –cpuidset 00000001 000106e5 00100800 0098e3fd bfebfbff
VBoxManage setextradata “macOS Big Sure Beta” “VBoxInternal/Devices/efi/0/Config/DmiSystemProduct” “MacBookPro14,3”
VBoxManage setextradata “macOS Big Sure Beta” “VBoxInternal/Devices/efi/0/Config/DmiSystemVersion” “1.0”
VBoxManage setextradata “macOS Big Sure Beta” “VBoxInternal/Devices/efi/0/Config/DmiBoardProduct” “Mac-551B86E5744E2388”
VBoxManage setextradata “macOS Big Sure Beta” “VBoxInternal/Devices/smc/0/Config/DeviceKey” “ourhardworkbythesewordsguardedpleasedontsteal(c)AppleComputerInc”
VBoxManage setextradata “macOS Big Sure Beta” “VBoxInternal/Devices/smc/0/Config/GetKeyFromRealSMC” 1Note: If inserting the above code didn’t solve the issue, then you may have to delete the VM and start over since macOS caches the VM information and does not allow macOS to be installed as VM.
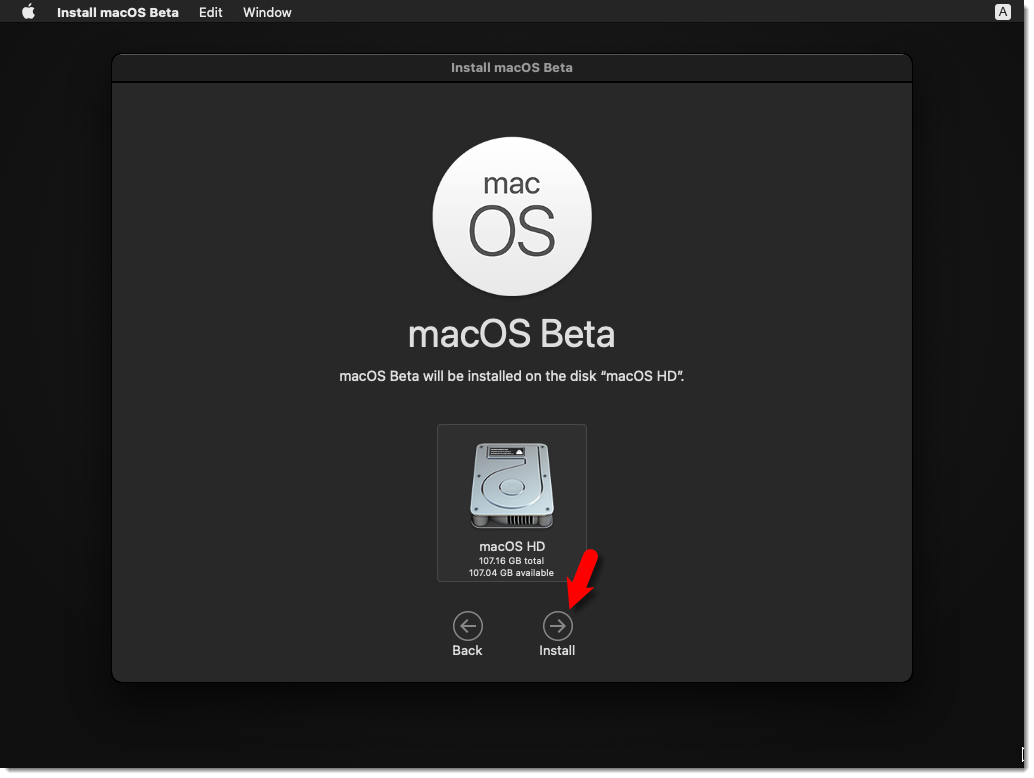
Start VirtualBox again and now you will be able to select the drive and install macOS Big Sur Beta.
For more information and threads, you can visit the following forums.
- https://developer.apple.com/forums/thread/649774
- https://forum.parallels.com/threads/macos-big-sur-and-parallels-desktop.350219/
If you’ve any other solution, please feel free to list them in the comment section below.


This worked for me, i just had to add another “-” next to -CPU”
Result: –cpuidset
Hey so im using a Macbook air mid 2012 and it doesn’t officially support Big sur but then i got a install package and when i tried download it had that domain error 3 but how will i use VMware to add that code it does need windows ryt??? please reply
Hi Mukhtar,
I have received the error massage on “VirtualBox MAC OS X”. Would you please guide me how to edit vbox configuration file (XML) and add hw.model and board-id?
Thanks
You don’t have to edit the configuration file. It’s already mentioned in this guide. So if you want to install macOS on VirtualBox, you should execute some codes before you try to install.
Please have a look at the code which we have provided in this article.
The first line of codes changes the product id and the second line changes the board id on VirtualBox.
Is there a way to resolve the BIErrorDomain error 3 during Big Sur Beta installation on VirtualBox for Mac?
That’s already mentioned in this post. The last section is for Virtualbox.
Just use a real Mac Board and Product ID. It should fix the issue.
On VM Ware, pasting;
smbios.reflectHost = “TRUE”
hw.model = “MacBookPro15,3”
board-id = “Mac-1E7E29ADo135F9BC”
Is not working.
So you can’t install on the disk? Is grayed out?
Do you install macOS on your Desktop or laptop>?
Hey, Try this
P.S If inserting the above code didn’t solve the issue, then you may have to delete the VM and start over since macOS caches the VM information and does not allow macOS to be installed as VM.
Hey Faiz !
It works !! Thanks!
My old ‘rig’:
HP Elitebook 8470w (old faithful, military grade components), 14 inch 1600×900, Core i5, Intel4000HD+AMD Firepro, 10GB Ram, SSD 128 for booting, HDD 500GB for all ISO, VMDK (yes, I know, it slow, but for just tasting MAC OS, don’t mind).
VMWare Workstation Player 15 ver 15.5.6.
PLEASE ENSURE YOU ALLOCATEat least 50GB (not 40GB) VIRTUAL DISK for this DISK MONGER BIG MAC.
It’s a little bit tricky: if you have created virtual machine, DELETE IT.
Then create as usual you mount the BIG SUR iso,
Fix the Operation Couldn’t be Completed BiErrorDomain Error 3 on Hackintosh
Maybe add the following for VirtualBox to fix this same error message:
Exit Virtulalbox
Do this on the command prompt (Run as Administrator):
Start virtualbox again and now you will be able to select the drive and install macOS Big Sur Beta.
See here: https://i.imgur.com/xDJtcJG.png
Hey, Jordan thank you for your suggestion. I’ve updated this article. Also, we’ve updated our Virtualbox article as well and last night we figured that how to bypass BiErrorDomain Error 3 message on Virtualbox.
Any way of solving this on VirtualBox ?
After doing the below the installation on VirtualBox is fast as hell again:
This is due to the Windows 10 Version 2004 May Update !
If you do the following if you have the same issues than it will work again:
1. Control panel -> Programs and Features -> Turn Windows Features on or off -> Uncheck Hyper-V and Windows Hyper-Visor Platform
Additional Notes for Windows Hosts
2. To check the status of Hyper-v in Windows 10, | Run | OptionalFeatures.exe, and look for the “Hyper-V” option. The box should be empty, not checked or shaded. If you want to be absolutely sure that Hyper-v is gone then open an administrator command console and type “bcdedit /set hypervisorlaunchtype off”. Make sure to fully power down and reboot the host after changing the Hyper-v setting.
3. On some Windows hosts with an EFI BIOS, DeviceGuard or CredentialGuard may be active by default, and interferes with OS level virtualization apps in the same way that Hyper-v does. These features need to be disabled. On Pro versions of Windows you can do this using gpedit.msc (set Local Computer Policy > Computer Configuration > Administrative Templates > System > Device Guard > Turn on Virtualization Based Security to Disabled. CredentialGuard is a subset of DeviceGuard, so disabling the former should be enough. If you cannot use gpedit for some reason then the equivalent registry hack is to find the key
and set it to 0.
4. On Win10 hosts, check Windows Defender > Device Security > Core Isolation Details and make sure settings in this panel are turned off, reboot the host from power down if you needed to make changes. “Core isolation [includes] security features available on your device that use virtualization-based security” …which is why they can interfere with VirtualBox.
After doing this masOS Big Sure Beta will run normal again on VirtualBox