Windows 11 is a lot cleaner compared to the Windows 10, also it has a good design, awesome interface and updates are coming faster. There are also new features and new featufes are coming with the each updates of windows 11. Among the windows features you may have known there is the snip tasks which is quite good for productivity. However if you are looking to Enhance Your Productivity even more then you better have to use the powertoys. What is exactly powertoys. Powertoys is a set of utility tools which is provided by Microsoft and it is specifically built for the programmers and developers to increase their productivity even more. PowerToys has alot of features but among but if you specically want to Enhance Your Productivity using PowerToys, you have to follow the below steps.
Download and Install PowerToys
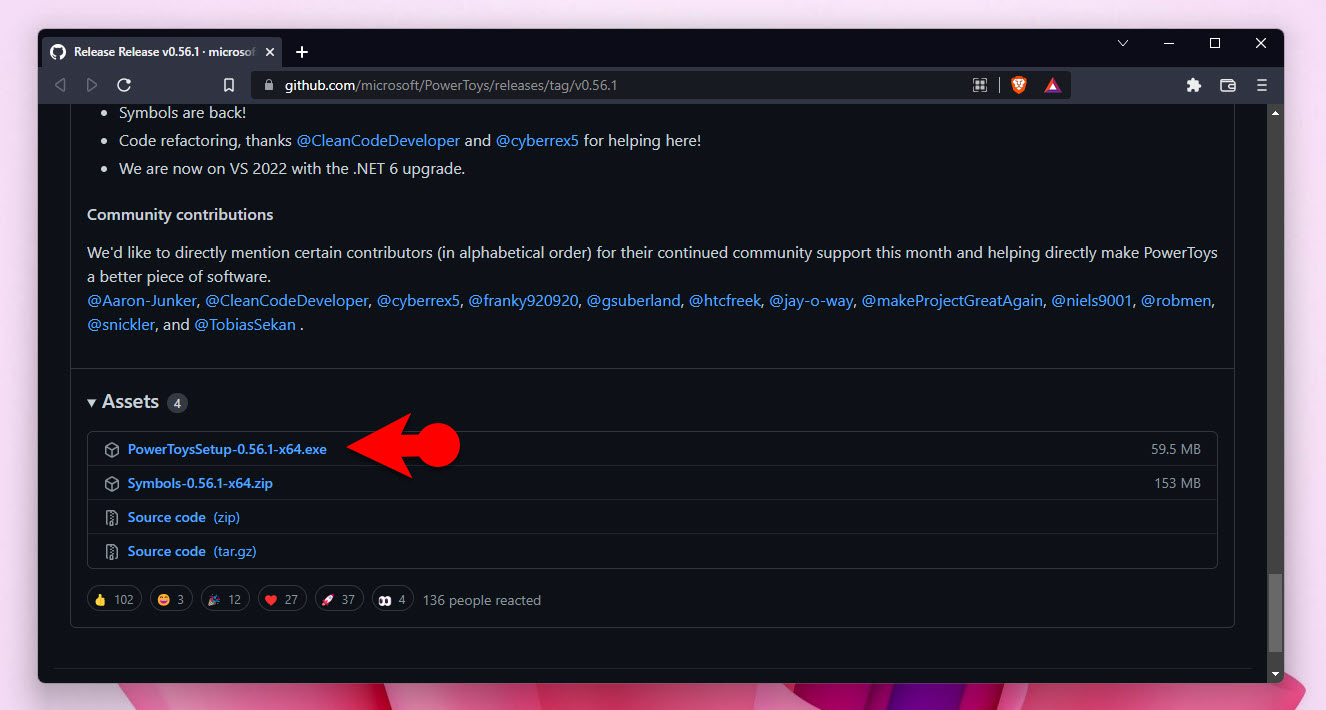
Before getting into configuring your settings with the powertoys, you better have to download and install the powertoys in your computer. There are a couple of ways and methods that you can download and install power toys, among them you can use the Microsoft Store. But I recommend you to to get the power toys from GitHub.
After downloading the power toys application, we have to remember the requirements four installing powertoys.
- You must be running windows 11, or Windows 10 version 1909 or later.
- You must install .NET Core 3.1.20 Desktop Runtime or the latest version.
- This application is only available for X64 architecture.
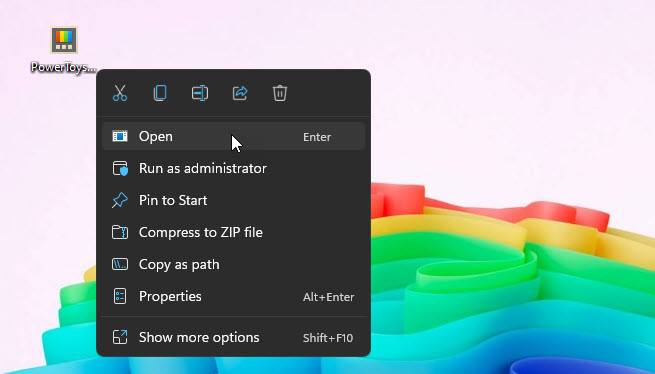
After making sure that your PC is compatible to install powertoys, just double click or right click on the setup and choose install. The installation process is not a lot of hard, all you have to do is simply accept the terms and condition and it will be done.
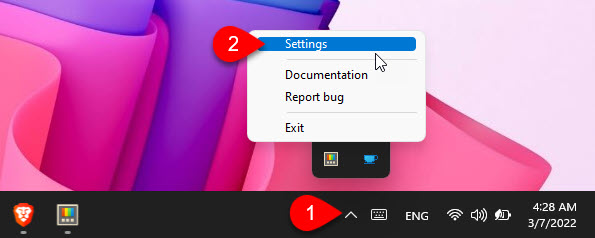
After installing powertoys, when you run the application you won’t see it, to access the settings of the powertoys go to your system tray click on more options, right-click on the powertoys and choose settings.
Enhance Your Productivity using PowerToys
PowerToys has tons of features and I will not be covering every aspect of the PowerToys in this article. Instead I’ll provide a link to the Microsoft official website where they have provided a video you can see and learn in detail if you’re a beginner. However if you are not a beginner then this 5 topics will cover most of your productivity.
1. Create Your Own Layout
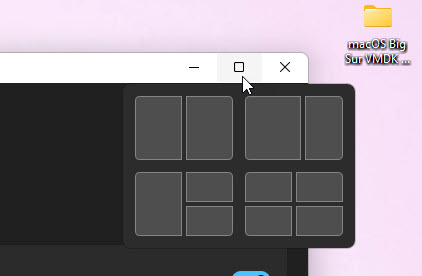
among the many features that windows 11 has introduced, the snippet layout is very impressive. All you have to do is hover your mouse on it and simply choose one of the pre built layouts and your window will turn to them.
In Windows 10 it is not this comfortable, even though you can drag a single window and and put it somewhere it will create the layout. However if these layouts are not enough for you then you can create your own custom layouts from the powertoys.
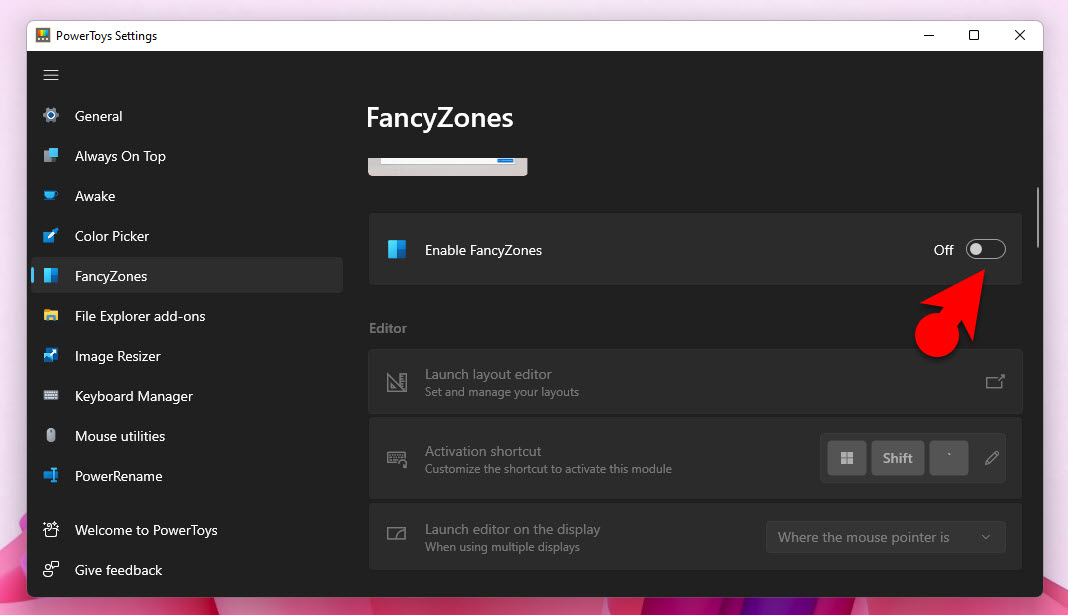
Open the settings of the PowerToys, go to the Fancyzone and enable the FancyZone options.
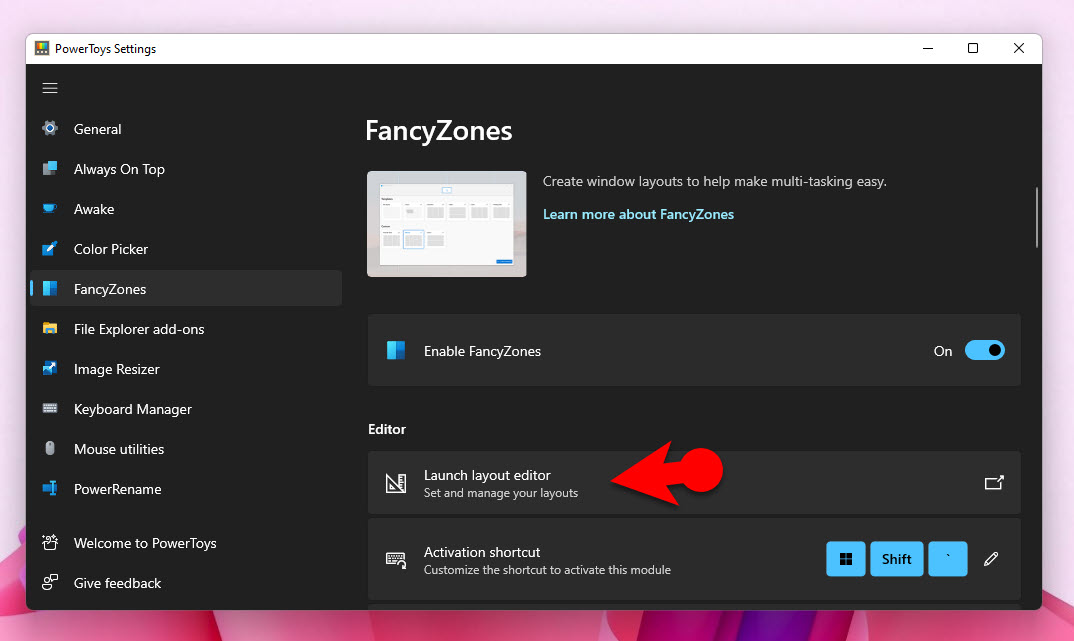
Once you enabled the FancyZone Layouts, click on the Launch Layout editor.
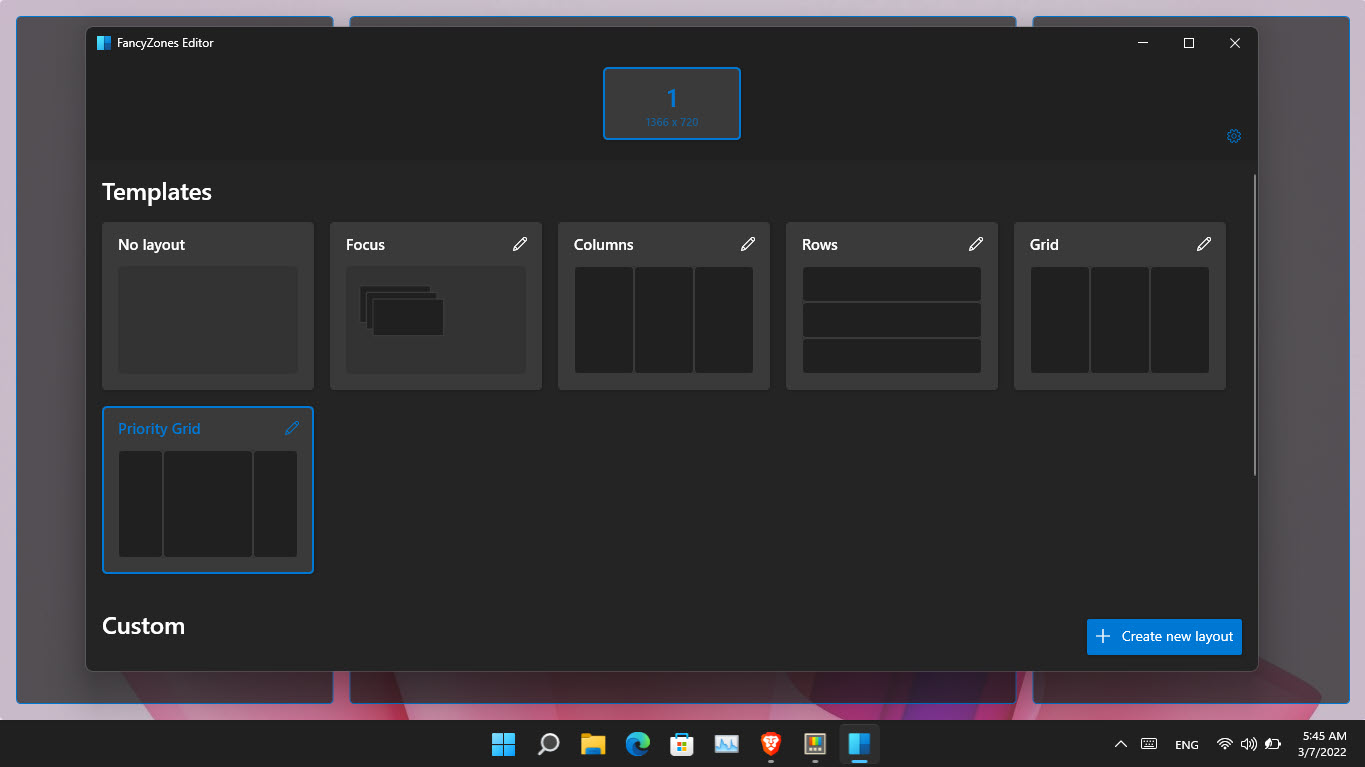
once the layout editor is launched, there are the pre sets available that you can use. However if you want to create your own layout at the bottom you will see a custom option click on add layout.
Once you configured the layout to activate that layout hold shift key on the keyboard and drag the Window, it will adjust their.
2. Image Resizer
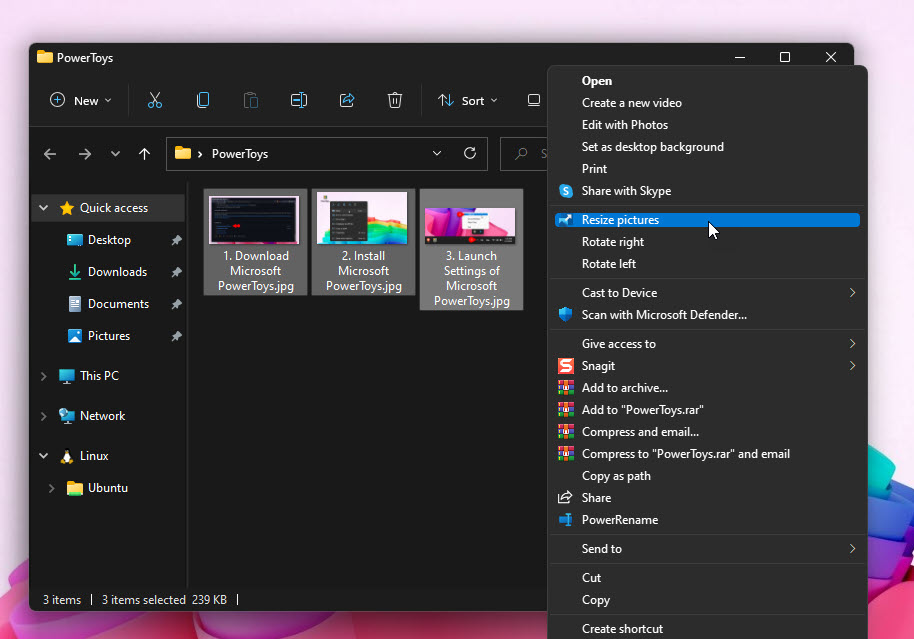
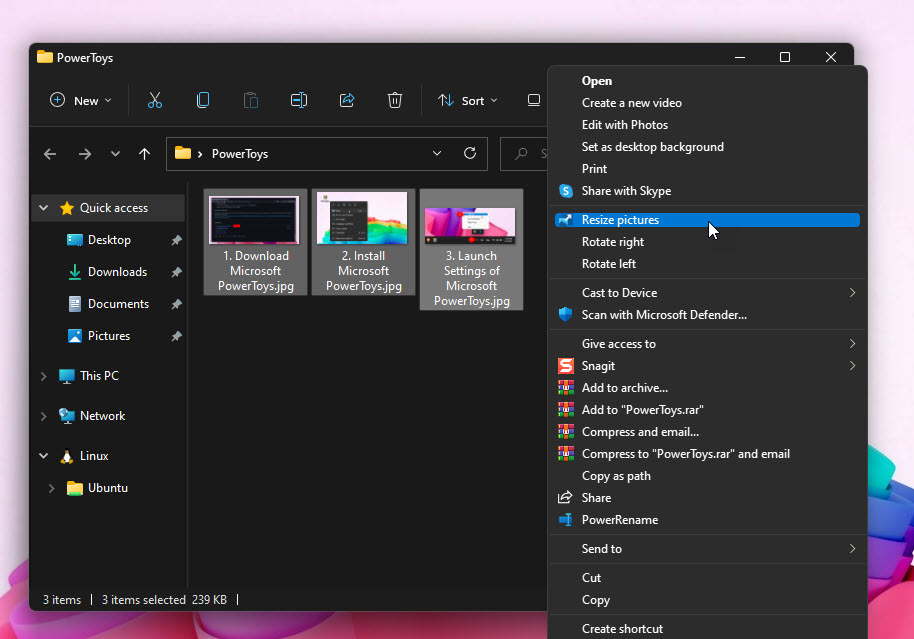
As I said earlier that powertoys is specifically built to increase your productivity on the daily basis. So let’s start our productivity by using the image resizers inside the powertoys. Now you may be thinking that I can resize any image using Microsoft paint or other applications, I admit you can do that. However what about if you resize about 10 or more than 10 images at the same time. With the PowerToys you can do it, here is how.
Select all of your images, right click on them and choose show more options and choose resize pictures.
There are already presets available, if you want to resize your images to a custom size, just click on the small area and the options will appear for you. Click on the custom, enter your size and all of your images will be resized easily.
3. Rename Your Images
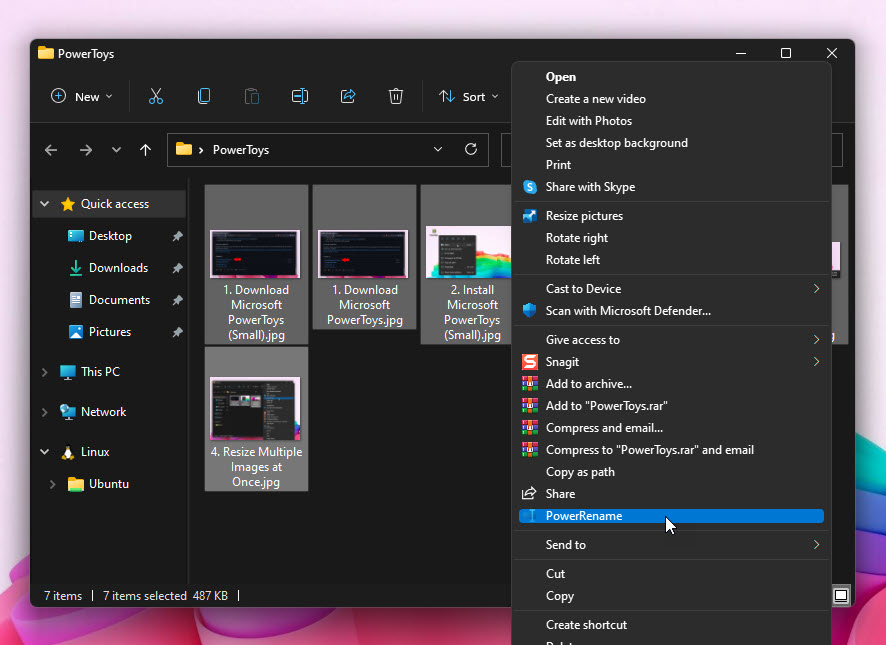
I personally don’t think that you may be using the rename alot on your files, but here is how you can rename multiple files at once. You need to select the files that you want to rename, once you did, right click on them, and click show more options> then click on rename. It is going to open a new panel where you can configure them.
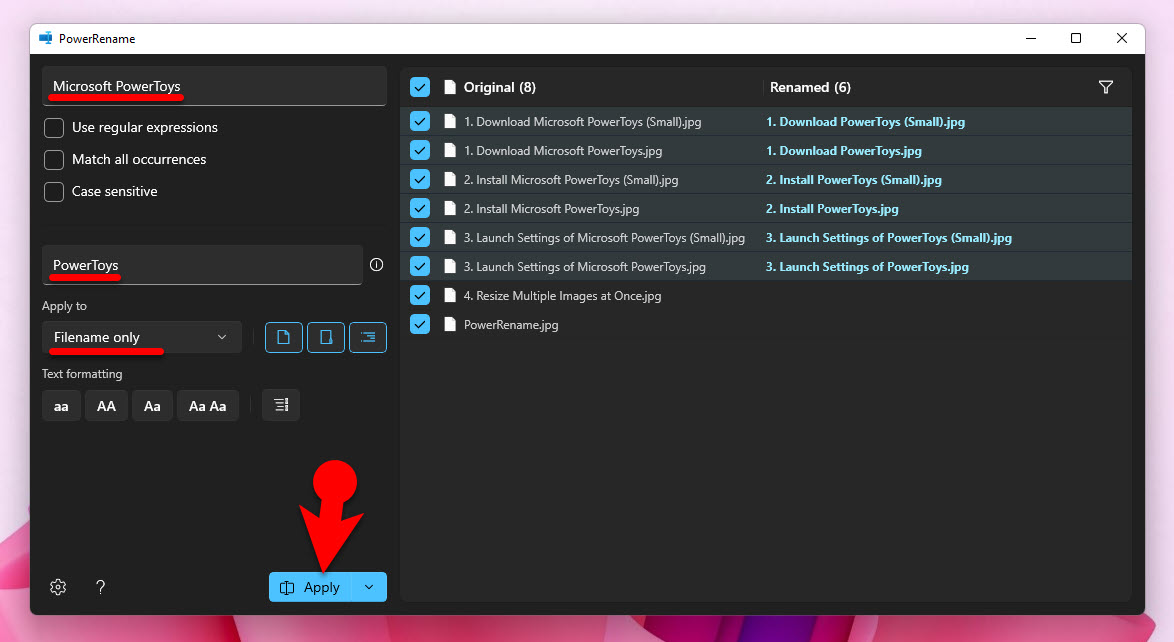
Suppose I want to replace the Microsoft PowerToys with Just PowerToys in several images, So, I will type Microsoft PowerToys at the top and PowerToys at the bottom. Once it is done, click on the apply and it will be done.
4. Quickly mute your audio & video all at once
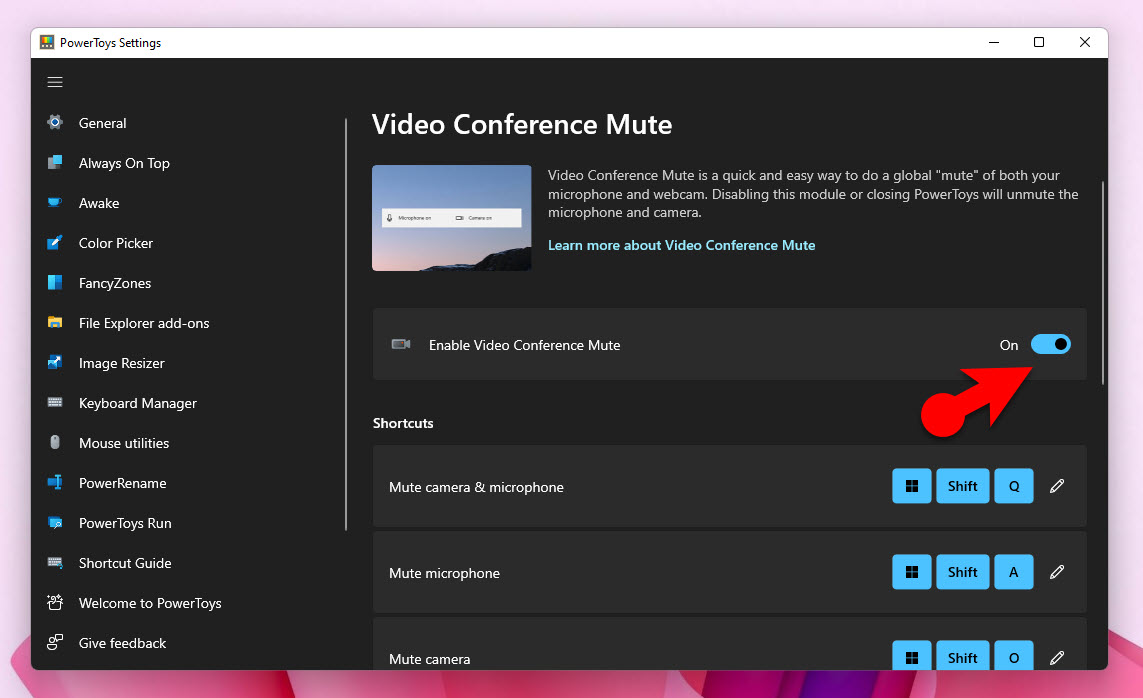
Another quick feature which is available inside PowerToys is the video conference mute. Once you turn this feature on, it is not only going to mute your audio but those applications which are connected to use audio and video, they all will be muted at once. So, it is a global app from where you can mute everything with only turning on the video conference mute mode.
So, open the settings> on the left menu click on the video conferernce mute and simply turn it on.
Once you turned it on, in order to activate this feature, press the shortcut key for them, it is written infront of it. Suppose in order to mute the the camera and microphone, press Windows +shift+ Q.
5. Enable Mouse Highlighter
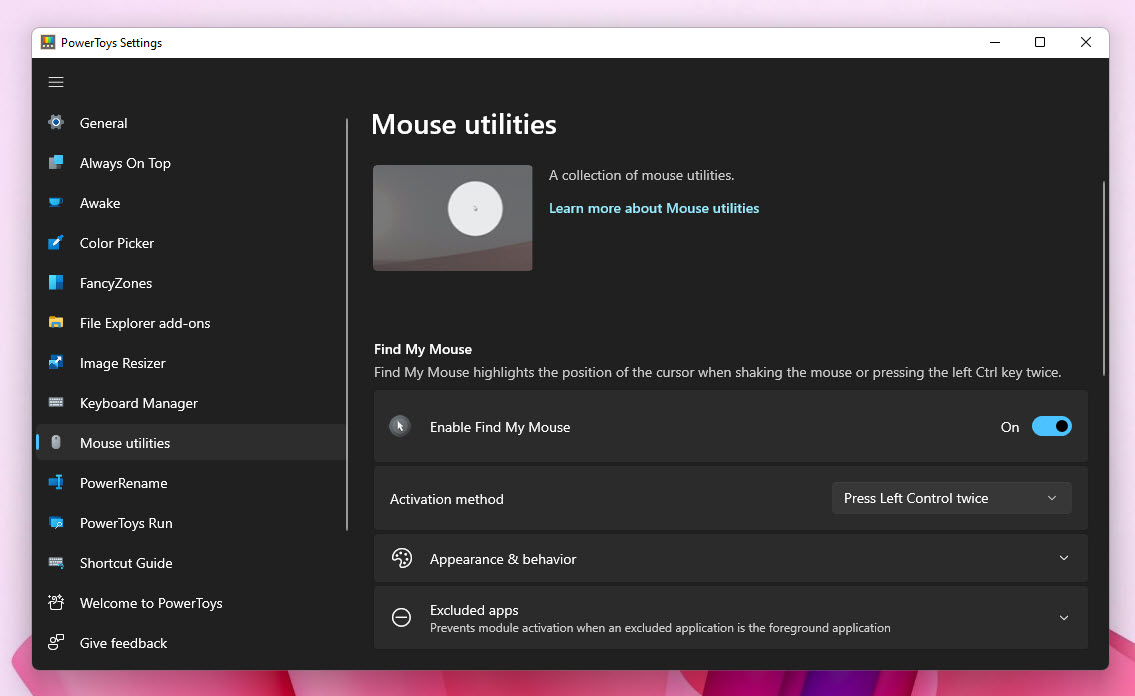
Among the other features of the powertoys, there is mouse highlighter, if you turn it on after you click a highlighted window will circle will cover the area.
Conclusion:
PowerToys is a set of utilities which has microsoft has bulid it with the help of open-source community. It has alot of features, which you can enable and implement them on your computer. So, basically when you enable it it will Enhance Your Productivity using PowerToys.

Leave a Reply