In this article, I am going to show you how to design custom slide on PowerPoint 2016. Mostly many designers all over the world they are using slide master from view tab or custom slides from design tab to design a slide, but today In this lesson I am not using any of them, instead, I am using a picture, a shape and text boxes. The slides designs are really important for a presentation. The presentation which I am creating is familiar with the creative websites, the only difference according to me is the animations which I have applied on the slide. So let’s get started with the job to design custom slide with powerpoint 2016.
Design Custom Slide on PowerPoint 2016
Step #1. Launch PowerPoint and open a blank presentation.
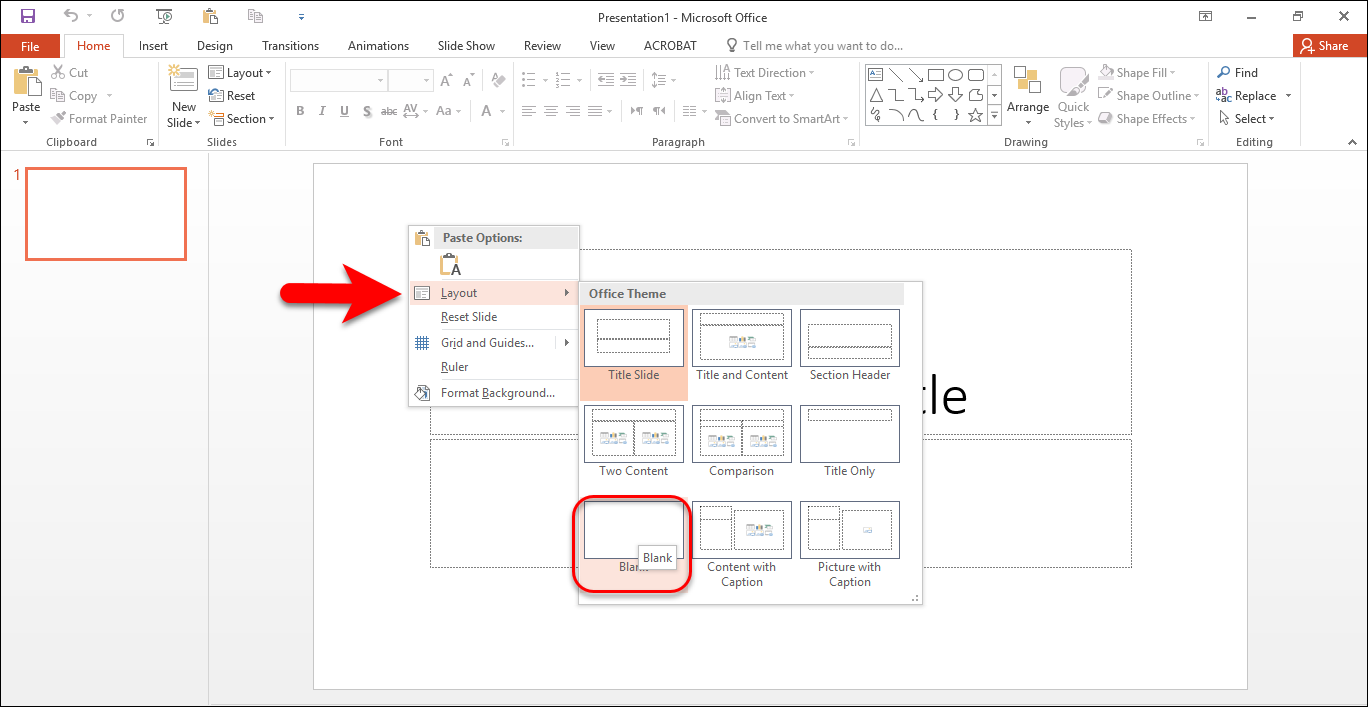
Step #2. In case if your layout is having a placeholder of” add a title”, right click on the slide and select blank layout like the shot.
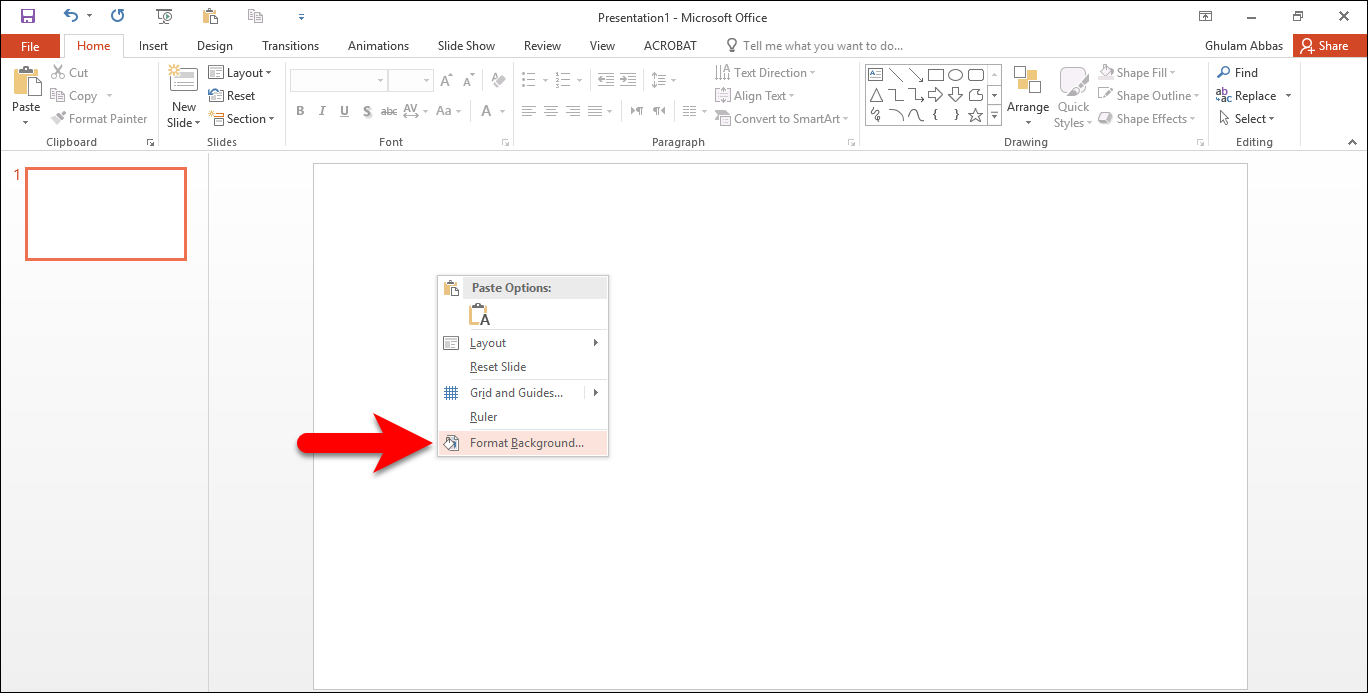
Step #3. When you cleaned Placeholder, it is time to fill the background with the Picture. In order to fill it right click and select Format Background like the screenshot.
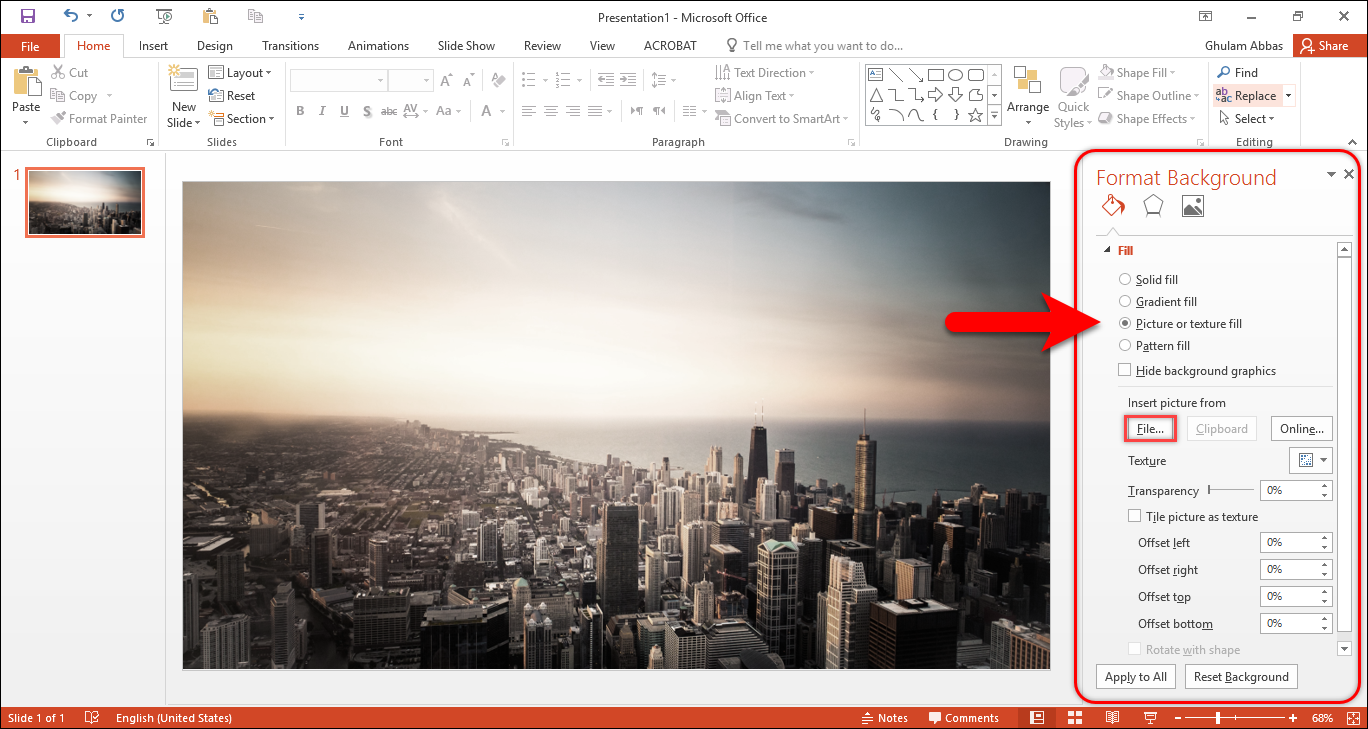
Step #4. After selecting Format Background a window will open on the right side in PowerPoint. In this window select Picture or texture fill, after that select file and open the image which you want to be in the background. You can see the Picture Which I have covered the Background.
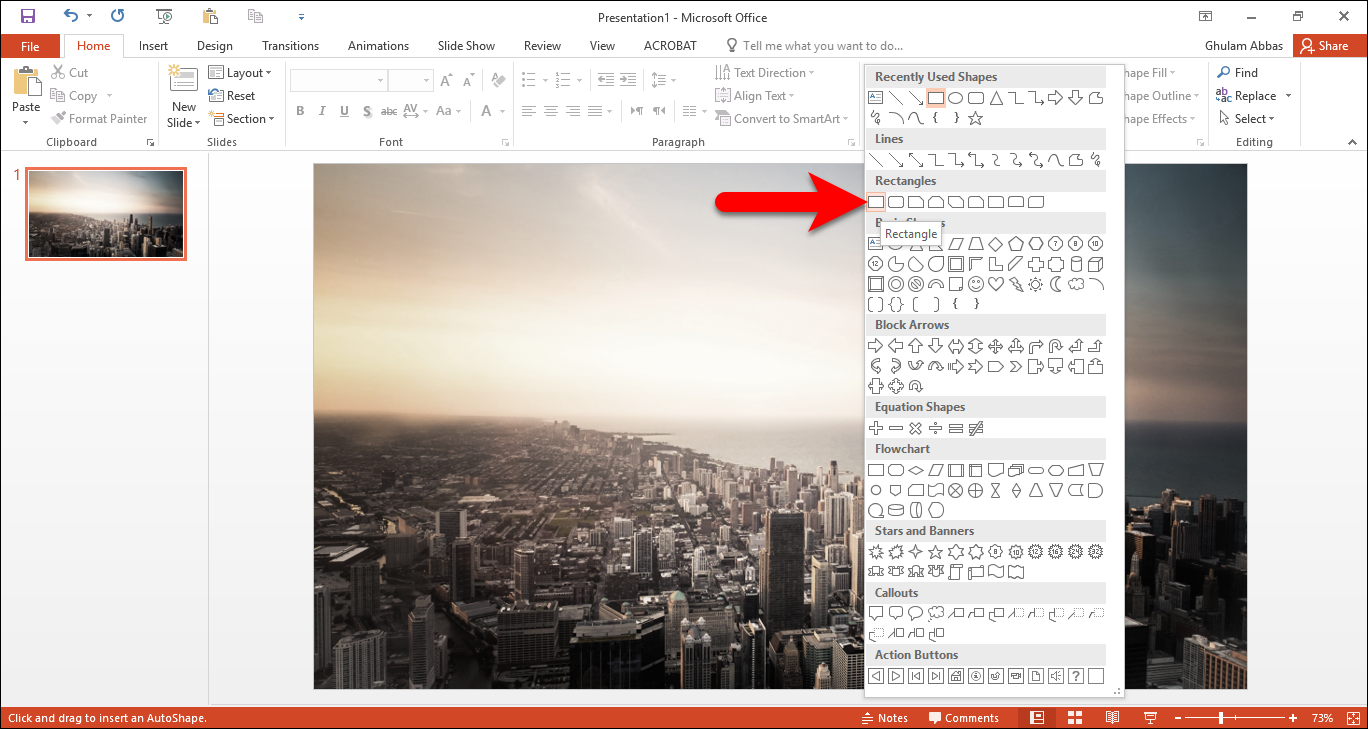
Step #5. So now we need to create a black cover on it. In order to create the black light, go to shapes in Home tab or insert tab, and select Rectangle.
Step #6. After selecting rectangle shape draw it on the Picture.
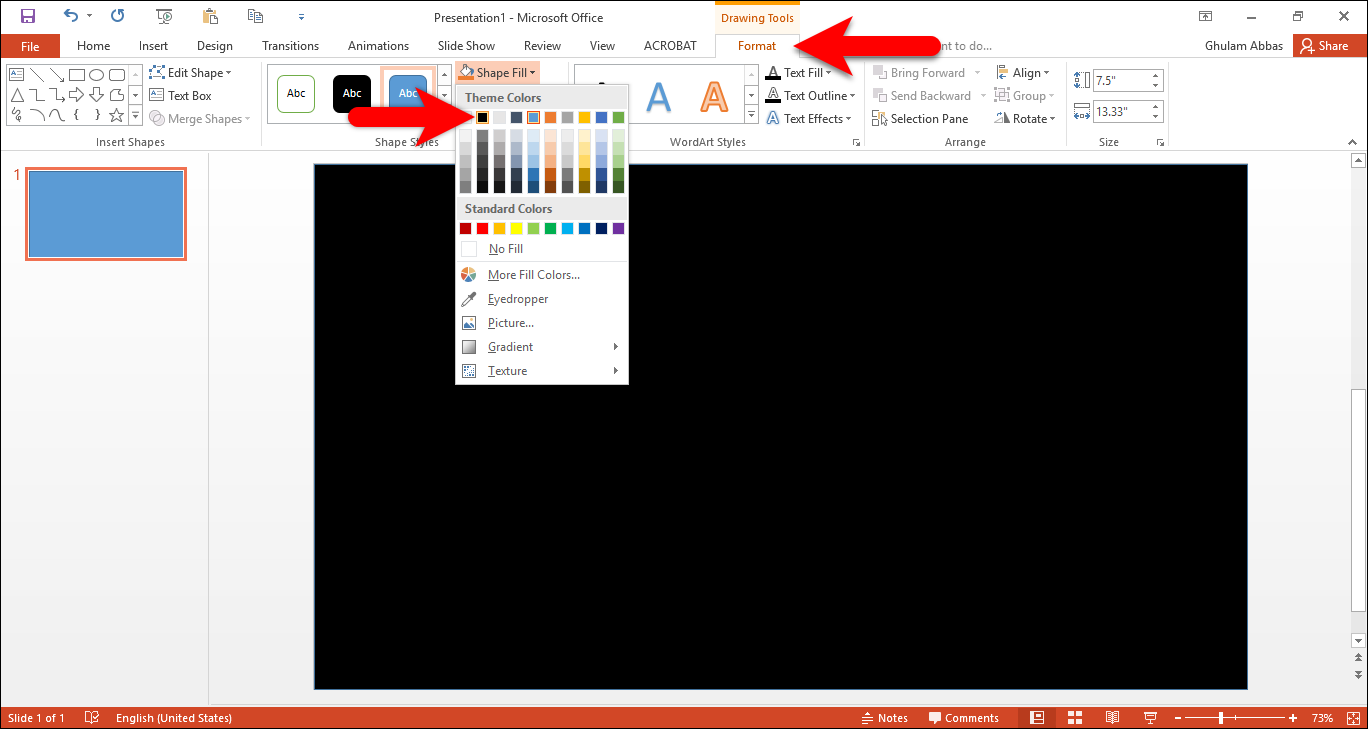
Note: Remember the shape fill color must be black, in order to fill it with black color, select the shape and format tab, select fill and select black color.
Note 2: Under-fill shape in format tab there is Shape Outline and select no fill.
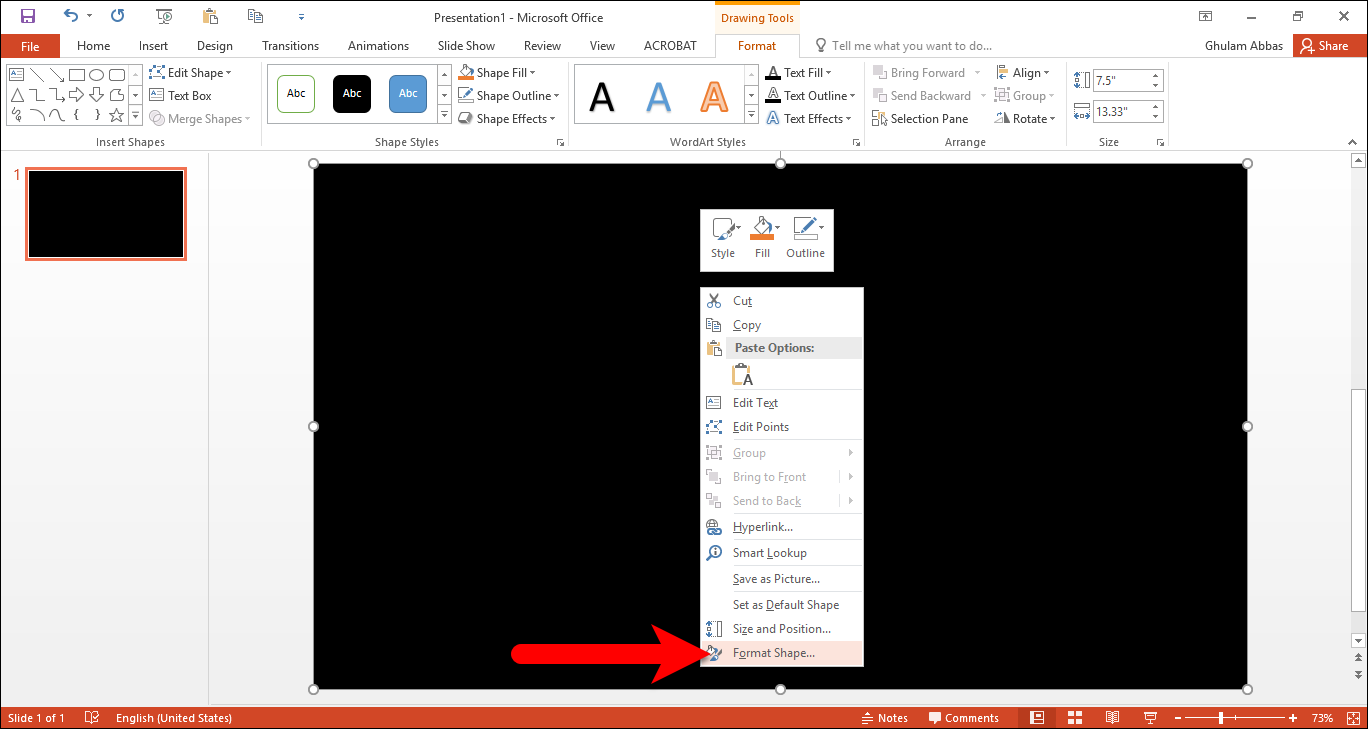
Step #7. You can recognize the shape which we have drawn, that isn’t a cover light. In order to change it to light cover, right click on the shape and select Format shape.
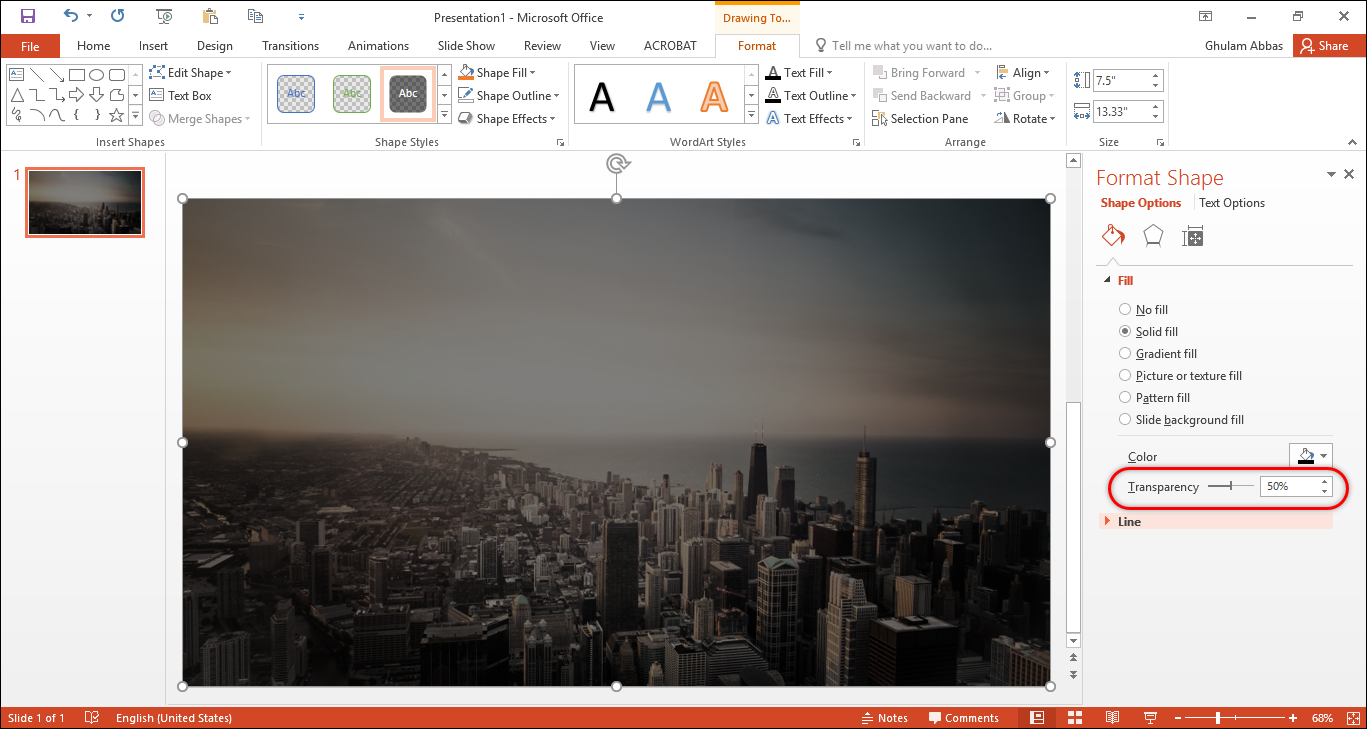
Step #8. After selecting format shape, format dialog box will appear on the right side of the PowerPoint. In this window decrease the Transparency. I have decreased it to 50%. After that, you can see the result in the snapshot.
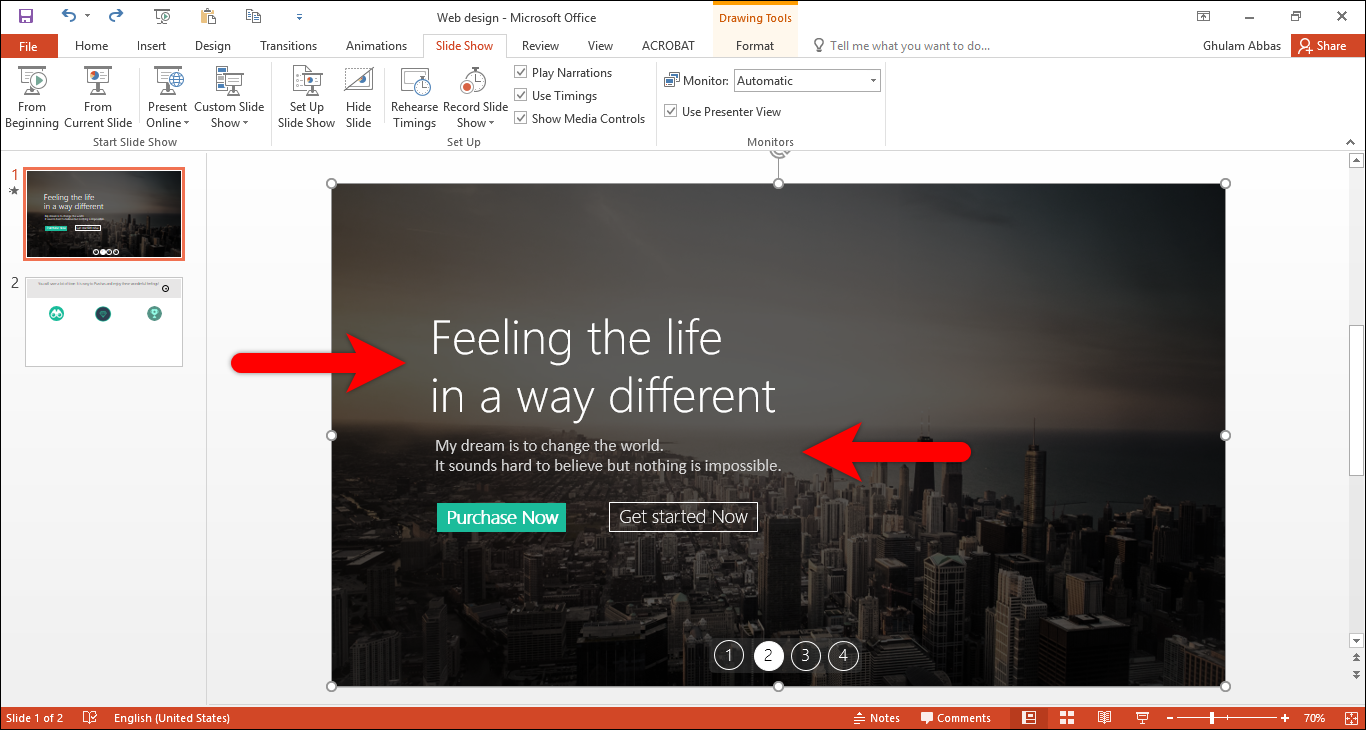
Step #9. Now you need to draw a text box from home tab or insert tab and write in it the anything which you want to write. I have written, ” Feeling the life in a way different” with Segoe Ul light font.
Applying Animation
It is time to apply the animation effect, which really makes the slide perfect for presenting.
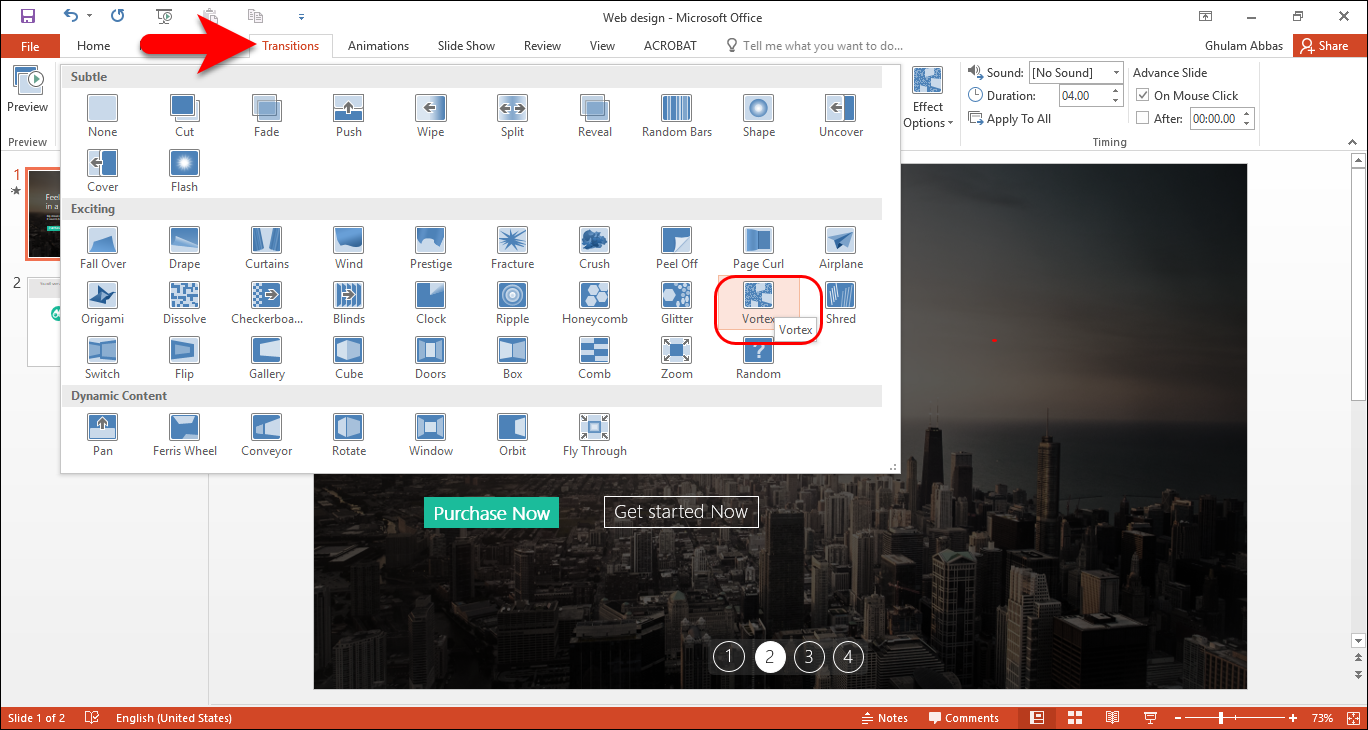
Step #1. Go to transition tab and apply any transition for the slide which you desire. I have applied vortex transition.
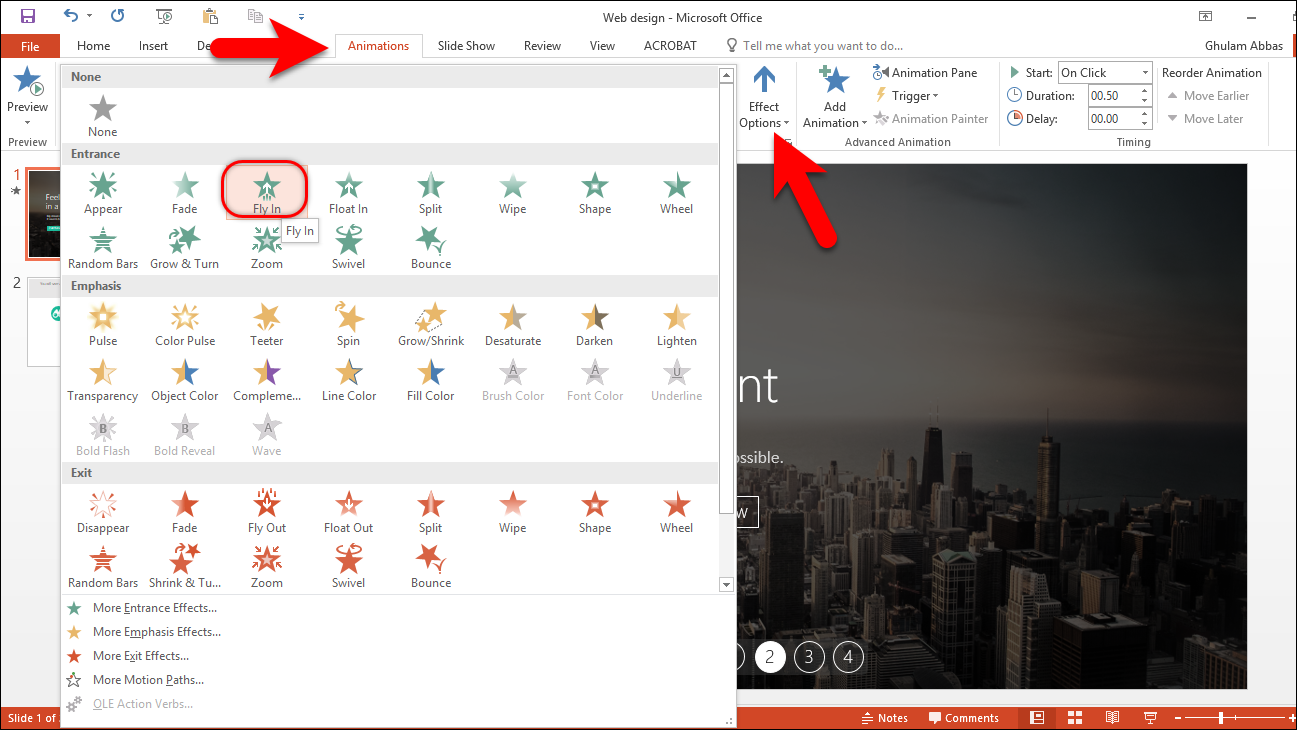
Step #2. This time select the shape, navigate to animation tab select Fly in animation. Next which I want is the shape should from the right slide, in order to change it click on Effect option then select From right.
Step #3. Apply the same animation on text boxes.
Setting up the Duration
After setting up the animation, it is time to set the duration of each animation which we Applied.
Step #1. Select the shape, go to animation tab, find timing gallery, change start to after previous, change to 1 second for both, delay and duration.
Step #2. Apply the same settings for the text boxes.
Note: You can apply your own settings, like setting the duration, animation, transition. Here take a look at Project which we created earlier before. I had increased its size due to its size. but when you will create, that will be slow.
Conclusion
It was all about, How to design custom slide on powerpoint 2016. I hope you have learned this article, and I hope you will ask your questions, give us your suggestions, opinion about what articles we have to write. If you faced any problem tell us below by comment, Feel free to tell us. we’re waiting for your suggestion.



Leave a Reply