In this article, I am going to show how to create UEFI Bootable USB for Windows 10. Creating Bootable USB for Windows 10 is as easy as create bootable USB for Windows 7 or 8. You can create Bootable USB of Windows 10 in many different ways like Diskpart utility, Powershell, Rufus, Windows USB/DVD Download Tool and many other third party apps. You can check all the 4 way to create bootable USB for any Windows in the article below.
However, all steps that are mentioned in the article above, will create bootable USB for windows as Legacy not UEFI except the Windows USB/DVD Download Tool way. So in this article, you learn how to create bootable USB of Windows 10 as UEFI.
Create UEFI Bootable USB for Windows 10
You can create UEFI Bootable USB for Windows 10 in two different ways. You can use Windows USB/DVD Download Tool which is officially by Mircosoft that transfers ISO files to the USB. It supports Windows 10,8 and 7. The next one is a free tool called Rufus, it’s faster, reliable, and offers more features compared to other tools. We recommend you using Rufus rather than Windows USB/DVD Download Tool.
Note: This method works for Windows 10, 8 and 7 also.
Step #1. Download the latest version of Rufus from the link below.
Step #2. Connect your Flash Drive higher than 4 GB to your PC then backup your files from it before continuing.
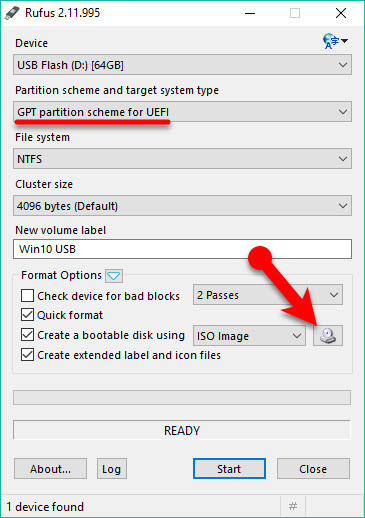
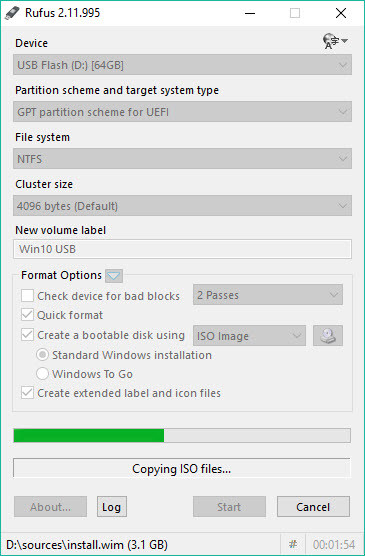
Step #3. Open Rufus then make your sure that in front of Device label your USB drive is selected.
Step #4. For partition scheme and target system type select GPT partition scheme for UEFI.
Step #5. From the File system drop-down list select NTFS or Fat32 (Default). Leave the cluster size by default(4096 bytes) and type a volume label.
Step #6. Make your sure that Quick format, Create extended label and icon files is marked. After that select create a bootable disk using ISO Image then click on the CD/DVD-ROM icon.
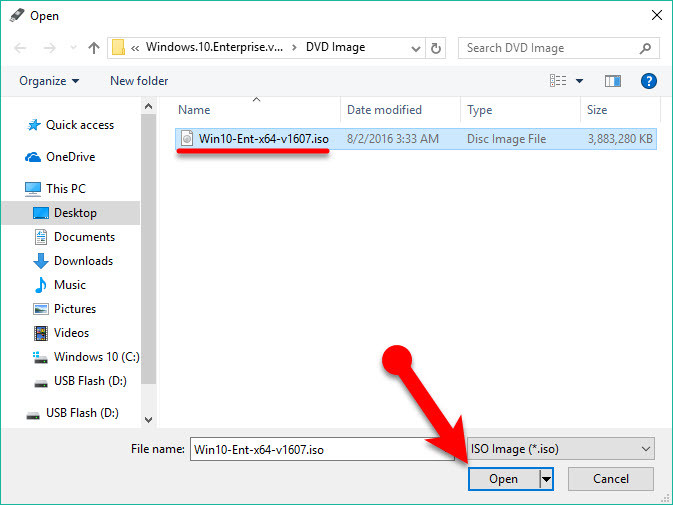
Step #7. Now navigate to the Windows 10 ISO file and click Open.
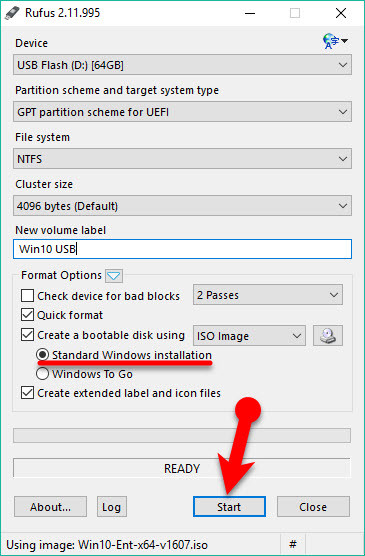
Step #8. Make you sure that Standard Windows installation is selected then Click Start.
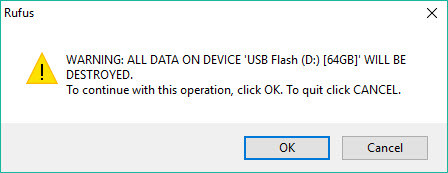
Step #9. A warning dialog box will appear, telling all the data in the drive will be clean, click Ok to continue.
Step #10. Wait for the process to be finished.
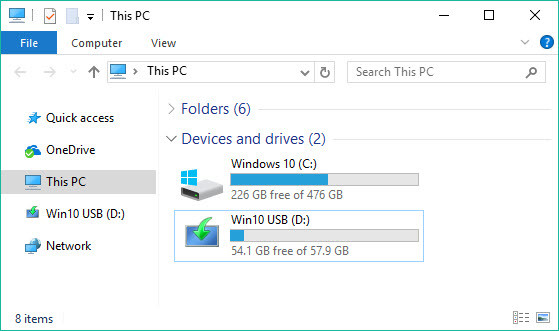
Finally: Now you are good to go for the installation process and you have successfully created the UEFI bootable USB for Windows 10,8 or 7.
It was all about, how to create UEFI bootable USB for Windows 10. If you faced any problem tell us below by comment, feel free to tell us. we’re waiting for your suggestion.
Searches related to How to Create UEFI Bootable USB for Windows 10
Rufus utility
Windows 10 UEFI iso download
Windows 10 UEFI secure boot
Windows 10 UEFI install
Windows 10 UEFI or legacy
Windows 10 without UEFI
Bootable UEFI USB of windows 10 using Rufus
UEFI boot USB windows 7

love it
thanks i did it
Hi there! Under “Boot Selection” in Rufus, UEFI is not an option. All it says is “Disk or ISO imagine (Please select)”. Does UEFI have to already be installed in your version of Windows for this to work? If there is no UEFI in your version of windows, is it not possible to boot from UEFI on a USB?
So strangely enough, after trying this two or three times, suddenly I had ten options appear on the drop down menu when there had been none all the other times I tried it! Technology is so frustratingly mysterious at time! Thanks, y’all.
nice i learn something today
Thank you for this! Tried to use the official Windows tool and it wouldn’t recognise my USB so came to you instead and am now typing from my Windows 10 PC!
Thanks for sharing your positive feedback. Good luck and have fun 😀