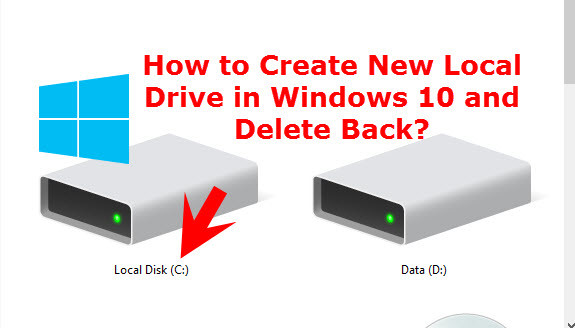
In this article we are going to show you how to create new local drive in windows 10 and delete or remove it back? It is very easy and simple just keep reading up to the end of this guide. It is very important and essential for those who have only a drive on their computer. One drive is not really enough for a real computer user. At least a computer must have two drives that in one drive the operating system should be installed and the second drive the data should be stored.
Create New Local Drive in Windows 10
Having miscellaneous drives on computer is really important. Because if your computer would have one drive, so what are you going to do with one drive? You would save data inside it or install operating system? You can do both but when your windows get slow what are you going to do? If you reset windows all the data which is on that drive will be erased. Now you may understood that how important is it? So now create new local drive on your computer so that you would not face this problem any more. Anyway just keep reading unless you get, how to create new local drive in windows 10?
Step #1. Right click on computer icon, if you don’t have computer icon on desktop just get it from here. When you tapped on computer icon then click on Manage.
Step#2. You will see Computer Management window. At the mid left-hand side, you will see the Disk Management so click on it. Here is another way of bringing Disk Management also. Press windows button+R so that you get RUN window and write there diskmgmt.msc then you will get the same disk management.
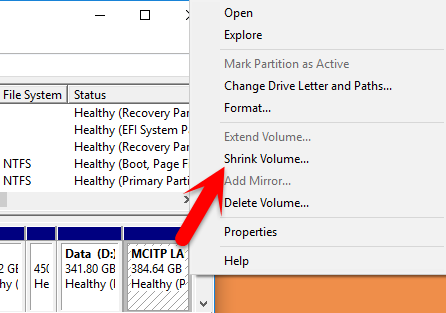
Step#3. Here I have three main drive which my data is stored on. If your computer have only a drive so it is very simple and easy, just click on it and select shrink volume. If your computer has a lot of drives so select one of the drive which you want to decrease the size and get an extra drive from it. Simply click on that drive select Shrink Volume.
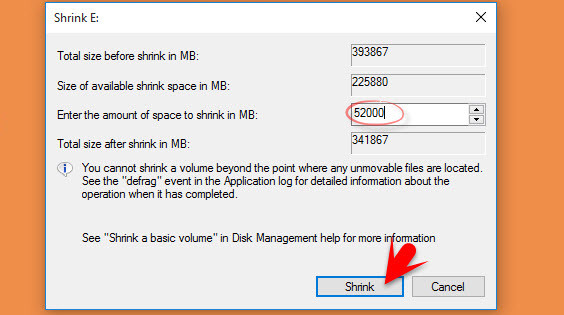
Step#4. When you clicked on shrink volume so a new window would pop up then you have to type the size for that drive. Here my one is 52000 MB that become 52 GB. That depends on you that how much space you want for that drive.
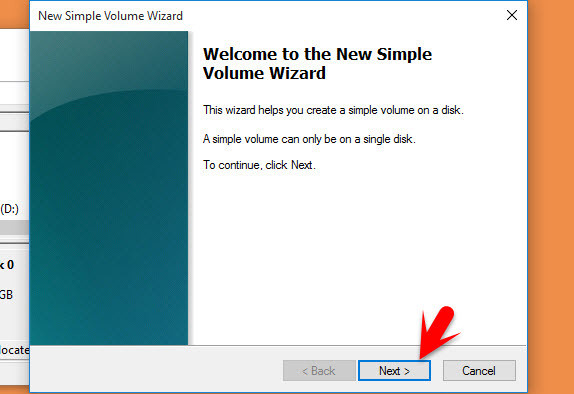
Step #5. You have successfully created a new drive but it is not finished yet. It should be configured after creating. Right click on the new drive then select New Simple Wizard. At the new simple volume wizard click next.
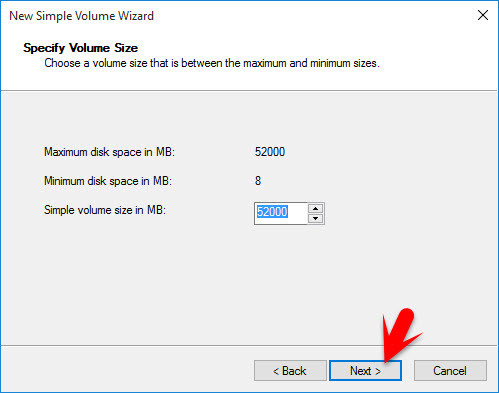
Step #6. On the Specify Volume Size once again you can opt the size of new drive. I set it as default and click Next.
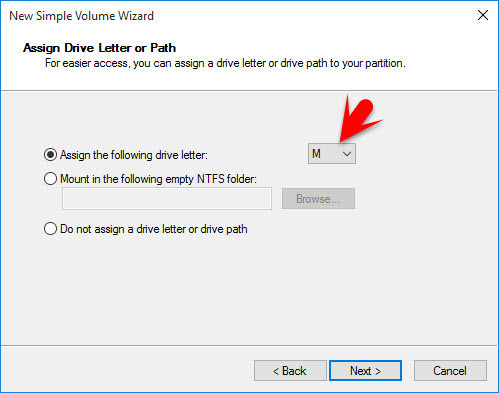
Step #7. Here you may assign a letter like A,B,C,D and so on for your new local drive or you can select new path. If you don’t want these two options just select the last option ” Do not assign a drive letter or drive path”. If you are satisfied, click on Next button.
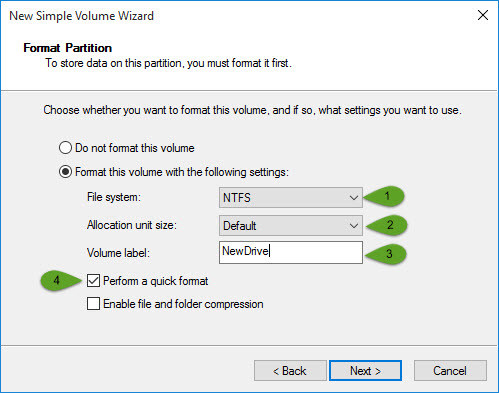
Step #8. To store data in this drive you must format it. Select second option “format this volume with the following setting” then choose a file system format “NTFS or exFat”. Check the quick format to format the drive quickly. Now click Next.
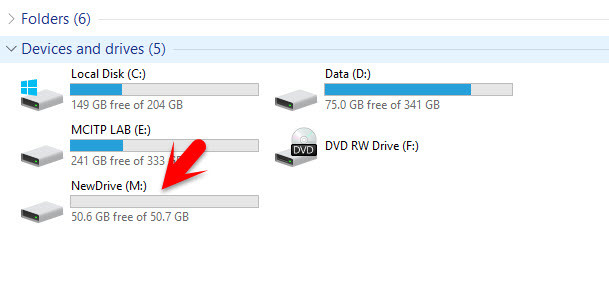
At the end click Finish to end up this process. Now you are successfully created new local drive and activated it on windows 10.
Delete New Local Drive in Windows 10
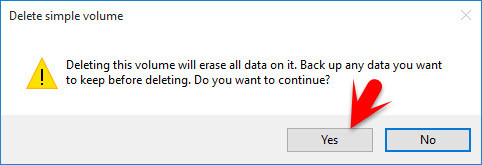
If you need to delete any drive from your computer just follow the below instructions. Again right click on my computer icon then select Manage. Disk Management window will open up. Select drive which you wanna delete it. Right click on it, Select Delete Volume. Be careful of your data because it may lost when you hit Yes button.
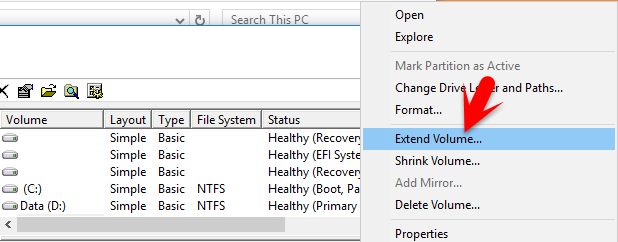
Step #2. Go to the same drive which you have shrinked this drive. Right click on it then select Extend Volume.
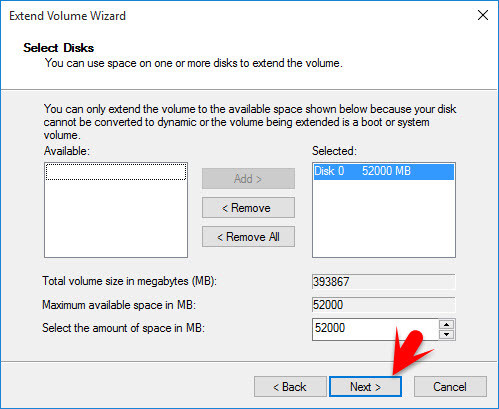
Step #3. Now new simple wizard will open up try to click on the Next button. Choose the the drive which you wanna extend on next drive. Click Next.
Now click Finish to end up this task. It was all about how to create new local drive in windows 10. As you can see the screenshot below the New Drive is removed or deleted. I hope that you guys enjoyed with this step by step guide and if you have got any question regarding to this article. Just hit a comment below to get the answer as soon as possible (ASAP).
If you did not get just watch the video below or on YouTube.com




How do i delete a local drive i deleted…when my screen shows there is no operating system found
The English is so bad in this article that it is incomprehensible.
You are right a computer user need to store data on a new partition or new drive.Because when any day he or she wants to change the operating system or reset the windows so all the data will be lost. If they have one more partition or drive they won’t lose anthing.
A new laptop always come with only 3 partitions. System Reserved, Windows and a backup. But the shrink is best method to create new partition from existing.
Thanks