In this article, I’m going to show you how to create bootable USB installer for macOS Sierra using UniBeast tool. There are various ways to create bootable USB installer for macOS Sierra, and therefore in our today’s topic, I would like to share that something is straightforward. We have written those other ways as well. If you would like to visit them, just put a glance down below.
- How to create bootable USB for Mac OS X El Capitan Using UniBeast
- How to create bootable USB for Mac OS X El Capitan Via TransMac
- How to Create Bootable USB Installer for macOS Sierra via TransMac
We’ll not only cover bootable flash for macOS Sierra but also in the next article; I’m going to show you that how to Install macOS Sierra 10.12 on PC using UniBeast software.
Create Bootable USB Installer for macOS Sierra
Step #1. The first task that you’re going to do is open the Apple App store. The store will open up after some seconds and tap on “Featured” then click on the “macOS Sierra” link.
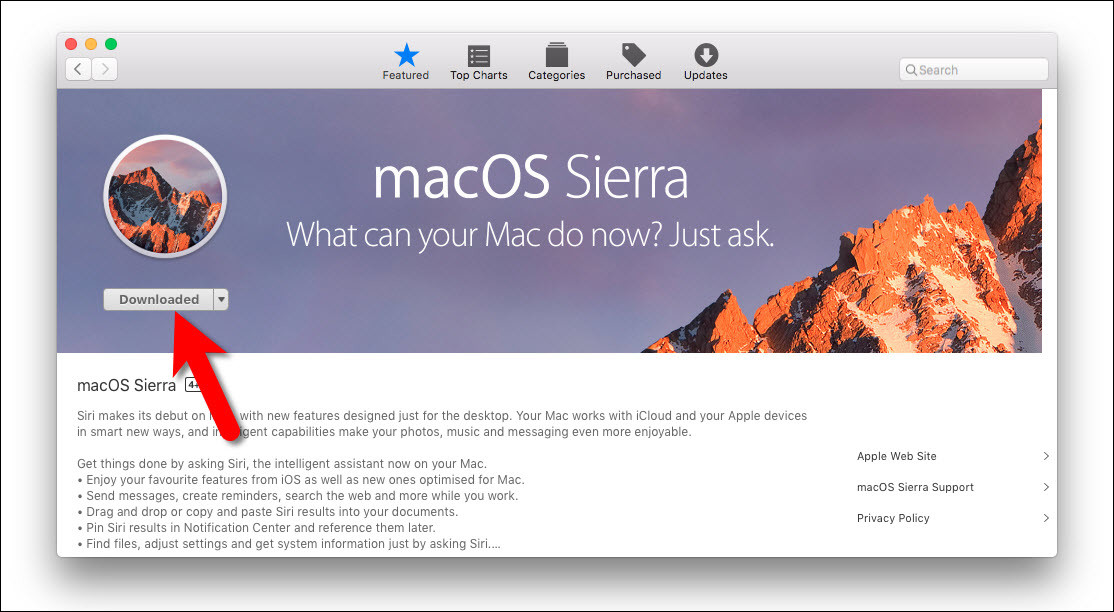
download macOS sierra 10.12
Note: macOS Sierra is free on the apple app store, and you can download it the final version.
Step #2. Now the Download button will appear. Click on the “Download” button then type your Apple ID with the password. If you don’t have an Apple ID or Don’t know how to create. Check out the step by step guide. “How to create Apple ID without a credit card on iOS Devices“.
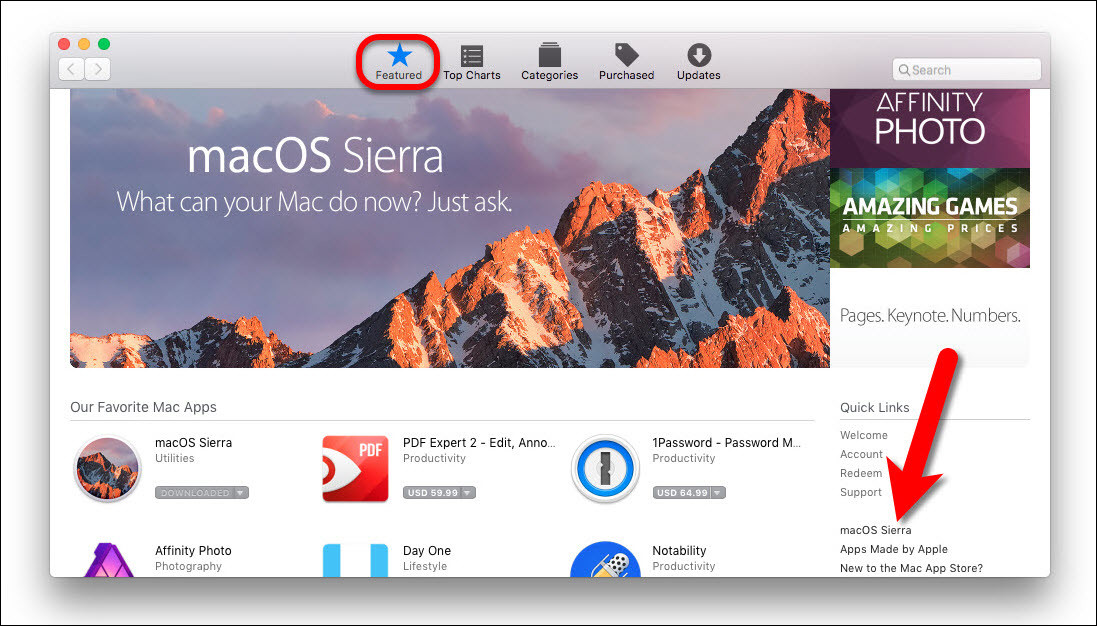
apple app store macOS sierra
Information: Once you have downloaded the “macOS Sierra 10.12”, the file will be downloaded to the Application folder on your Mac operating system or open the launchpad then you will see the macOS Sierra.
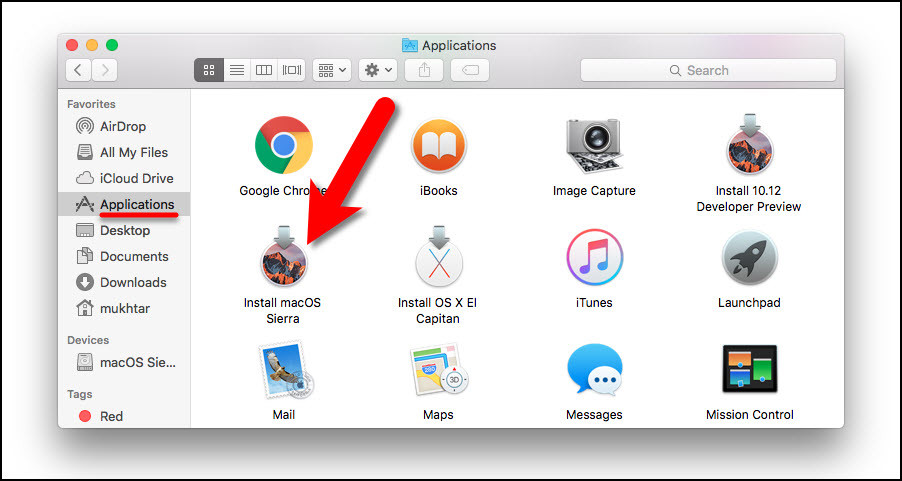
MacOS sierra downloaded in the application folder
If you don’t have the Mac device and you still want to install the macOS Sierra on your machine, you need to download the dmg file and create a bootable USB via TransMac software that is for Windows operating system. Check out the step by step guide the link above.
- Download macOS Sierra 10.12 DMG file (Direct Link)
Create Bootable USB Installer for macOS Sierra Using UniBeast
Step #1. The Second operation that you’re going to do is open up the “Disk Utility” tool on your Mac device then erase your USB flash drive for macOS Sierra. Once you open up the “Disk Utility”, then erase the USB as the given screenshot.
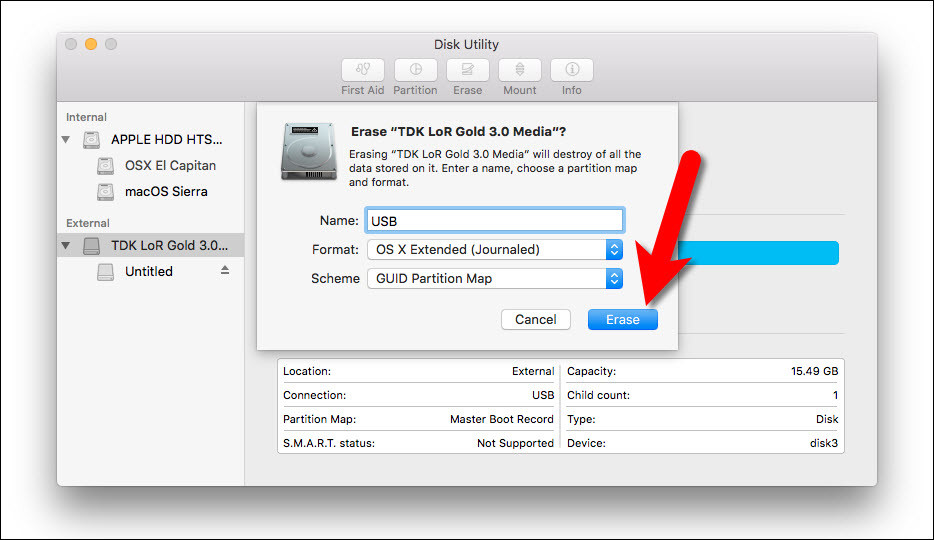
erase-USB-for-macOS-sierra
Step #2. The Third task that you are going to do is download the UniBeast. UniBeast is a portable software that does not need Installation. Download UniBeast then starts creating bootable USB, with it. This tool to create a bootable USB device from your Mac app store purchased copy of macOS Sierra.
Step #3. Now that you’ve downloaded the UniBeast software, you should start creating a bootable USB for macOS Sierra. Open the UniBeast software then hit the “Continue” button.

welcome-to-Unibeast
Step #4. Read the information about UniBeast software then hit the “Continue” button.

read-the-Unibeast-important-information
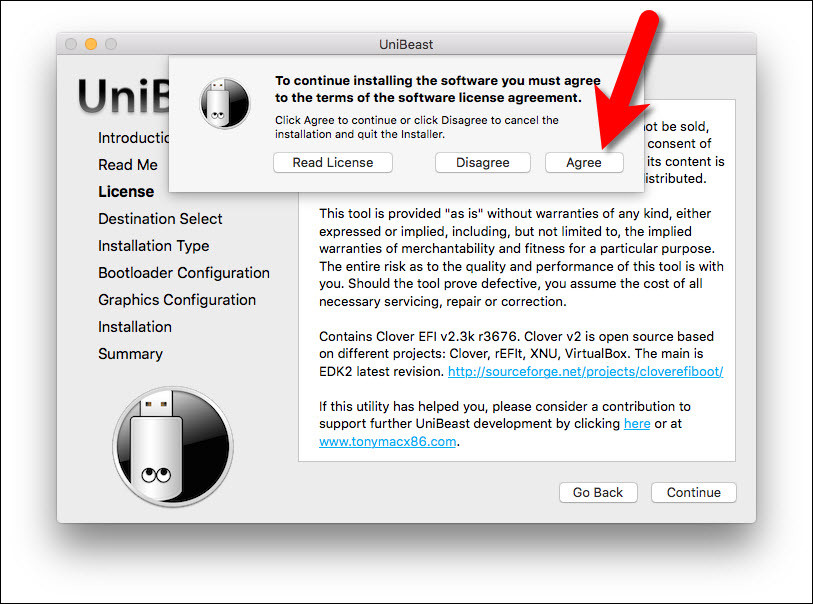
Step #5. Read UniBeast software license agreements then hit the “Continue” button. A small notification or warning will appear while you press the continue button. Click “Agree”.
agree-to-the-Unibeast-license-agreement
Step #6. Choose the macOS Sierra USB Flash, then tap on “Continue” button.

select-a-destination
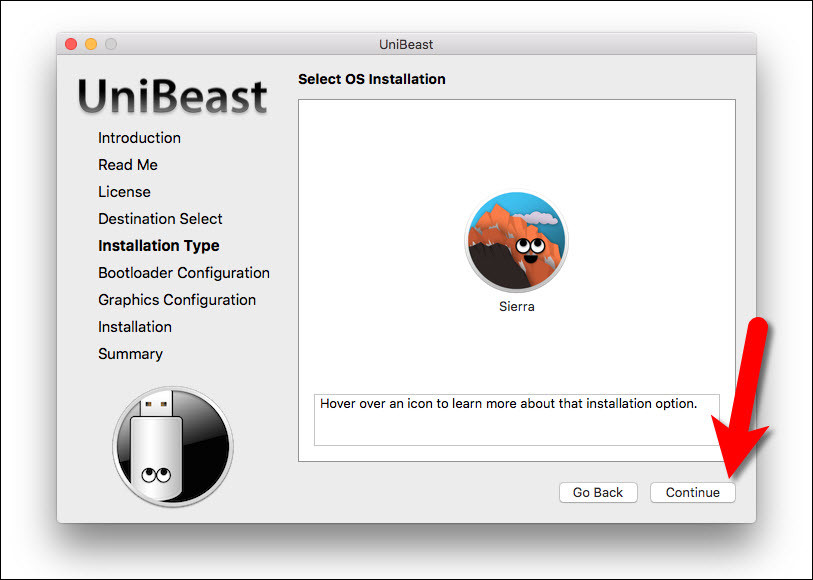
Step #7. You’ve two options “Sierra” and “El Capitan”. Here, you’ve downloaded the macOS Sierra version 10.12, so you must select the Sierra. If you have the “El Capitan” version, select “El Capitan” then click on Continue button.
select-os-installation
Step #8. In the “Bootloader Configuration”, choose the device boot support. If your computer support “UEFI Boot Mode”, select “UEFI Boot Mode”. If it doesn’t support UEFI, select “Legacy Boot Mode”. Click the “Continue” button.

choose-bootloader-configuration
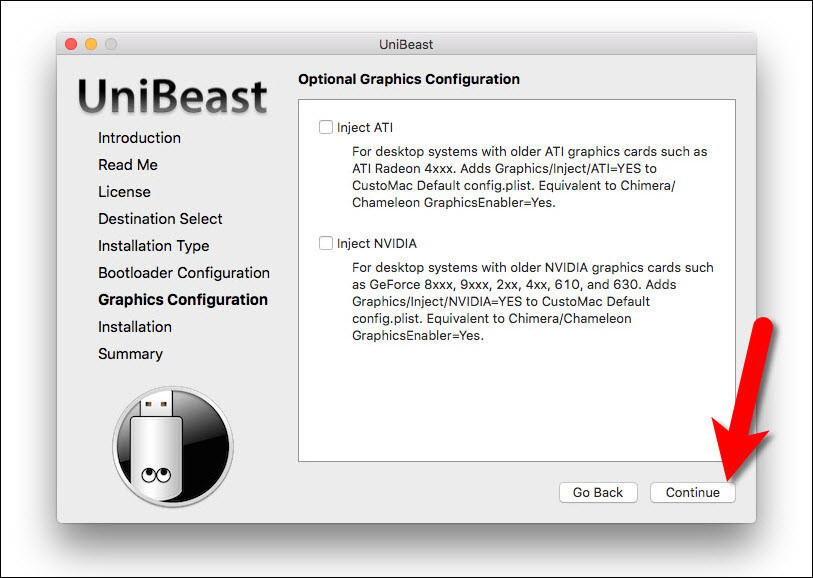
Step #6. In this step, a window will appear that you can check from these two options all or none of them. Choose “Inject NVIDIA” then tap “Continue” button. It’s optional, not compulsory.
choose-graphics-configuration
Step #7. Here, you’ll have the summary of what you’ve done. Click the “Continue” button.

verify-installation-options
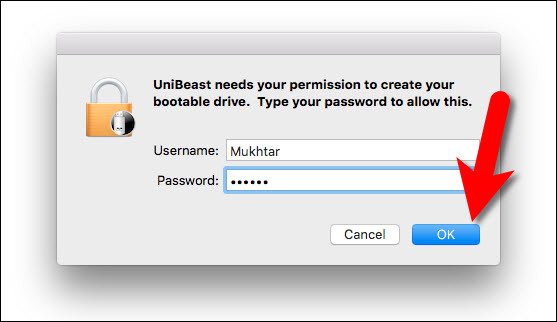
Step #8. Now, you’ll see a warning message that says “UniBeast needs your permission to create bootable drive”. Type your username and password then click the “OK” button.
type-the-device-username-and-password
Now set back relax. Because this will take around 40 to 50 minutes to complete. It is not accurate the exact 40 to 50 minutes. It might be going to take time. It depends on the speed of your computer.

installation succeeded
Conclusion
This was how you could create bootable USB Installer for macOS Sierra using UniBeast. Now eject your flash drive then install macOS Sierra on PC or your Mac device. If you don’t know how to install macOS Sierra, visit the following article.

WOW just what I was searching for. Came here by searching for comprar links
I’ve tried step by step to install High Sierra on my Lenovo G50…
I got a message that said “EFI USB Device has been blocked by the current security policy”
The only option at this point is hit the “ok” and reboot and then I got the same thing. What should I do?
After creating the USB drive to install High Sierra my laptop, a Lenovo Ideapad 300, will not boot to the installer, it just stops with a black screen and sits there.
I’m trying both UEFI and Legacy mode. Am I missing something?
Change your config.plist file from default to your own system.
Find your system config.plist file from the link down below.
https://github.com/RehabMan/OS-X-Clover-Laptop-Config
Dear All..thank for lovely tutorial..
actually..i use unibeast (7.1.1) method..every thing running well..until i stuck in my laptop installation at phase the installation need verify blutooth keyboard & mouse..
first tryng is connect my usb keyboard into laptop usb port, result = not detected at all..
anyway this is my laptop specs
ASUS a451LB
i7 4500 U, 1,8 GHz
HD 4400 + GForce 740M
Realtek Soundcard
Qualcomm Atheros AR9485WB-EG wifii adapter
Realtek PCIe Ethernet 802.3
RAM 4 GB DDR3
Any suggest???
thanks b4 n success always for u all……..
To get your keyboard and mouse (touchpad) work in that section, you need to place 3 kext to your USB Installer EFI > Clover > Kext > Other.
Download and paste this kexts: AppleP2SmartTouch, VoodoPS2Controller and FakeSMC Kext.
Note: You can mount the EFI of your USB Installer via Clover Configurator or EFI mounter 3.
Hello, i was able to create succesfully an usb stick as mentioned. Even changed the file according to the hardware specs (Pacote de Config) but every time i boot, i boots all the way but the install menu never shows up and it’s rebooting again. Do you have some tips ?
Maybe your system is not compatible. Can you give me your system specification?
Can you please upload in Google drive? That website is extremely slow. With 4g internet i get 30-40kbps
We will update the link but now we don’t have time. And our internet speed is so slow.
pls update ur link
Which link?
Hello. When I chose to erase my USB with Disk Utility, there was no option for Scheme. After I created the bootable USB in El Capitan in VirtualBox, Windows Disk Management saw the drive as RAW. And I couldn’t boot into the installer at all. Did I miss something?
You have to erase or clean the whole USB, and on that time, you see the option Scheme, and if you select just the volume, it will show only the name and format type, not the scheme.
Thanks man it’s describing very well.
You’re welcome and good luck