If you’re looking to install windows 11 on your computer, then you need to check if your PC has TPM 2.0 alongside this secure boot. Now that Microsoft has taken down the official tool to check windows 11 compatibility, we need to find out other ways and methods to check if your PC has TPM or no. Since businesses are using the TPM 2.0 for security reasons since 2011 they can easily install windows 11 on their actual PCs. There’s also another theory for home users if you have bought your computer in 2016, then most likely your PC have the TPM 2.0 chip in the motherboard. However, it is disabled from the BIOS of your computer, go there and enable the TPM 2.0.
Why there is a theory for home users because the inter 8 gen processors and the AMD Ryzen 2000 series and 3000 series were launched in 2016 and 2017.
4 Ways to Check If Your PC has TPM 2.0 or no
Method #1. Check If Your PC has TPM using the TPM Management
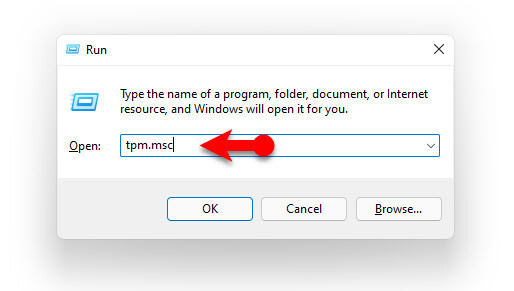
By default, if PM it’s enabled from BIOS on your computer, then you can access the TPM management using the TPM.msc on the run dialog box. You can also search in the start menu for tpm.msc and press enter.
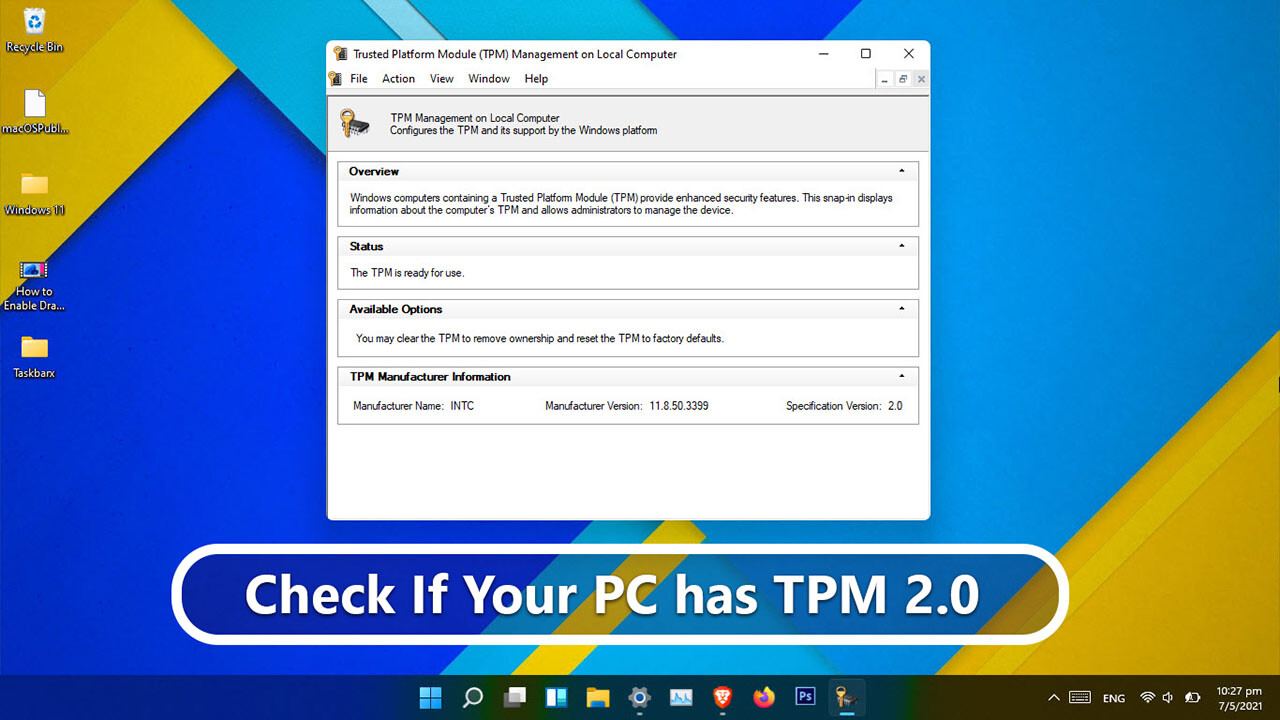
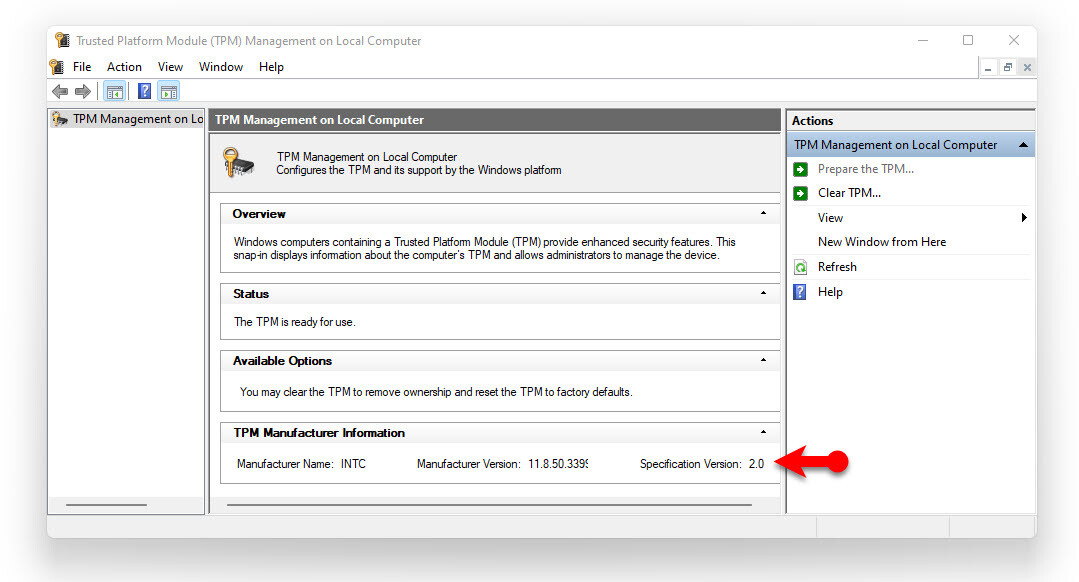
Once the TPM management on local computer is opened, you can find if your PC has TPM or no. If your PC has TPM, then you need to check the version of the TPM because windows 11 requires the version of 2.0.
The TPM management on the local computer can show other information regarding the status of the chip and the TPM manufacturer.
if your PC does not have the TPM chip on the motherboard, then you will see that compatible TPM cannot be found.
Method #2. Check If your PC has TPM using the device Manager
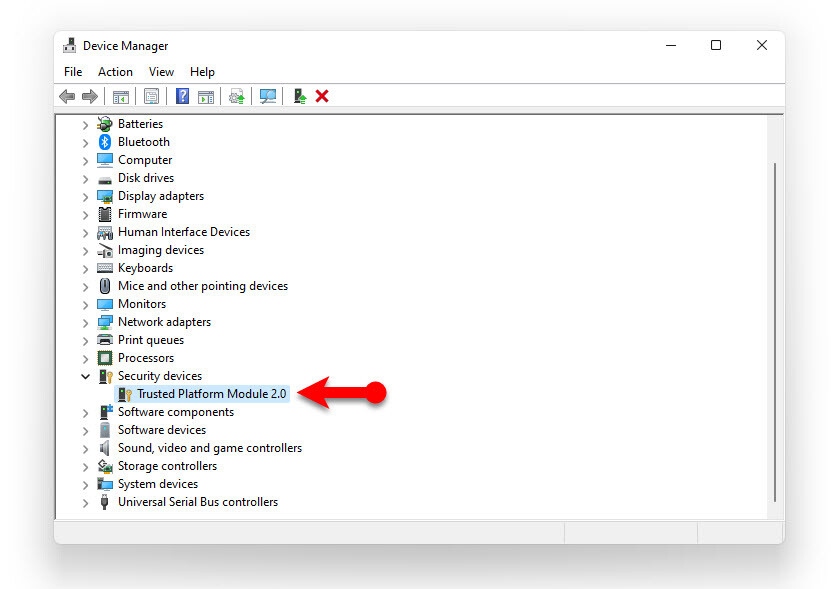
The device manager is the place where the drivers of the operating system are available. So, if your PC has a TPM chip available on the motherboard then the driver should also be available in the device manager.
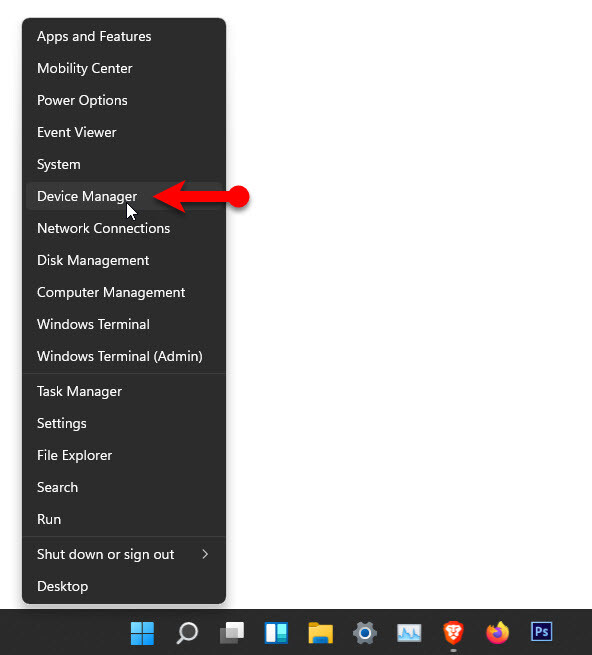
The very first thing is that you have to open the device manager by right-clicking on the start menu and choose the device manager. Or you can type devmgmt.msc on the run dialog box and hit enter to open the device manager.
The moment the device manager is launched, expand the security devices, you will see there the TPM along with the version of it.
Method #3. Check If your PC has TPM using the Command Prompt
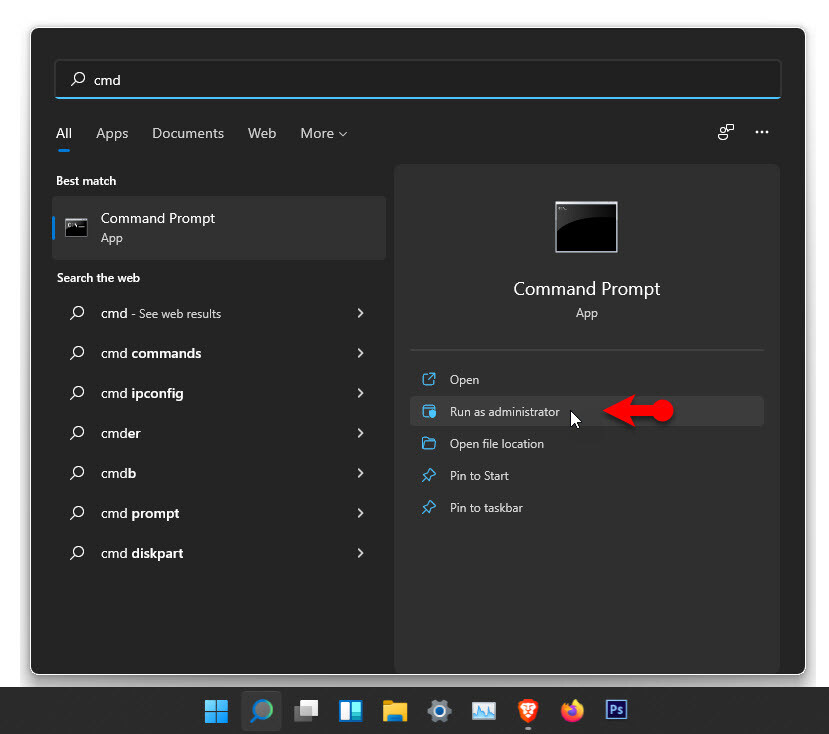
open command prompt with the administrator privileges. You can do it by searching CMD on the start menu and choose run as administrator.
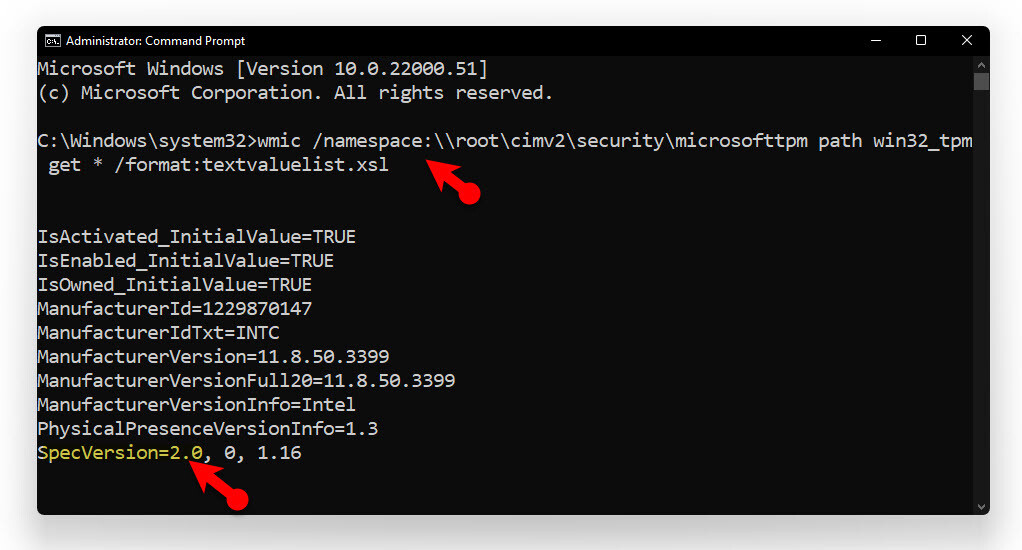
On the command prompt window, you need to type the following command, or you can simply copy the commands and paste them there.
wmic /namespace:\\root\cimv2\security\microsofttpm path win32_tpm get * /format:textvaluelist.xslAt the end of the line, you will see the TPM version.
Method #4. Check If your PC has TPM using the BIOS
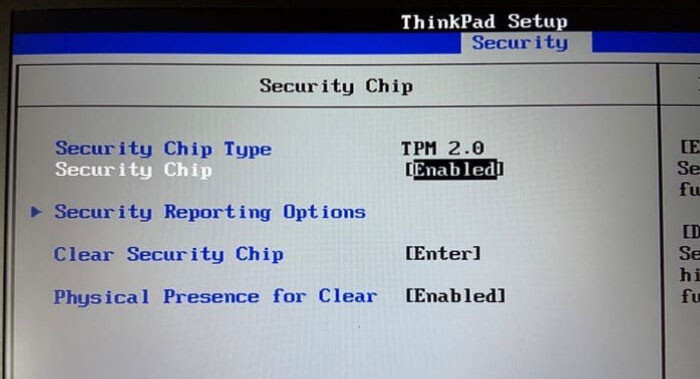
Restart your computer, hit the BIOS key off your computer, and then go to the security tab. There you will see the TPM whether it’s enabled or disabled, if it’s disabled you have to enable it. Above you can also see the TPM version. However, modern motherboard settings are not like this (Screenshot below) and you may not see the TPM version. You can only enable or disable the TPM on the motherboard.
Among the F.A.Q, one question is asked alot, and that is can I add a TPM 2.0 Chip to my Computer or No?
The answer if yes, but only in desktop computers, laptops motherboard, do not have the option.
Summary:
Before installing windows eleven on your actual PC you need to check if your PC has a TPM 2.0 chip or on the motherboard, to check if you can use one of the below methods.
- Open the TPM management on the local computer using the run dialog box.
- You can also use the device manager to check whether your PC has a TPM 2.0 or no.
- Or you can use the CMD to run a command and see the version of the TPM.
- And finally go to the buyers of your computer, go to the Security tab, enable TPM 2.0 if it is disabled.

Leave a Reply