Boot in safe mode is a good choice for those who want to solve technical issues on its operating system. The safe mode explains that it has no third party application installed on the computer, and presents only few hardware drivers. Thus making sure that your computer only accesses its hardware components in normal condition. At the same time, you can choose to load a previous operating system state by using the repair function of Windows safe mode. Anyway in this article you will learn How to Boot Your Windows 11 PC into Safe Mode?
What is Safe Mode?
Every now and then your PC will run into trouble, and sometimes your PC won’t even installed. This is the time where the safe mode comes in handy. When you are in the safe mode, the programs and the drivers will be disabled, and it even what comes with its own third party drivers that it is booting it.
And now you get the idea when we are about to use these safe mode. Suppose if you have installed an application or a malware has installed silently in the background, after shutting down your PC you can’t boot normally into your windows. Instead you are facing booting issues, if you go to the safe mode, all of these all of the software features and malware will be disabled, that is a place where you can remove them and boot your computer normally.
In any case if you could not solve the issue, at least you can copy all of your files from your computer into an external drive or into cloud, then try reinstalling your windows. As far as I know, as long as the core of the windows 11 is not damaged, you can troubleshoot and diagnose your windows issues with the safe mode or the other troubleshooting tools.
This is the main reason that we are using safe mode. But now the bigger question is how to access safe mode in windows 11 or Windows 10. Apparently there are a lot of methods and ways that you can use to enter into the safe mode in your windows 11 PC. So let’s begin into the process and learn them one by one.
1. Access Safe mode using the Advanced Startup
Perhaps the quickest and the yet the simplest method that you can use to access the safe mode in your windows 11 PC is the advanced startup. apparently there are to Apparently there are several methods that you can use to access the advanced startup. But the quickest method to access the advanced startup is to hold shift and click on restart button it will take you directly into the advanced startup.
Once you are inside the advanced startup, click on troubleshoot.
Inside the troubleshoot, choose advanced options.
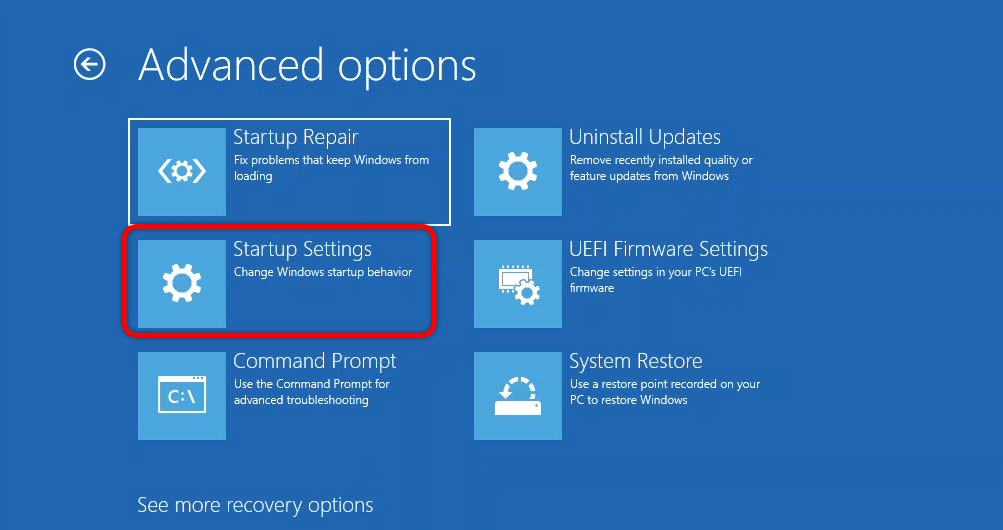
This time go to the startup settings.
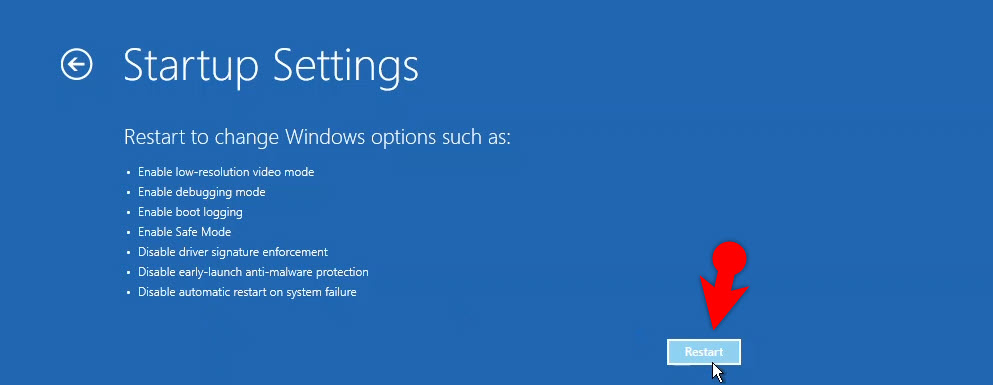
The moment you are inside the startup settings, you will see a lot of options once you restarted your PC. You will also notice the Safe Mode among them. Anyway you have to click on restart.
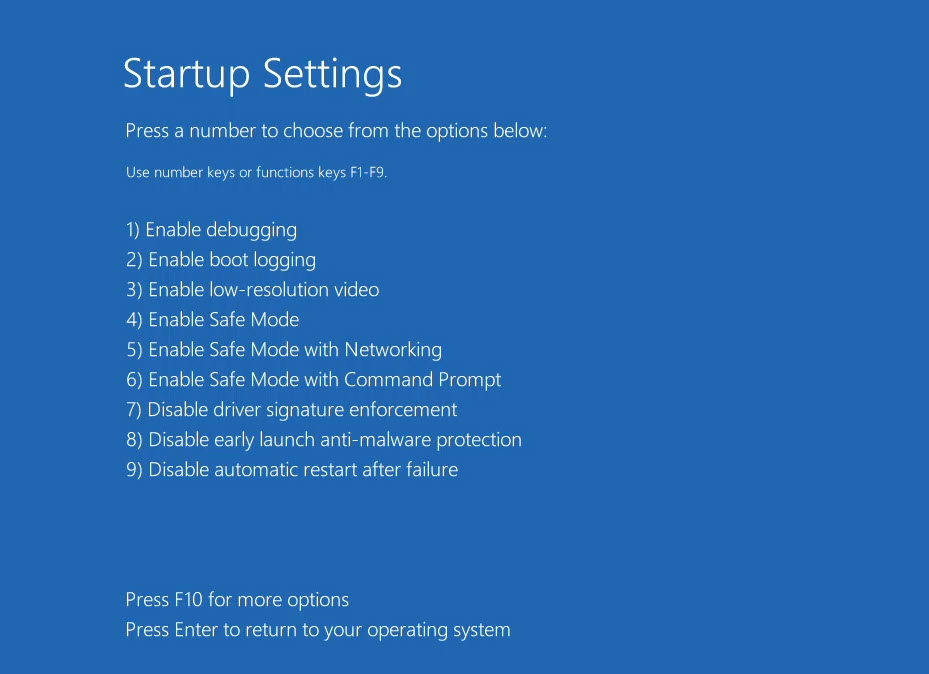
After your computer restarted, right now you can access startup settings which also includes the safe mode. If you want to access the safe mode in windows 11, there are three options.
- The Stanard Safe Mode: If you want to go to the standard safe mode, you have to press 4 on the keyboard.
- Safe mode with networking tools: if you press 5 on the keyboard it will take you to safe mode but it will also enable the networking drivers for you.
- Safe mode with command prompt: Press 6 and it will take you to the safe mode.
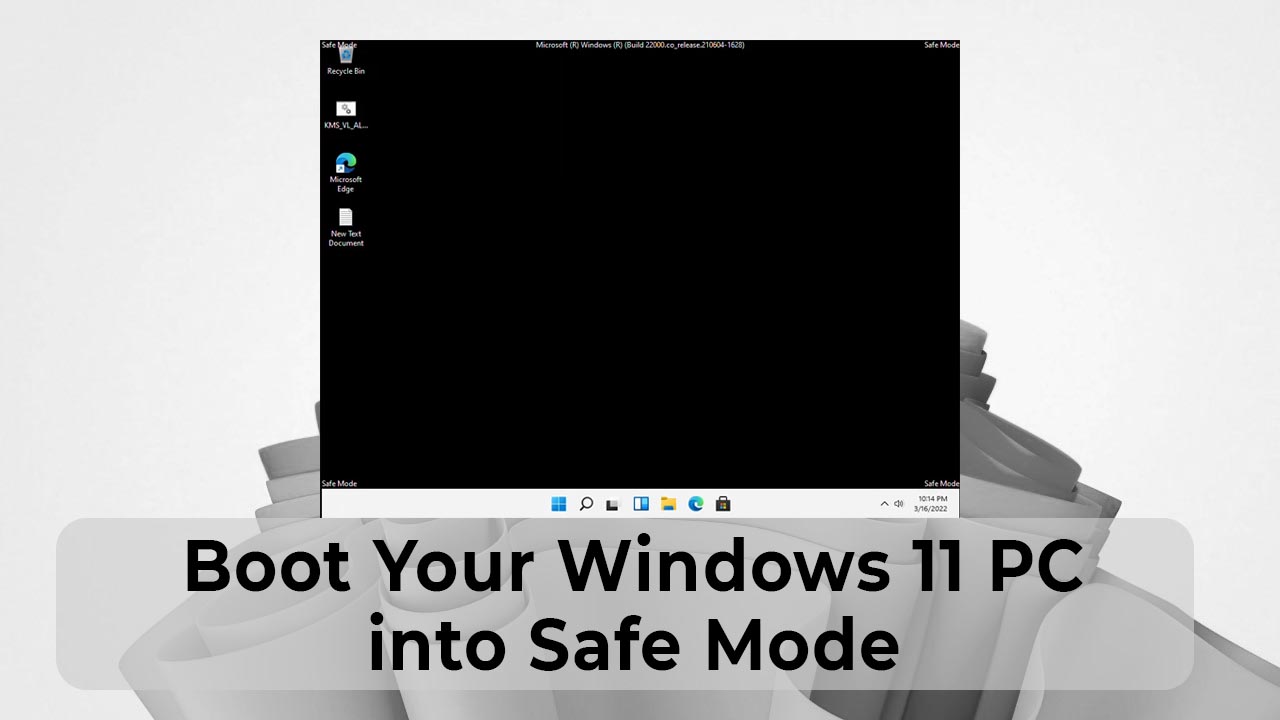
And now have a look at the accessed Safe mode.
2. Access Safe mode using Bootable USB
For some reason if you can’t even access to the login page of your windows 11, then you have to use this method to access the safe mode in your windows 11 PC. For this you have to create a bootable USB of windows 11. So you have to borrow a computer of your brother, sister or a colleague, maybe use your office’s computer. Then for creating a bootable USB of windows 11 you will need the windows 11 ISO, a USB flash drive and use Rufus or use command prompt to create a bootable USB. That is all
Once you created the bootable USB for your computer you need to attach the USB to your computer and then press the boot key off your computer. So you have to do a Google search and find out the boot key on your computer, if you do not know about it. Once you did that, boot your PC into the USB flash drive and once you are on the installation page of windows 11, at the bottom you have to choose repair your windows.
It will restart your computer, after the restart it will take you directly into the advanced startup options.
Once you are inside the advanced startup options you need to choose troubleshoot, on the next pad you have to choose command prompt. And inside the command prompt you have to enter the below command and press enter.
bcdedit /set {default} safeboot minimal
Once you entered the command, close the CMD window and go back. This time you have to choose continue.
Note: The command that you entered inside the CMD, it has set the safe mode as a default boot. So it means every time that you power on your computer it will boot your computer directly into the safe mode. But once you have fixed the issue you can fix that problem from the system configuration. Just search for system configuration from the taskbar, and disable the safe mode.
3. Access Safe mode using the System Configuration
As I said earlier, that there are multiple methods that you can use to access these safe mode in windows 11 PC. Among them comes the system configuration. You can access the system configuration by searching for it on the search box at the taskbar, or you have to simply open the run dialog box and type Msconfig and press enter. Either of this method is going to open this system configuration easily and quickly.
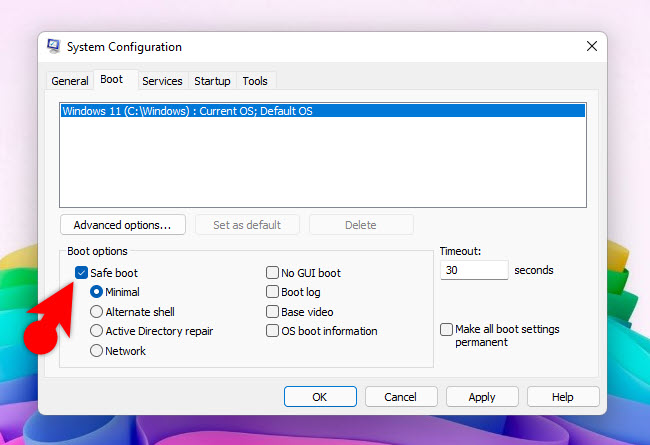
once the system configuration is opened, go to the boot panel. Under the advanced options, check the box of safe mode and click ok.
Conclusion:
For troubleshotting your computer, safemode is a handy feature.You can also access safemode through the Recovery drive too. Anyway I hope you have learned this lesson and let me know your thoughts in the comments section.





Leave a Reply