The very first question that may appear on your mind, is why in the world you have to block IP addresses on Windows 11 or macOS. There could be a lot of reasons, suppose you may want to block an IP address to stop others and yourself from accessing a specific website. You can also block malicious IP addresses to protect your computer from hackers and bots online.
The question is can you really block IP addresses on your computer or no?
To give you a crystal clear answer, Yes, you can block IP addresses on your computer to access certain websites. If those websites have only a single IP address, then after blocking you won’t have any issue. However suppose if you want to block Facebook, then blocking Facebook could be a bit tricky, why because Facebook is using multiple IP addresses. So in simple words, you will have to block all of those IP addresses of Facebook. Also if disabling a simple IP address has blocked you from accessing that site, then it is very good for you. That time you don’t have to block other IP addresses or Facebook.
Steps to Block an IP Address on Windows 11
The simplest and yet the cleanest method that you can use to block an IP address on windows 11, window 10, and other versions of Windows, is the firewall.
Step #1. Find the IP address of the side that you want to block.
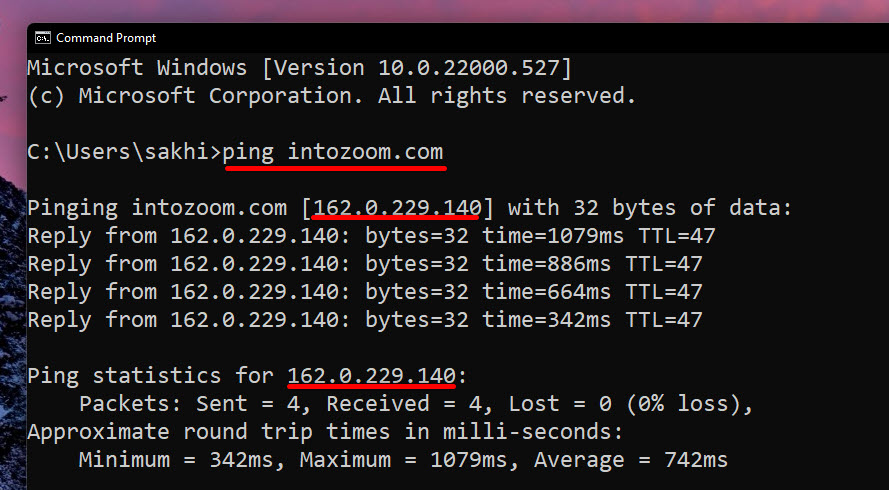
Suppose I want to block Intozoom.com, the very first step would be that I have to find this website’s IP address. To find the IP address on windows 11, simply open CMD, and then inside the same day type pink intozoom.com
After running the command, you’ll see a reply from the IP address, inside the parenthesis you will see the IP address of that website. In my case, the IP Address of Intozoom.com is 162.0.229.140.
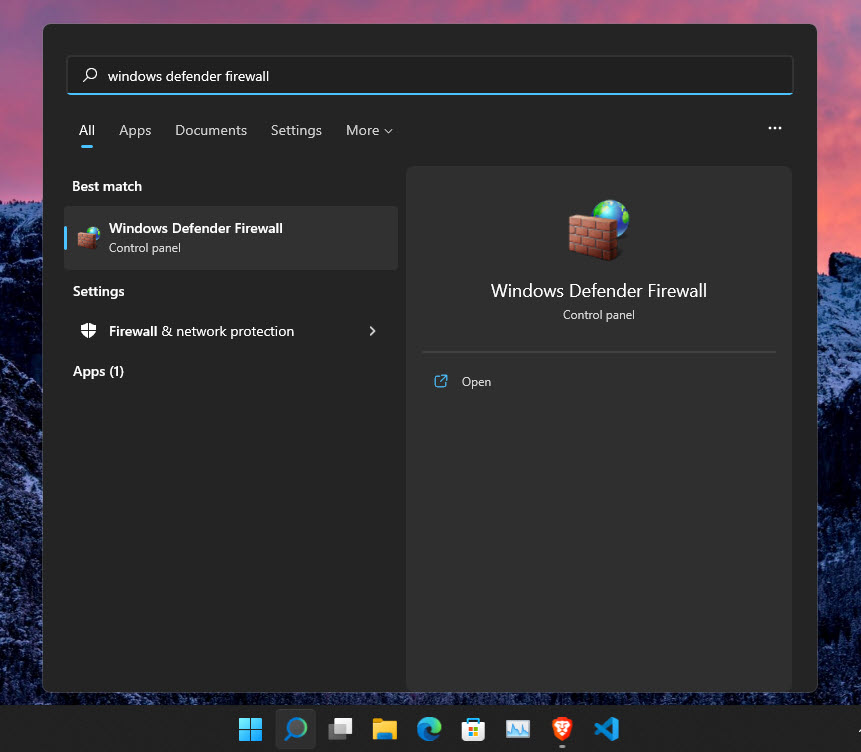
Step #2. Open the windows defender firewall.
Click on the search icon at the taskbar, and search for Windows defender firewall, after appearing simply open it.
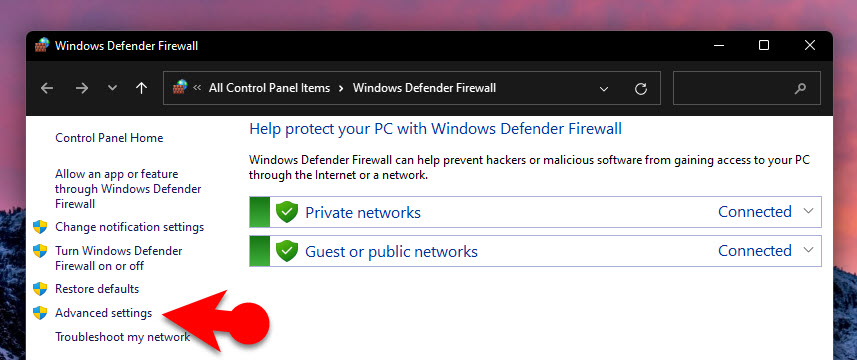
On the Left Panel, click on Advanced Settings.
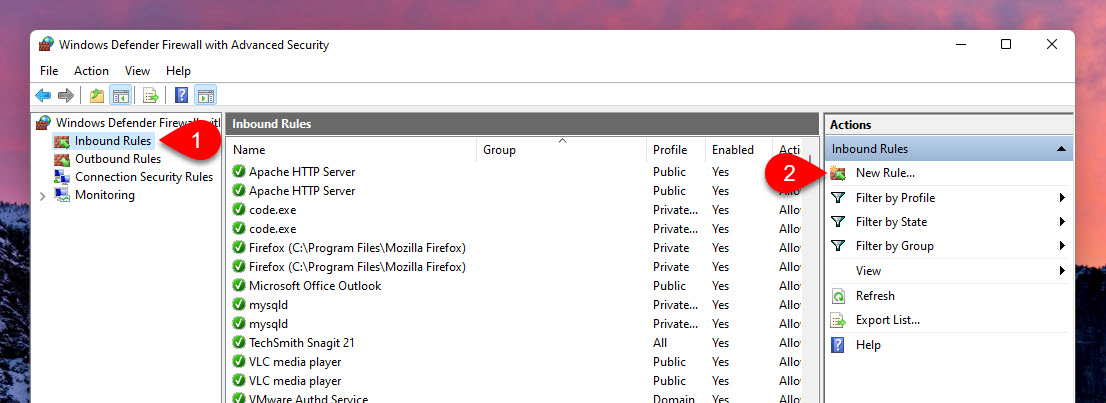
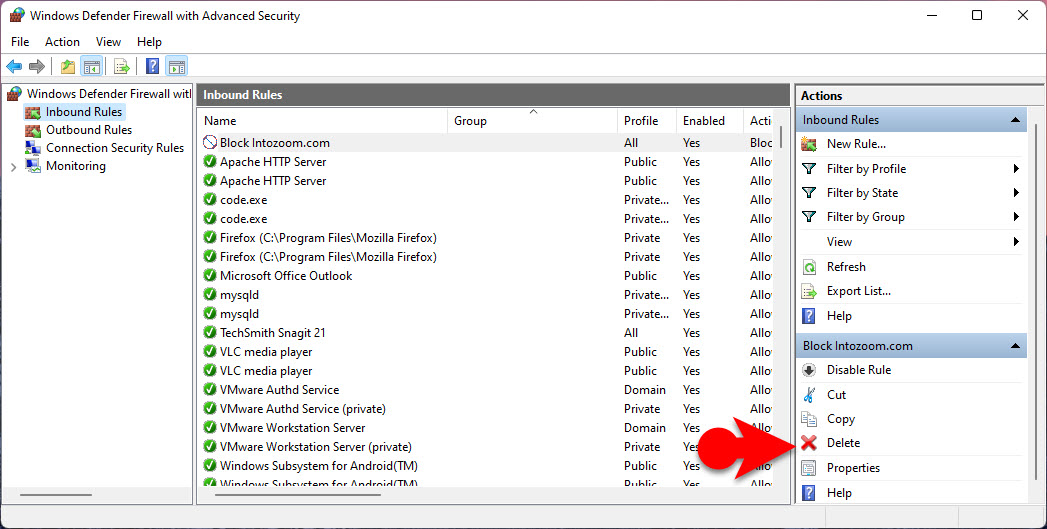
Click on the Inbound rules then click the new rule.
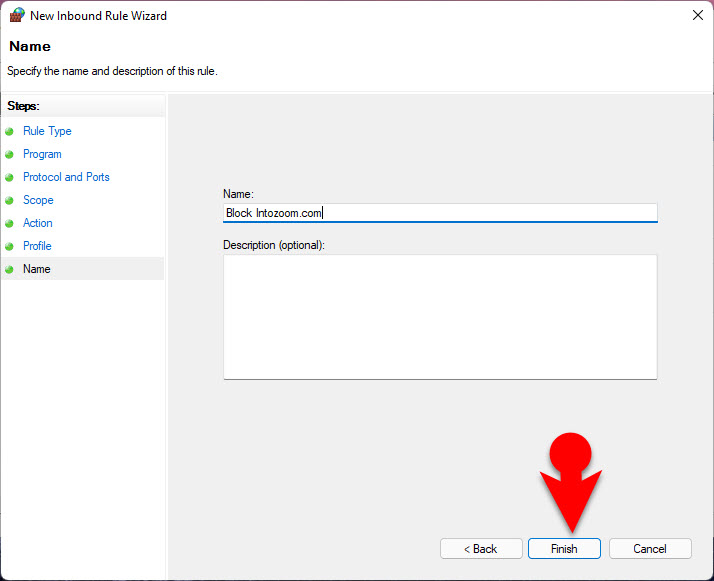
Apply the following steps next.
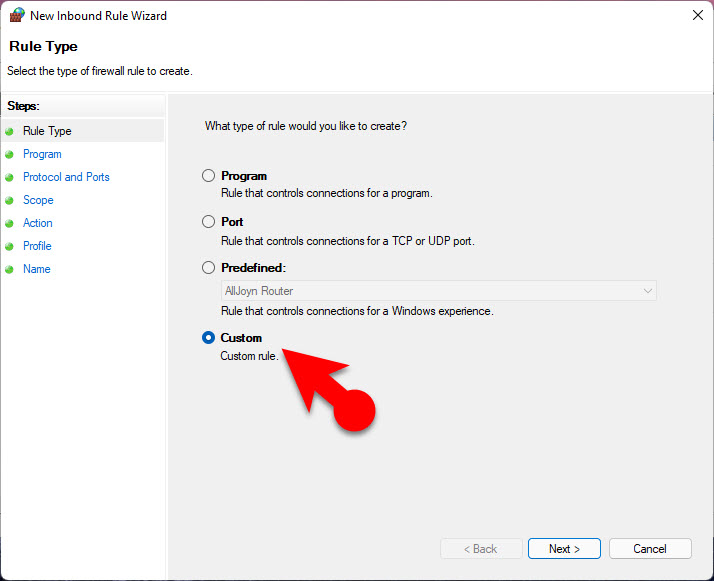
- On the Rule Type window, click custom and click next.
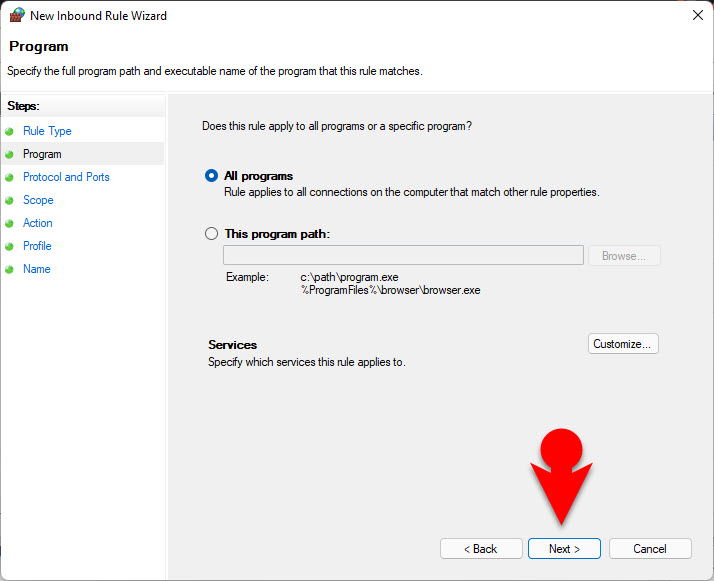
- Click Next on the Programs Page too.
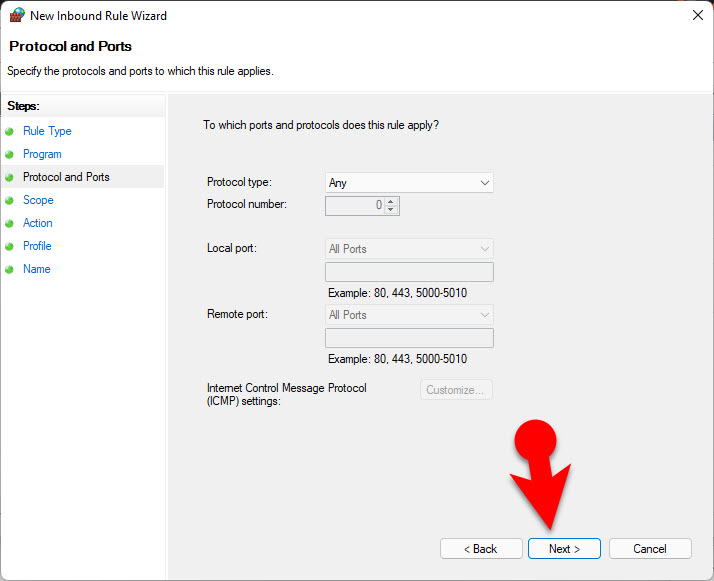
- On the Next page which is the protocol and page, also click next.
Click on the Images to Zoom in.
- 1. Custom Rule
- 2. Program
- 3. Protocol and Ports
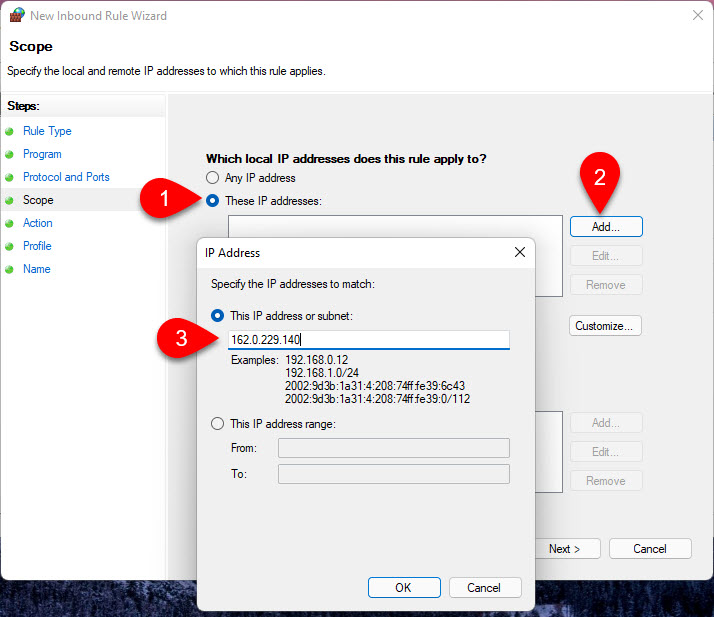
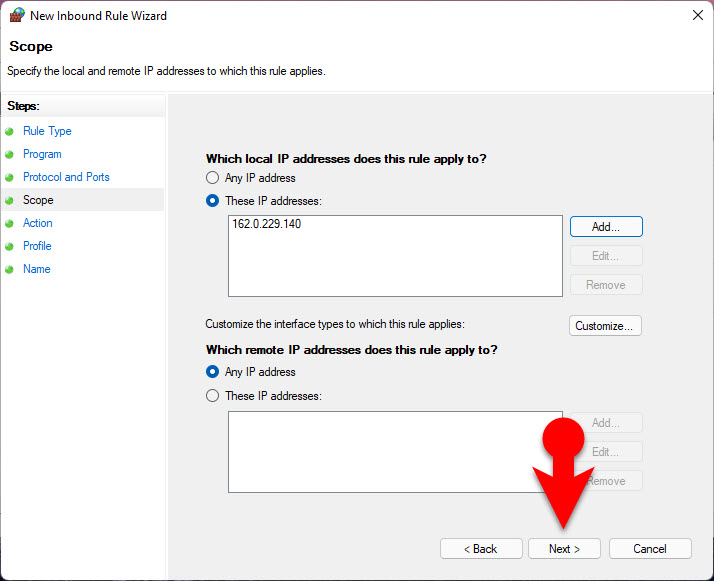
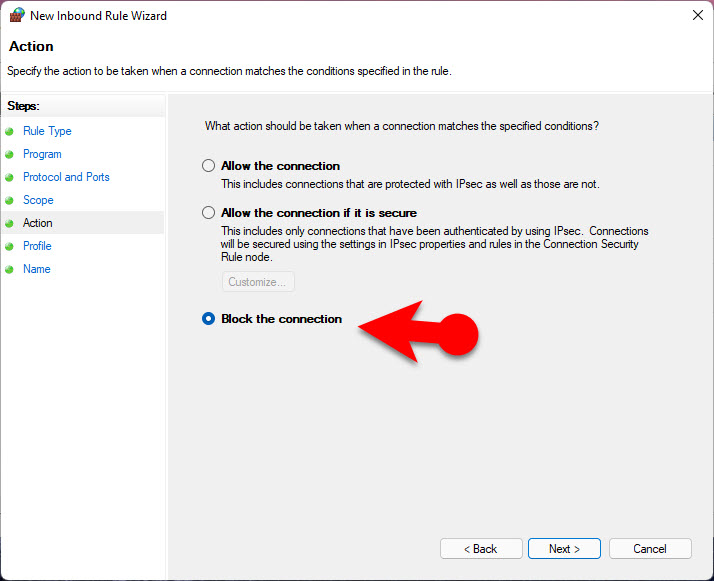
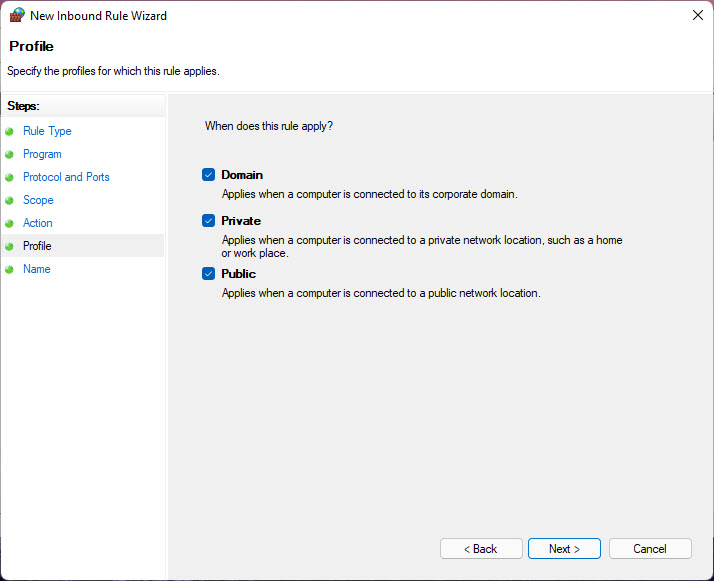
Step #3. This is the step where we are going to insert the IP address to block it on the computer. First Click on the “this rule is applied to These IP Address”, then click on Add, and insert the IP Address that you want to Block.
Conclusion:
This is how you can block an IP address on windows 11 using a firewall. I hope this article has been helpful to you and let me know your thoughts according to this post in the comment section.

Leave a Reply