One of the most important factor to any blogging site is to gain traffic in any way possible. Some are running Google ads, social media ads and some are working on the search engine optimization in order to rank their post on these search engines. In today’s era social media plays a key role for any successful business specifically blogs. So if you are running a blogging website, maybe you are posting several posts a day, then sharing those posts individually into different social media platforms is going to take a lot of time. Specifically if you are using WordPress, there are plugins you can purchase, or you can use the free plugins such as jetpack to automatically share blog posts on social media.
If you are a beginner, you must follow this step by step article to automatically share blog posts on social media while you are publishing your post into your blog. Also if you go deeper into the settings of the jetpack, you can even schedule your posts without purchasing a third party tool for social media.
What is Jetpack Plugin?
I am not going to explain what is jetpack plugin based on the description that provided into WordPress and their official website. I will be providing the result based on my experience that I have used this plugin for the past 7 years.
To be perfectly clear, jetpack is an all-in-one plugin and at the same time a heavy plugin if you’re hosting is not fast enough. Apparently you are only installing one plug-in but when you install just jetpack plugin you are going to get the following other features with it too.
- Daily Site sates
- Jetpack security
- Jetpack Backup
- Scan (Only if you upgrade your Plan)
- Anti-spam
- Comment moderator
- Brute force protection
- Downtime monitoring
- Performance and Growth such as Image Accelerator, Search, VideoPress, SEO Boost (If you Purchase it), Jetpack blocks
- Social Media Sharing and more.
In any case most of these features are by default enabled, even in the free version. But the option that we are looking is called social media sharing which by default is not a turn on from its settings. And in this article our sole focus is to enable it and then configure it to automatically share your blog posts into social media.
Automatically Share Blog Posts on Social Media Using JetPack
Before beginning this post, you must first search for jetpack and install it on your WordPress website. Aside from that one you also need to create a WordPress account or you can use your Gmail account to setup your Jetpack account. In any case if you have already set up a jetpack account then you have to skip the following step and move on to the next step.
Step #1. Setup Jetpack Account using Your Gmail account
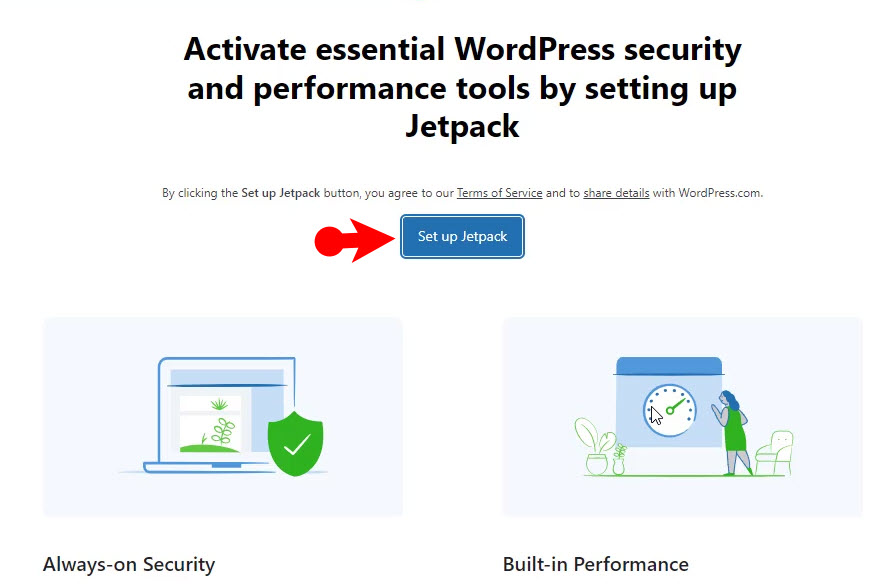
The moment you activate the jetpack plugin, it is going to ask you to set up your account. Without setting up your account you can still use it but not to the full potential of this plugin. In any case as I said earlier, if you have already set up this is a step then you can simply skip it and move on to the next step of automatically sharing your post into social media.
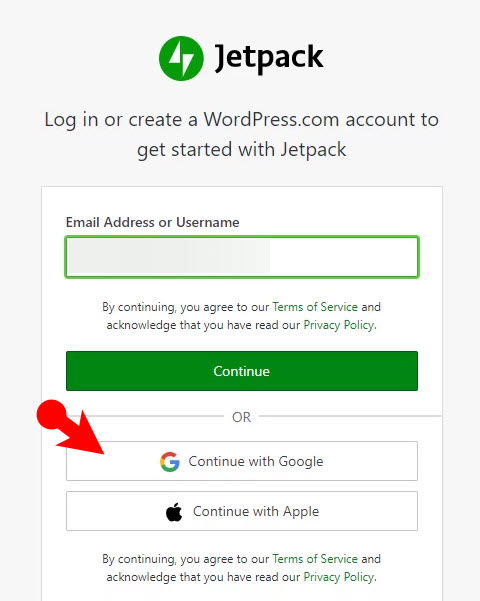
Apparently sharing your post to social media is not a default option in the jetpack plugin, for that you have to sign up into wordpress.com. So, you can just go ahead and simply create an account inside wordpress.com or you can use a Gmail account just I am using. So, click on continue with Google, then a new window will open where you have to select your Gmail and then it will direct you to the next step.
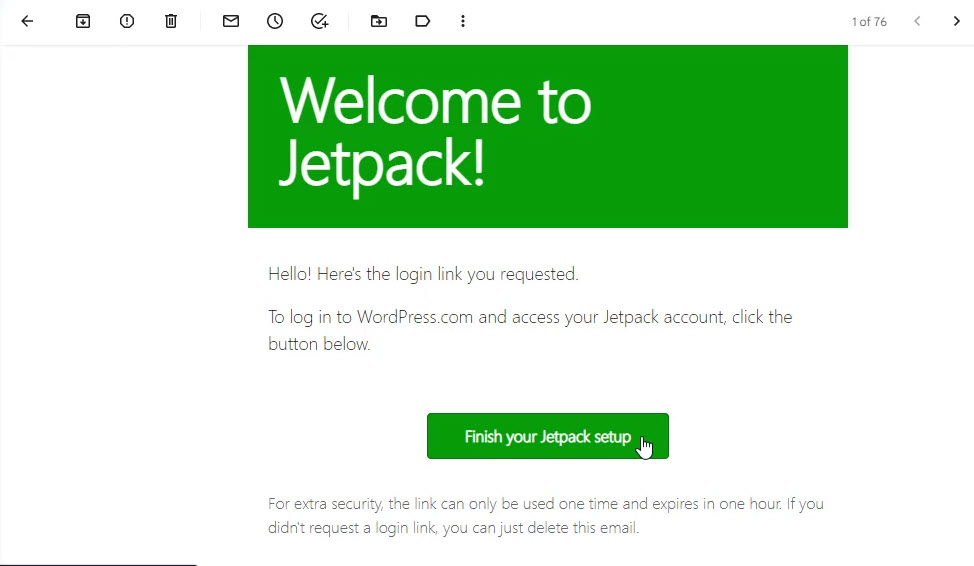
Once you selected continue with Google, you have to wait until a login credentials will be sent into your Gmail account. Once you have received it in your inbox on your Gmail, click on the finish your jetpack setup.
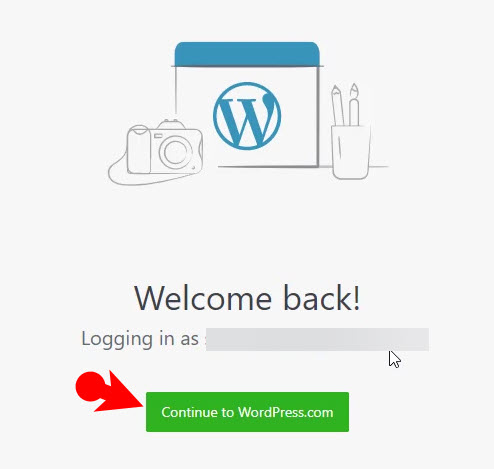
Once you click on finish setting up your jetpack, in the new window you will see a login option into the wordpress.com. You have to simply click continue to wordpress.com and move on.
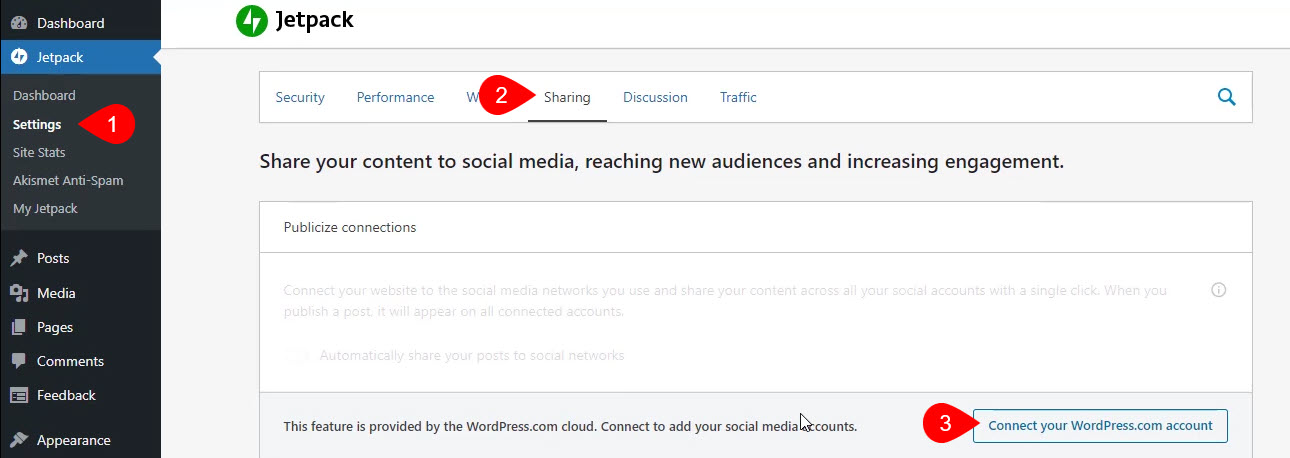
The final step is to connect jetpack to wordpress.com. For that you have to click on jetpack in the left panel then click on settings, go to the sharing category and click on connect to your wordpress.com account.
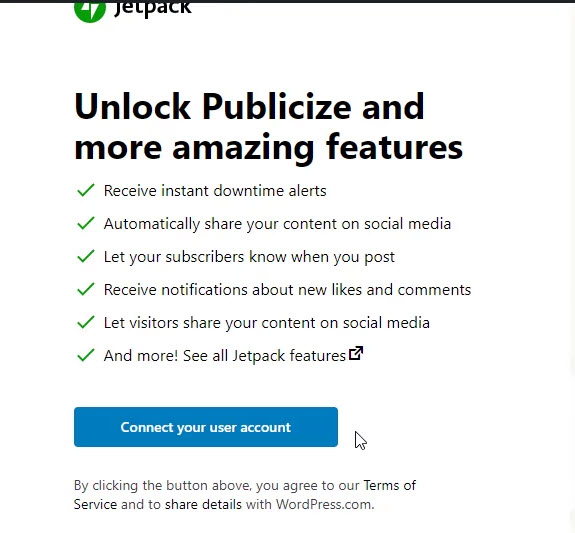
The moment you clicked on connect your wordpress.com account, a jetpack page will open very again where you have to click on connect your user account.
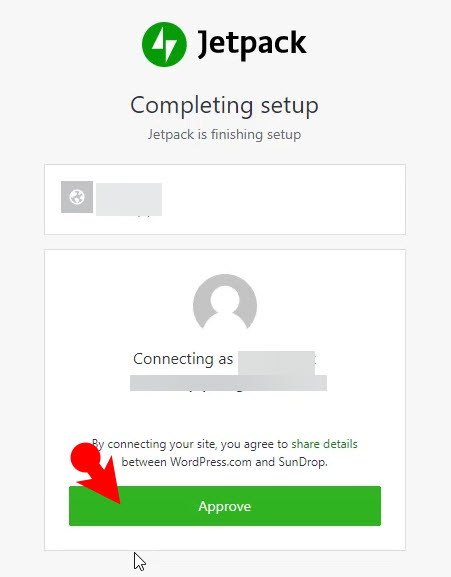
In the new tab, you have to click on approve to finish setting up jetpack..
After you clicked on approve, in the new tab you will see packages of jetpack. And since we are only using it for our own personal website, because of that we have to use a free version of the jetpack. You have to select the last option which is called Jetpack Free and click on start for free.
Step #2. Start Settings Jetpack to Sharing your posts to social media Automatically
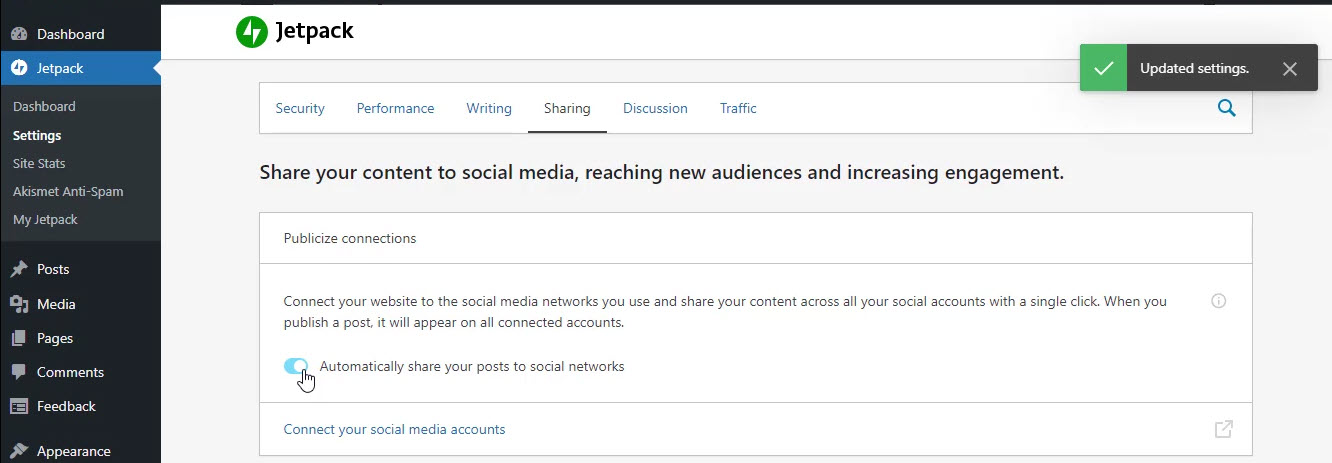
Right now we are ready to finalize the settings of jetpack to share your post automatically into the social media. For that you have to click on the settings on the left panel under the jetpack and then go to the sharing tab. In the sharing tab you have to turn on automatically share your post to social media.
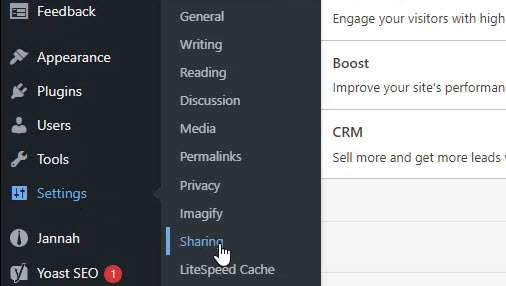
After that you have to visit the settings of WordPress and click on the sharing.
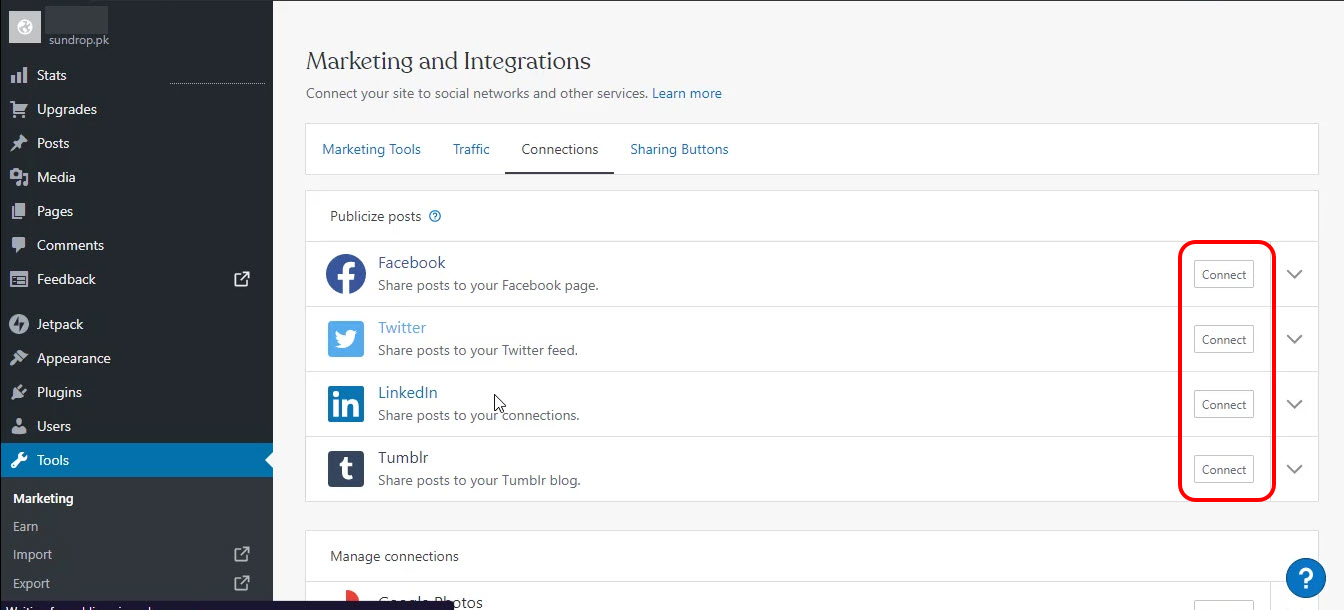
Click on publicize settings and it’s going to open it or take you into the wordpress.com page.
Right now you are ready to connect your social medias to your website. Just click on connect, a new tab will open your you have to log in with your credentials and then allow the social media to publish your post automatically.
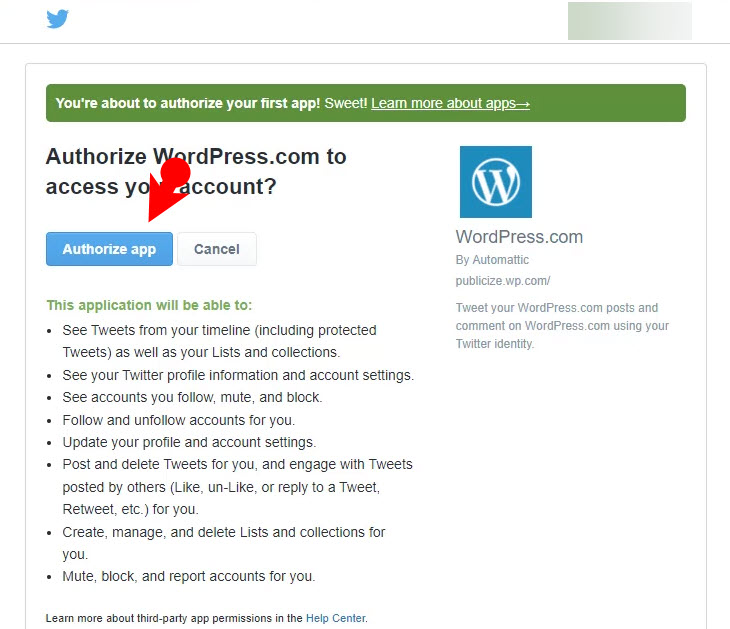
for instance, I have connected my website to Twitter. Now you can see there is the authorized app I have to click on.
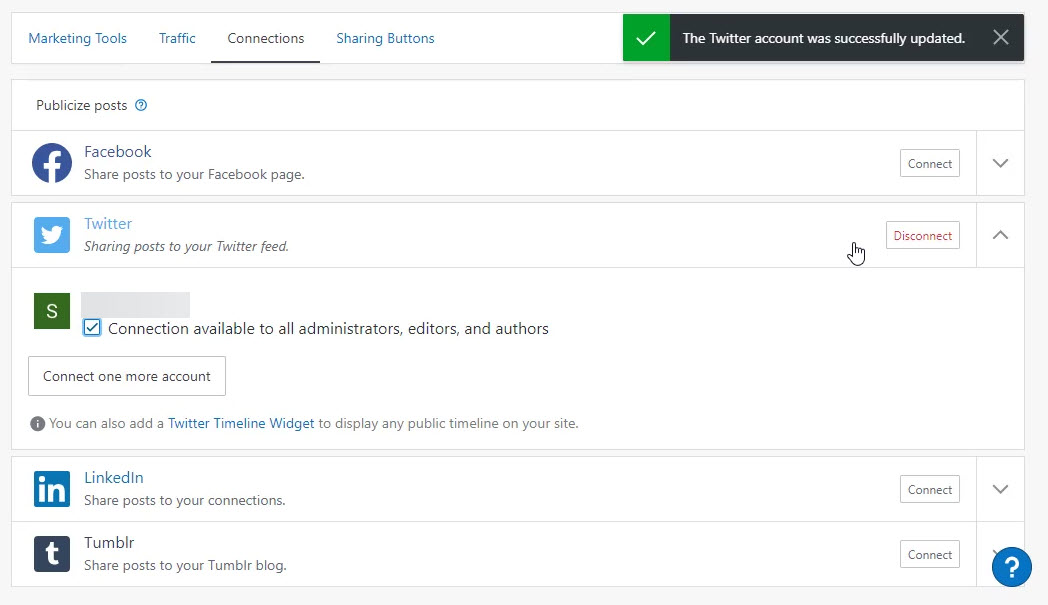
Once the social media is connected to your WordPress website, you have to check the box of connection available to all administrators, editors and authors. You need to keep in mind that at the same time you can connect to two social media pages. Suppose I can connect my WordPress website to two different Facebook pages.
Jetpack is a fine and powerful plugin which you must install on your website in order to use its feature. Among those features is sharing your post automatically into the social media. But in order to Automatically Share Blog Posts on Social Media, you must install, configure and finally activate it. By the way if you have another plug in which is better than jetpack, let me know in the comment section I will be delighted to test it and then provide it into this article.




Leave a Reply