Gmail was launched in 2004 as a service provider which at the time didn’t have sufficient infrastructure for users to provide with 1 GB storage space. Now Gmail has become the reliable and favored email service provider for personal, small, medium, and large businesses. We have seen over the years How Gmail has transcended from a Personal email service provider up to the enterprise business. Believe it or Not, using Gmail is a lot easier than you think, open a browser tab, type Gmail.com, and start sending emails. Gmail has tons of amazing features, almost the most favored guys don’t know about it. Anyway, in this article, you are going to learn a step-by-step guide on How to Add a Signature in Gmail.
Reasons to the Importance of Gmail Signature
Based on personal reasons of anyone, there could be a lot of reasons Why is a Gmail Signature Important?, but based on my thoughts, I have the following reasons for the importance of Gmail Signature.
1. It makes Your Brand/Company Recognizable
Well, mostly, the Gmail signature is a bit different compared to papers on schools, NGOs, and more. You can add your signature (If you want), Brand/Company name, Your Job Title, Email ID, contact number, website address, social buttons, and more. Imagine when your recipients receives or forward your email, they will everything about your website, so it is the Gmail Signature that makes your Brand/Company Recognizable (At least that’s what I think).
2. Increase of Traffic to your Site and Visiting Card
If you have some kind of service, your visiting card can get double, if your service is online only through your website, your website’s traffic can increase too. You know visiting card has your business’s information, like Name, Address, Mobile Number, and more, Gmail’s Signature is also like the visiting card. When you are sending an email to some, they will find out about your business.
3. Prove it is not a Spam
Think a minute about it, If you add around 5 links into an email, won’t it be selected as part of the spam directory. I think it will be, if those links are added properly, in the Gmail Signature, it will not count as a spam email. So, Gmail Signature provides Authenticity.
How to Add a Signature in Gmail?
Adding a Gmail signature is not very hard, it is easier than you can think.
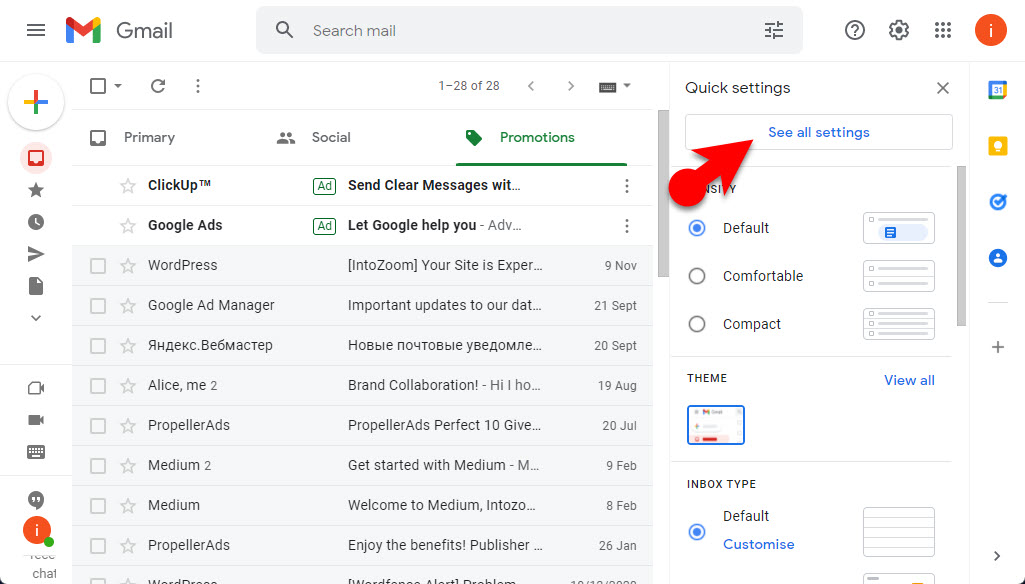
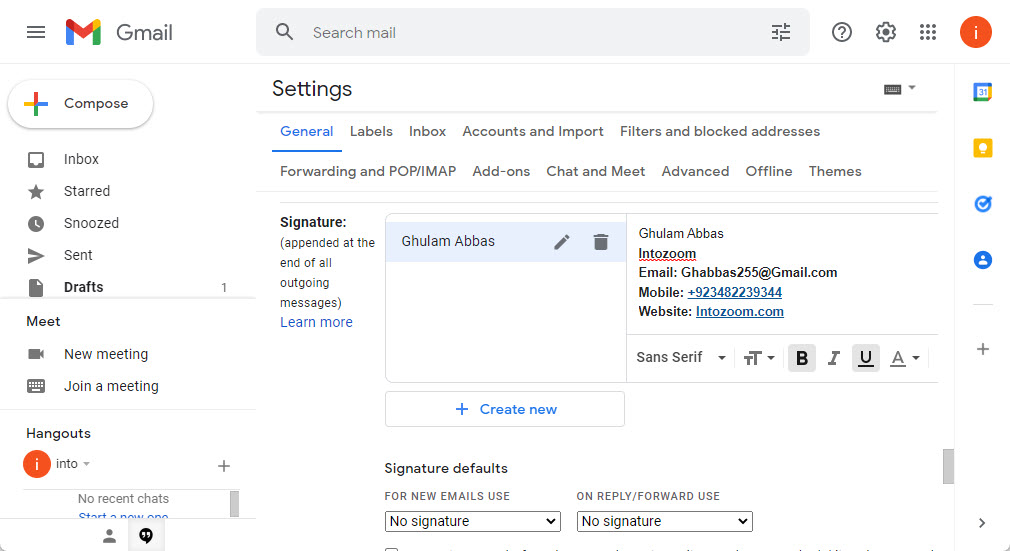
Step #1. Open Your Gmail in your favorite browser, then click on the gear icon choose all settings.
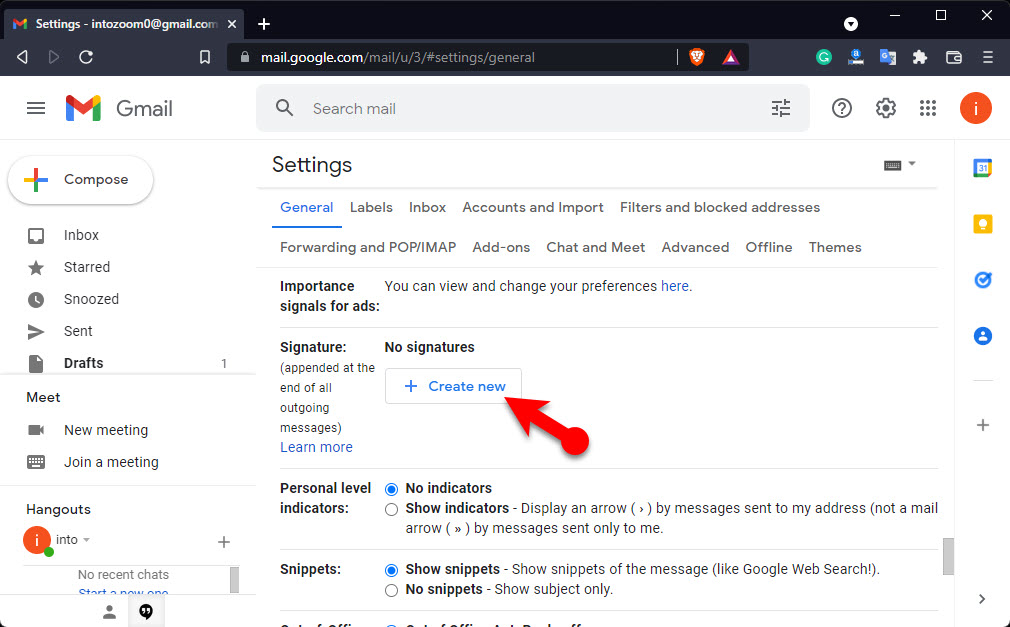
Step #2. In the General settings, you have to find the signature, then click on the Create Signature.
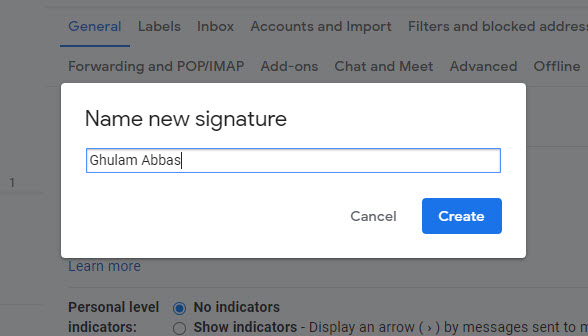
Step #3. Name the Signature.
Now you have to insert a Logo (If you want), Type your job title, Mobile Number, and more. You can type manually, and style them. Also, make sure that you choose the Signature defaults too. Under the signature defaults, you can see the options, Set a Signature.
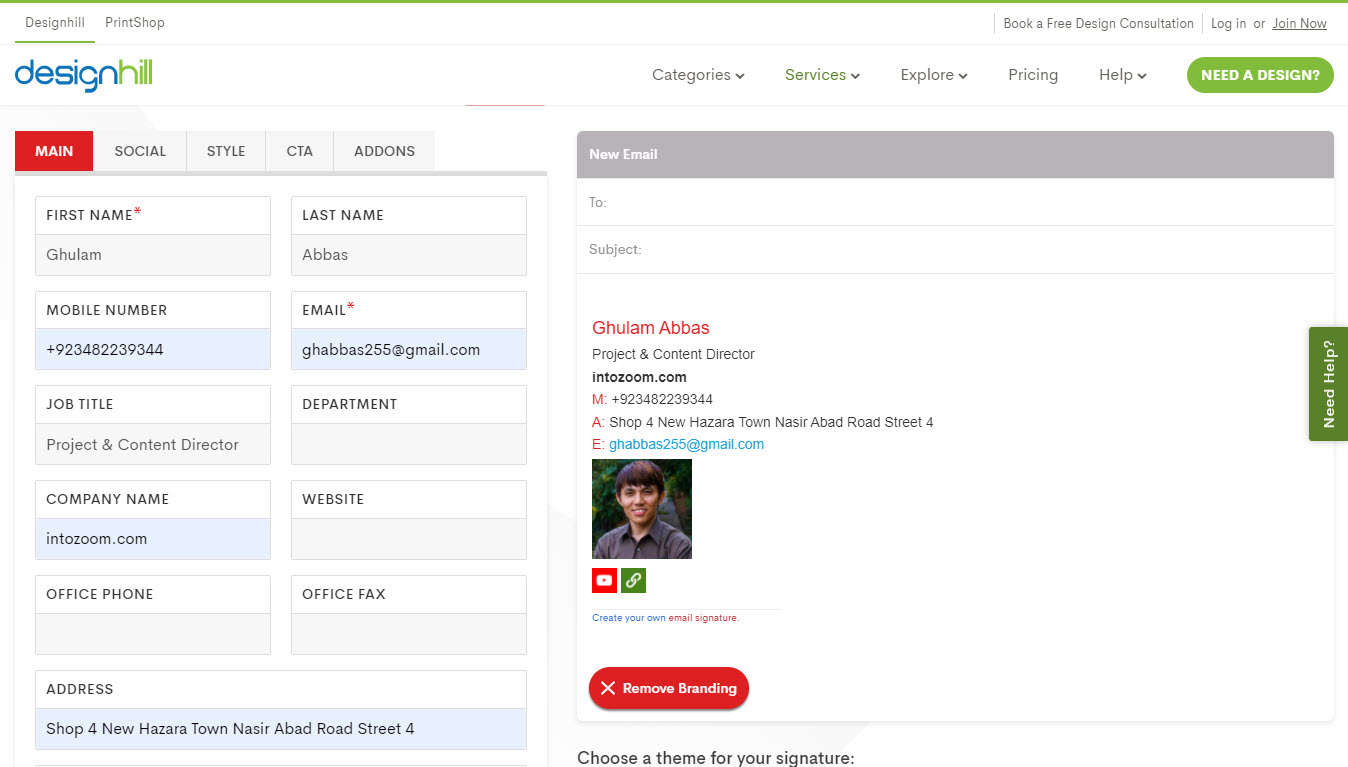
Well, you can either use the default Gmail Settings and configure your Gmail Signature or you can use other programs to style your Gmail Signature. In my case, I will use designhill.com (It is a website that you can use to create Gmail Signature and many business stuff.)
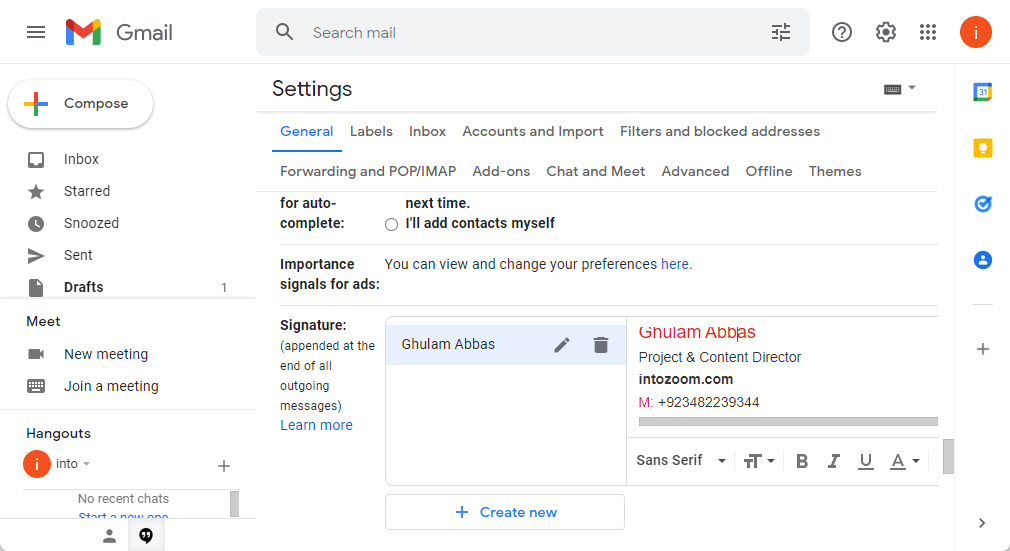
After inserting your information, copy the Design, and then paste it in the signature in Gmail.
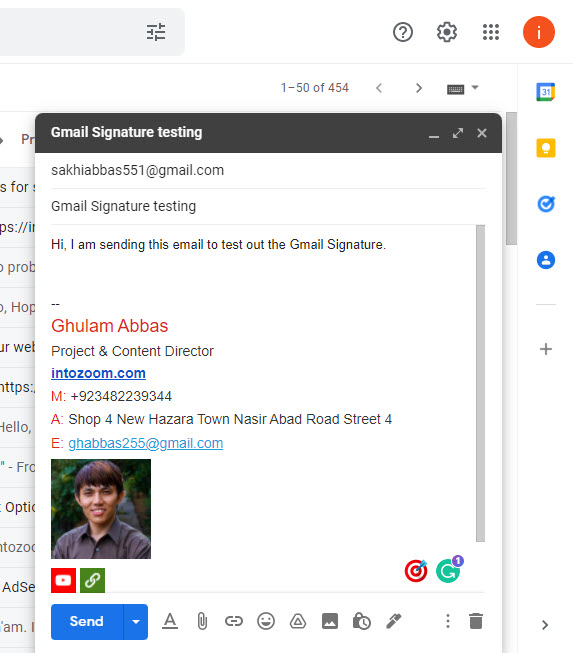
After everything is done, save the changes in the Gmail settings. Now let’s Go on and test if it is showing or not, click on compose and see the Gmail Signature if it is available or not.
Conclusion:
This is How you can Add a Signature in Gmail, try it, it is very important for your business. Also, let me know if you have any questions about the Gmail Signature in the comments, I would be happy to answer them for you.

Leave a Reply