In this article, I’m going to show you the Windows 10 initial configuration that suit for every kind of user from basic to advanced. When for the first time you install the Windows 10 operating system and everything looks troubled and strange. This post will help you to go according to the checklist and do them one by one. It’s not the matter whether you install Windows 10 on a physical machine or virtualization software like; VMware workstation, VMware Fusion, Hyper-V, or VirtualBox. Here the main focus of topic is Windows 10 initial configuration, not anything else.
Windows 10 Initial Configuration
In this post, we are going to cover the following objectives.
- Hide Search Bar
- Show Desktop icons
- Fix Screen Resolution
- Change System Name
- Change file explorer default view
- Install drivers
- Add multiple languages
- Enable photo viewer
- Enable Hibernate
- Adjust or fix start menu
- Update Windows
- Install Essential Software
#1. Hide or Customize Search Bar
The first step towards this guide is customizing search bar. When you install Windows 10, you see a search bar at the bottom left-hand side of the screen which takes many places on the taskbar. If you use lots of application and software, the search bar will take the place so don’t worry you can disable or only can show the icon. This depends on your usage of the search bar. Most of the people don’t like it to appear on the taskbar. To hide search bar just right-click on the taskbar and choose Search then tap on Hidden. The search bar will disappear automatically.
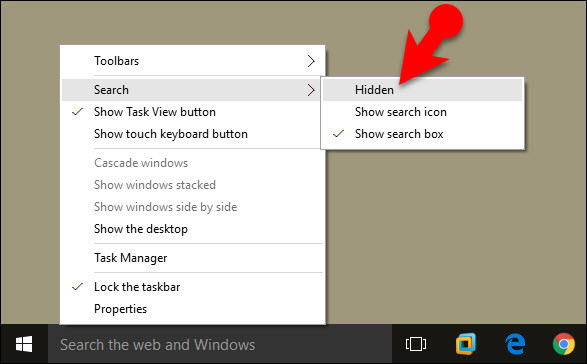
Hide Search Bar
#2. Show Desktop Icons
When you install Windows 10 for the first time, you can’t see the desktop icons so what you are going to do is right-click on the desktop then choose Personalize then personalization window will appear.
Related post: How to change Windows 10 desktop icons
Windows 10 Desktop icons
From the left-hand side choose Theme then tap on Desktop icon Settings. Choose those icons you want to show them on the desktop, click Apply & OK.
Show Windows 10 Desktop Icons
#3. Fix Screen Resolution
Screen resolution is a headache problem that makes us crazy sometimes. To change Windows 10 default screen resolution just follow these steps.
#1. Right-click on the desktop then select Display Settings. Click on Advanced Display Settings.
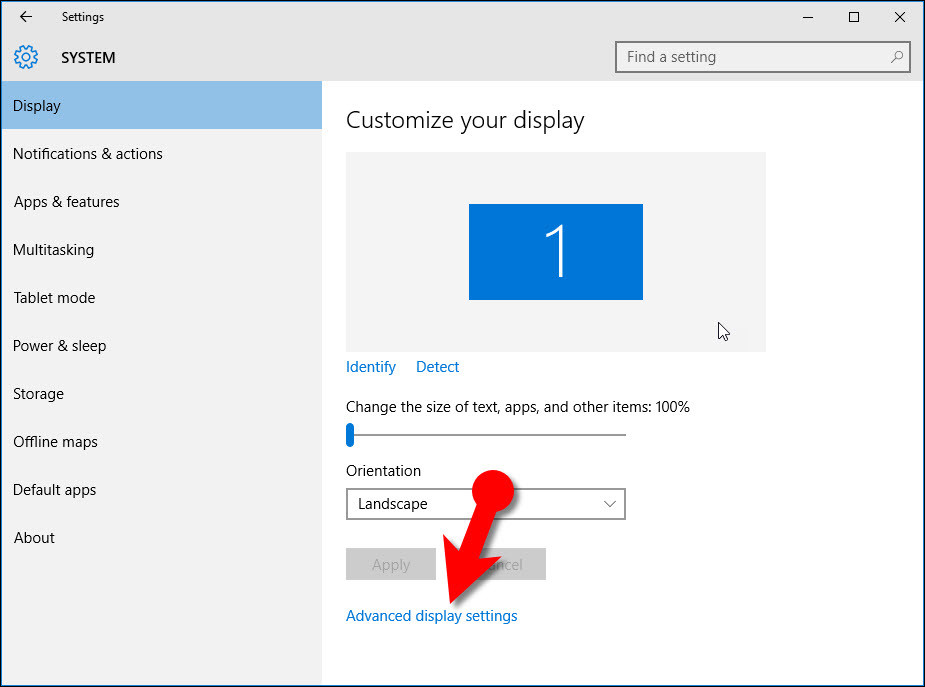
advanced display settings
#2. In the advanced display settings, dialog box. Choose your appropriate resolution.
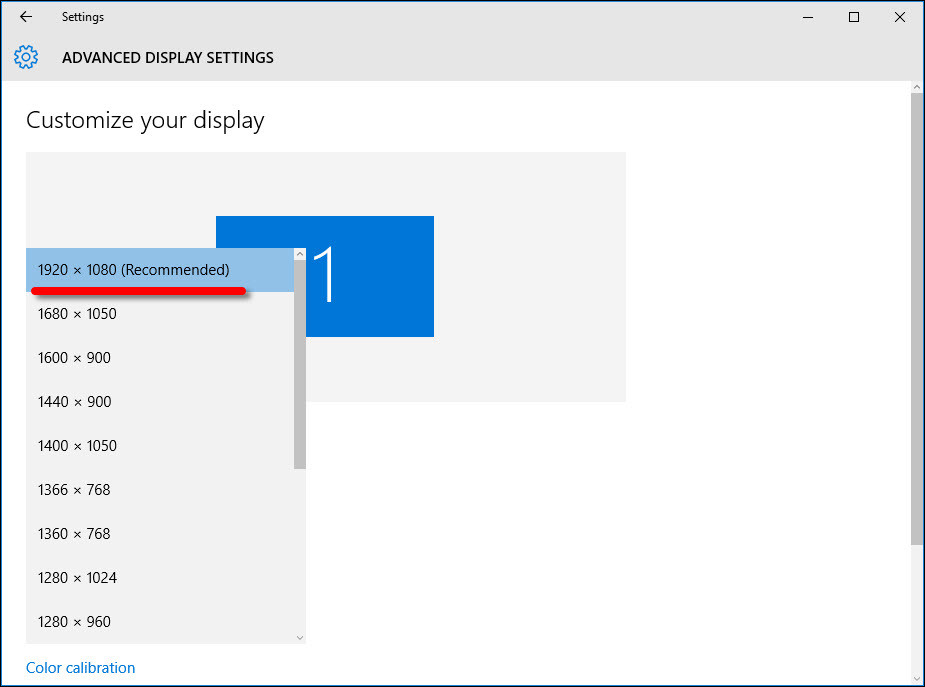
Customize Display Settings
#4. Change Computer Name
This step is especially for network professionals that are the most important thing to know it. In the network environment, you must have a proper computer name that should be identified by the network administrator or domain controller. In this case, you are compile to change your system name in order to join the domain. Without changing the name as well you can join to the network but it’s very difficult to remember the default computer name. Now, follow the steps below.
#1. Press Windows key+R to open up the Run window then type sysdm.cpl and hit enter.
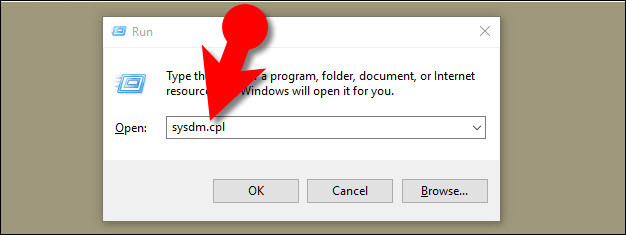
change the computer name
#2. On the System Properties window, click on Change then type your computer name.
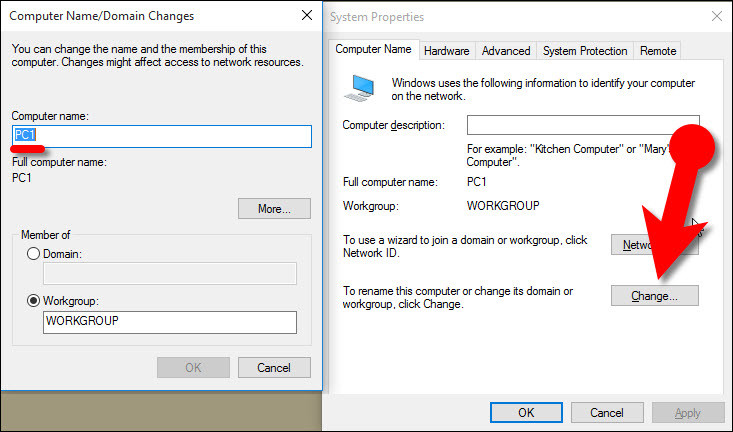
Change Windows 10 Computer name
#5. Change File Explorer Default View
Whenever you open up the File Explorer on Windows 10 so you will see the default view. Windows 10 File Explorer default View is like this that when you open, it will show you the “Frequent Folder” with “Recent Folder”. The picture, movies, documents, and other materials that you have opened them will be shown to you.
In Windows 8 this feature was not developed on the other hand it has improved in Windows 10. Recent File will help to have quick access to the files which you have recently used them. There may be some users that don’t like while opening the file explorer they see the recent files. So, in this case. If you don’t want just visit this link to change Windows 10 file explorer default view. Change Windows 10 file explorer default view.
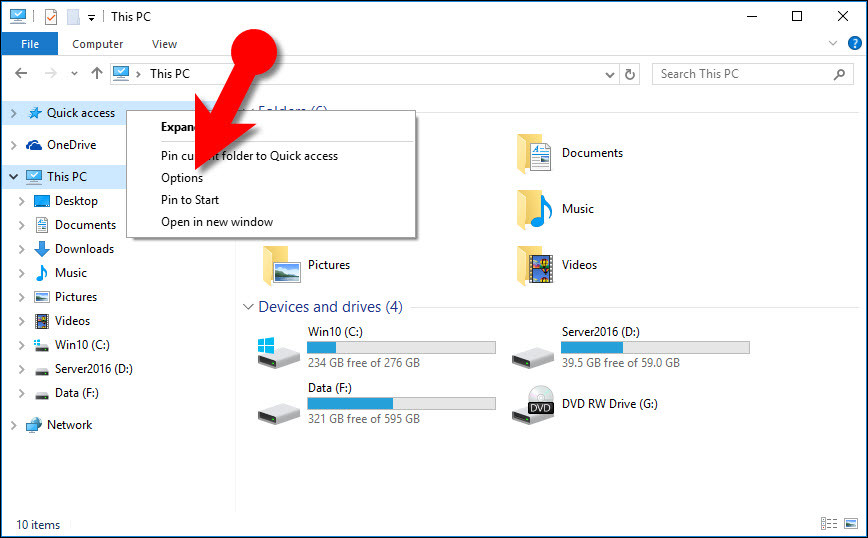
Change File Explorer Default View
#6. Install Windows 10 Drivers
This step is the most amazing and interesting step that everyone needs to apply it to their Windows 10 drivers. As you know that when you install Windows 10, there you don’t have the high-quality audio, Wireless connection, Bluetooth, Advanced screen resolution, and so on. By following this step, you’ll fix all these problems and issues. So, let’s get started.
#1. First, you need to download DriveTheLife software which is a great tool that installs all the essential drivers that your system needs.
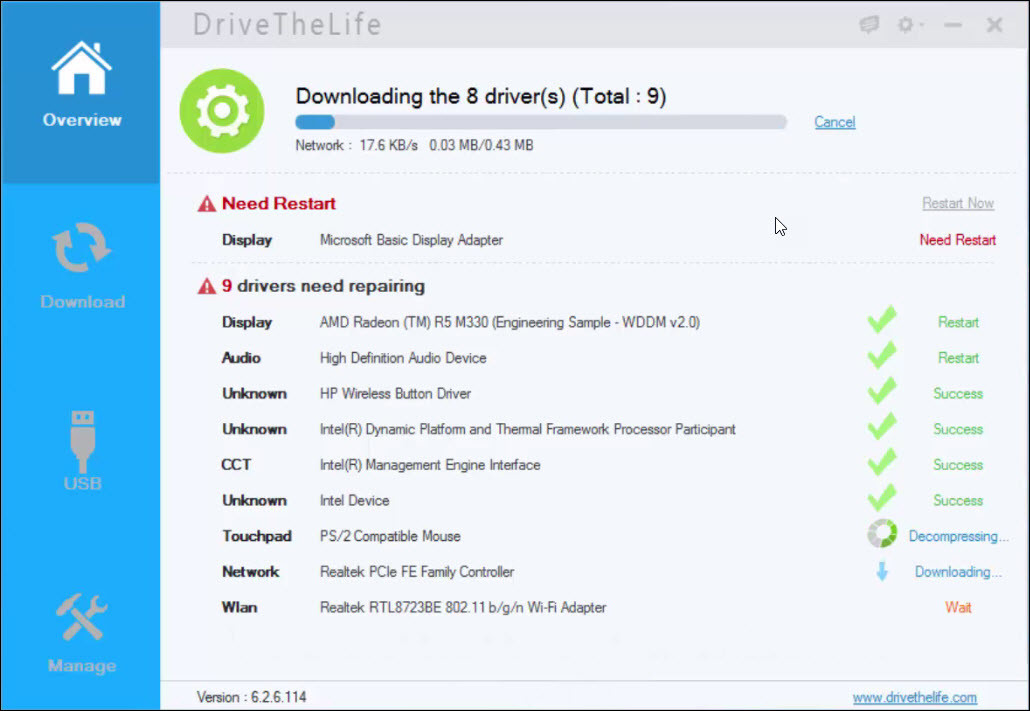
Install Windows 10 Drivers with DriveTheLife
#2. Once you’ve downloaded the software, install it on your system. Click on Start and finally Repair. Wait for some minutes until the drivers install on your computer. Last you should restart the computer then everything looks pretty awesome.
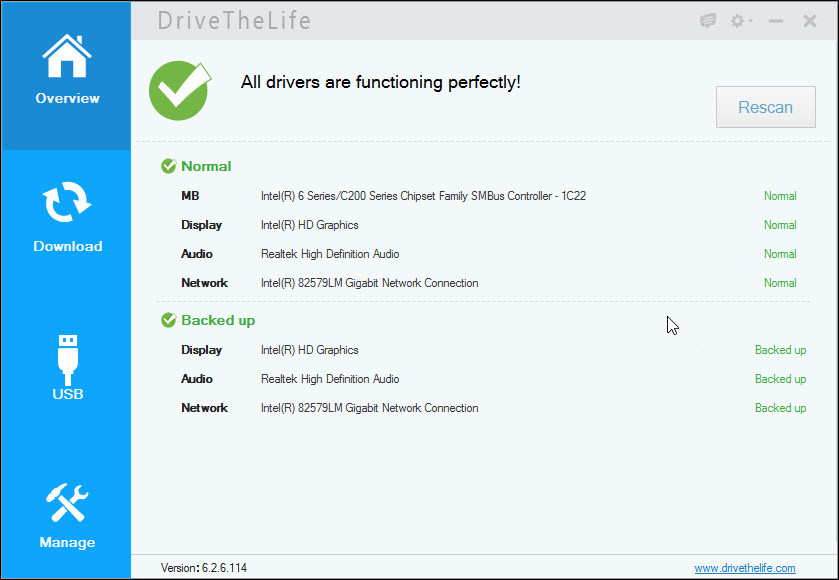
Install Windows 10 Drivers
#7. Add Multiple Language
Most of the time working with one language is not enough for the computer user or blogger. Most of the programmers are using lots languages on one computer. So it’s so important to know how to add language on Mac OS, Windows, and Kali Linux? Today we are going to show you that how to add any language to these most three popular operating systems. Several times my friends asked me that how to type add Persian Language or add language on Mac OS X El Capitan, macOS Sierra?
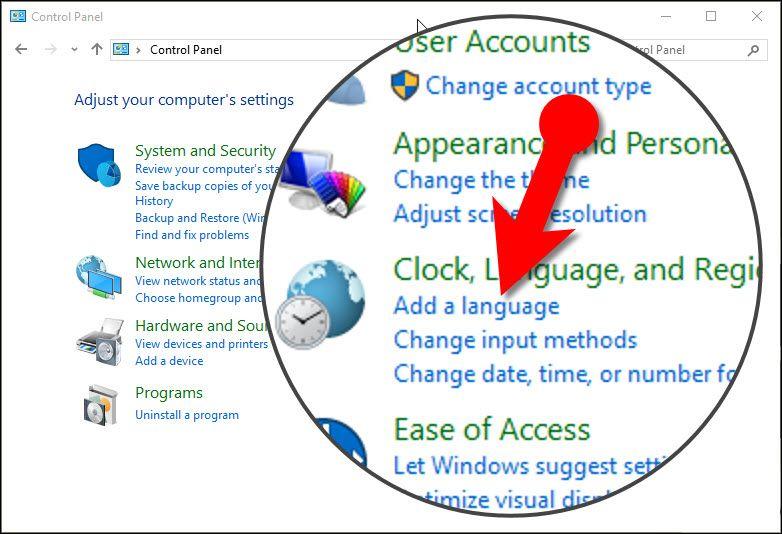
add language on windows 10
I thought it is important that I should make an article regarding this task. So you might know how to add language on windows 10 or any other version of windows. But today we will show this task on all operating systems. Click how to add language on Windows 10, Mac OS, and Kali Linux.
#8. Enable Photo Viewer
Usually, you could use Windows Photo Viewer to view your image files in a variety of ways. You can also print, order prints, attach pictures to an e‑mail message, burn, or open photos in another app on your PC. Windows 10 uses the Photos app as the default app to open image files with instead now. By default, Windows Photo Viewer is no longer listed in Open with, and only has .tiff files associated with it in Default Programs.
This tutorial will show you how to restore Windows Photo Viewer to be able to select to open image files in Default apps, Default Programs, and Open with for only your account or all users in Windows 10.
#1. It’s very easy and simple. Just download Photo viewer code then right click on it. Click on Merge then it will install the photo viewer app on your system.
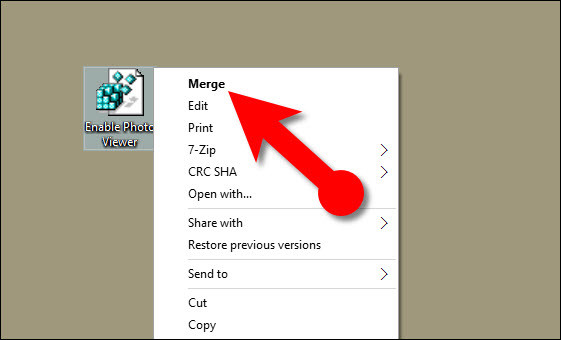
Enable Photo Viewer on Windows 10
#9. Enable Hibernate
Hibernate is a feature that when you turned off your PC but your apps stay opened when the PC is turned on again you’re back to where you left off if you put your PC on hibernate mode. Whenever you work on a special project, just hibernate the system and when to get free just turn on the computer and start from the same step as you left out. We have the step by step guide regarding this subject so click on this link. Enable hibernate on Windows 10.
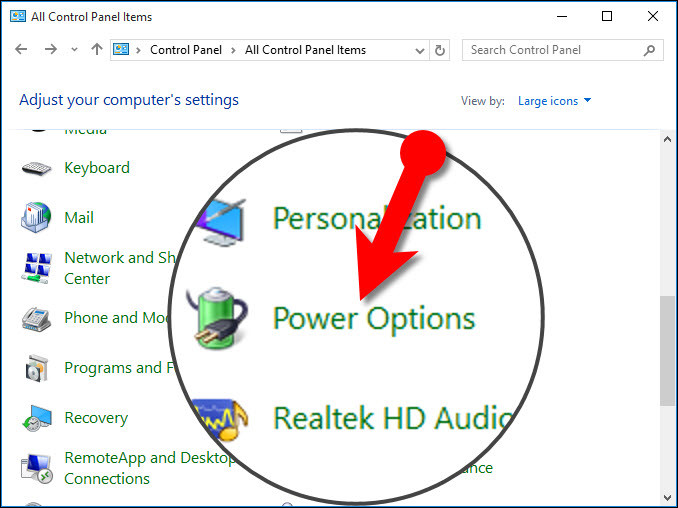
Power Options
#10. Adjust or Customize Start Menu
The Windows 10 Start menu got a visual update (I won’t say upgrade because some of us don’t like the new look) in the recent Windows 10 Anniversary Update.
The Start menu now has three sections instead of two. On the far left, you’ll find icons representing important menu items that vary depending on your settings (more on this later), including your account, settings, and power options. These icons are unlabeled by default, but if you need help figuring out which is which, you can tap or click the menu button at the top of this section (looks like three horizontal lines) to reveal labels for each icon. For step by step guide click this link.
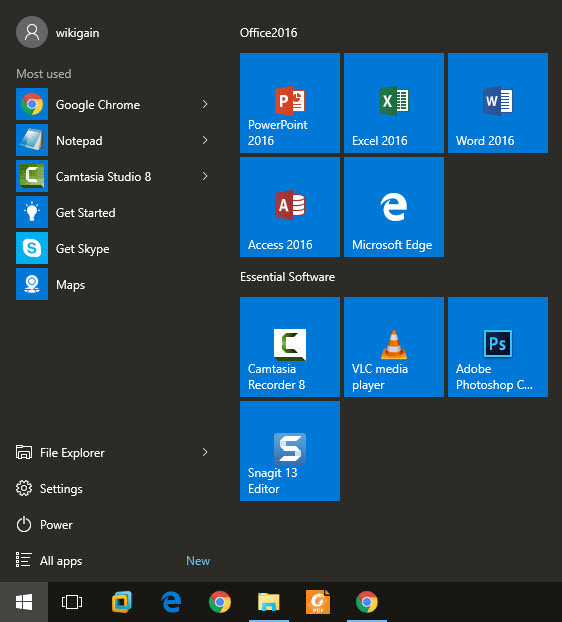
Adjust Start Menu
#11. Update Windows 10
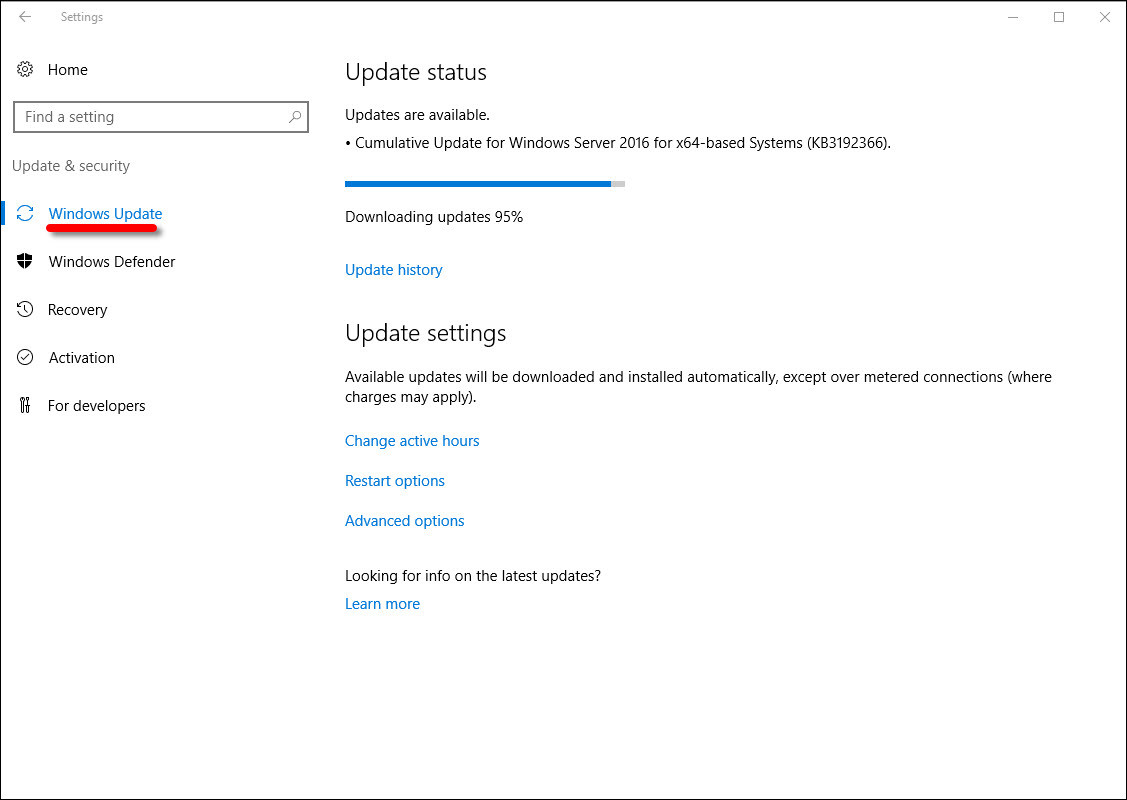
Windows 10 Updates
#12. Install Essential Softwares
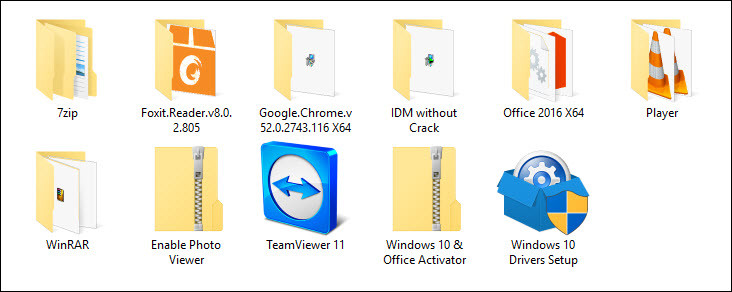
Install Essential Softwares
- Windows 10 Activation Software: https://goo.gl/1FWh03
- Windows 10 Drivers Software: https://goo.gl/CbrWZd
- Enable Photo Viewer Code: https://goo.gl/3f2V2h
- Download 7zip: https://goo.gl/13O4
- Download Google Chrome: https://goo.gl/4WuB0
- Download IDM: https://goo.gl/EpfzQu
- Download Foxit Reader: https://goo.gl/XQOnb
- Download VLC Player: https://goo.gl/oRNqK
- Download Office 2016: https://goo.gl/s04KwQ

The link for downloading Microsoft word is not working. It gives an error
Microsoft Office 2016 link is updated and now you can download it. Thanks for informing.
Thanks it worked for me.
How to Enable Photo Viewer on Widows 10 Professional?
You can enable photo viewer by downloading the below code and right-click on the code click Merge. It’ll activate Photo Viewer on Your System
Right-click on any image then find Photo Viewer from the programs list.
https://goo.gl/3f2V2h